I’m taking a step back from clockmaking for a while.
My latest three pieces are still for sale. There are no plans to make more at this time.
Thank you for all your support over the last 22 years.
I’m taking a step back from clockmaking for a while.
My latest three pieces are still for sale. There are no plans to make more at this time.
Thank you for all your support over the last 22 years.
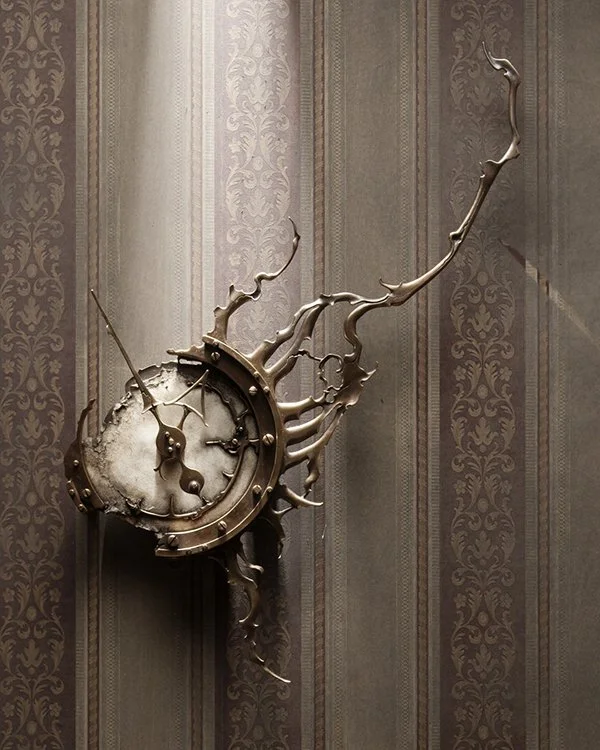
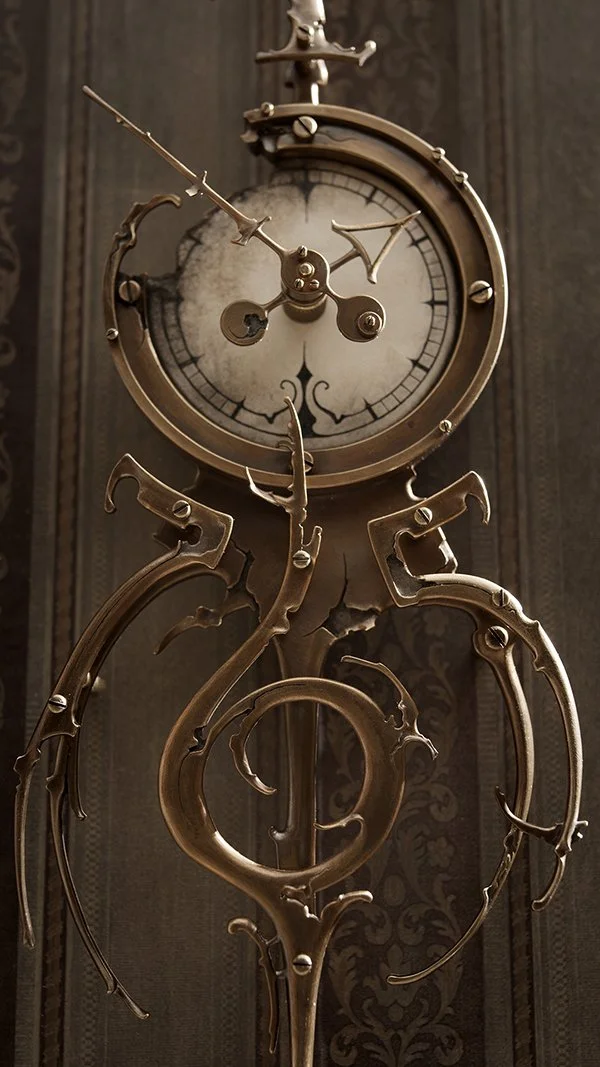
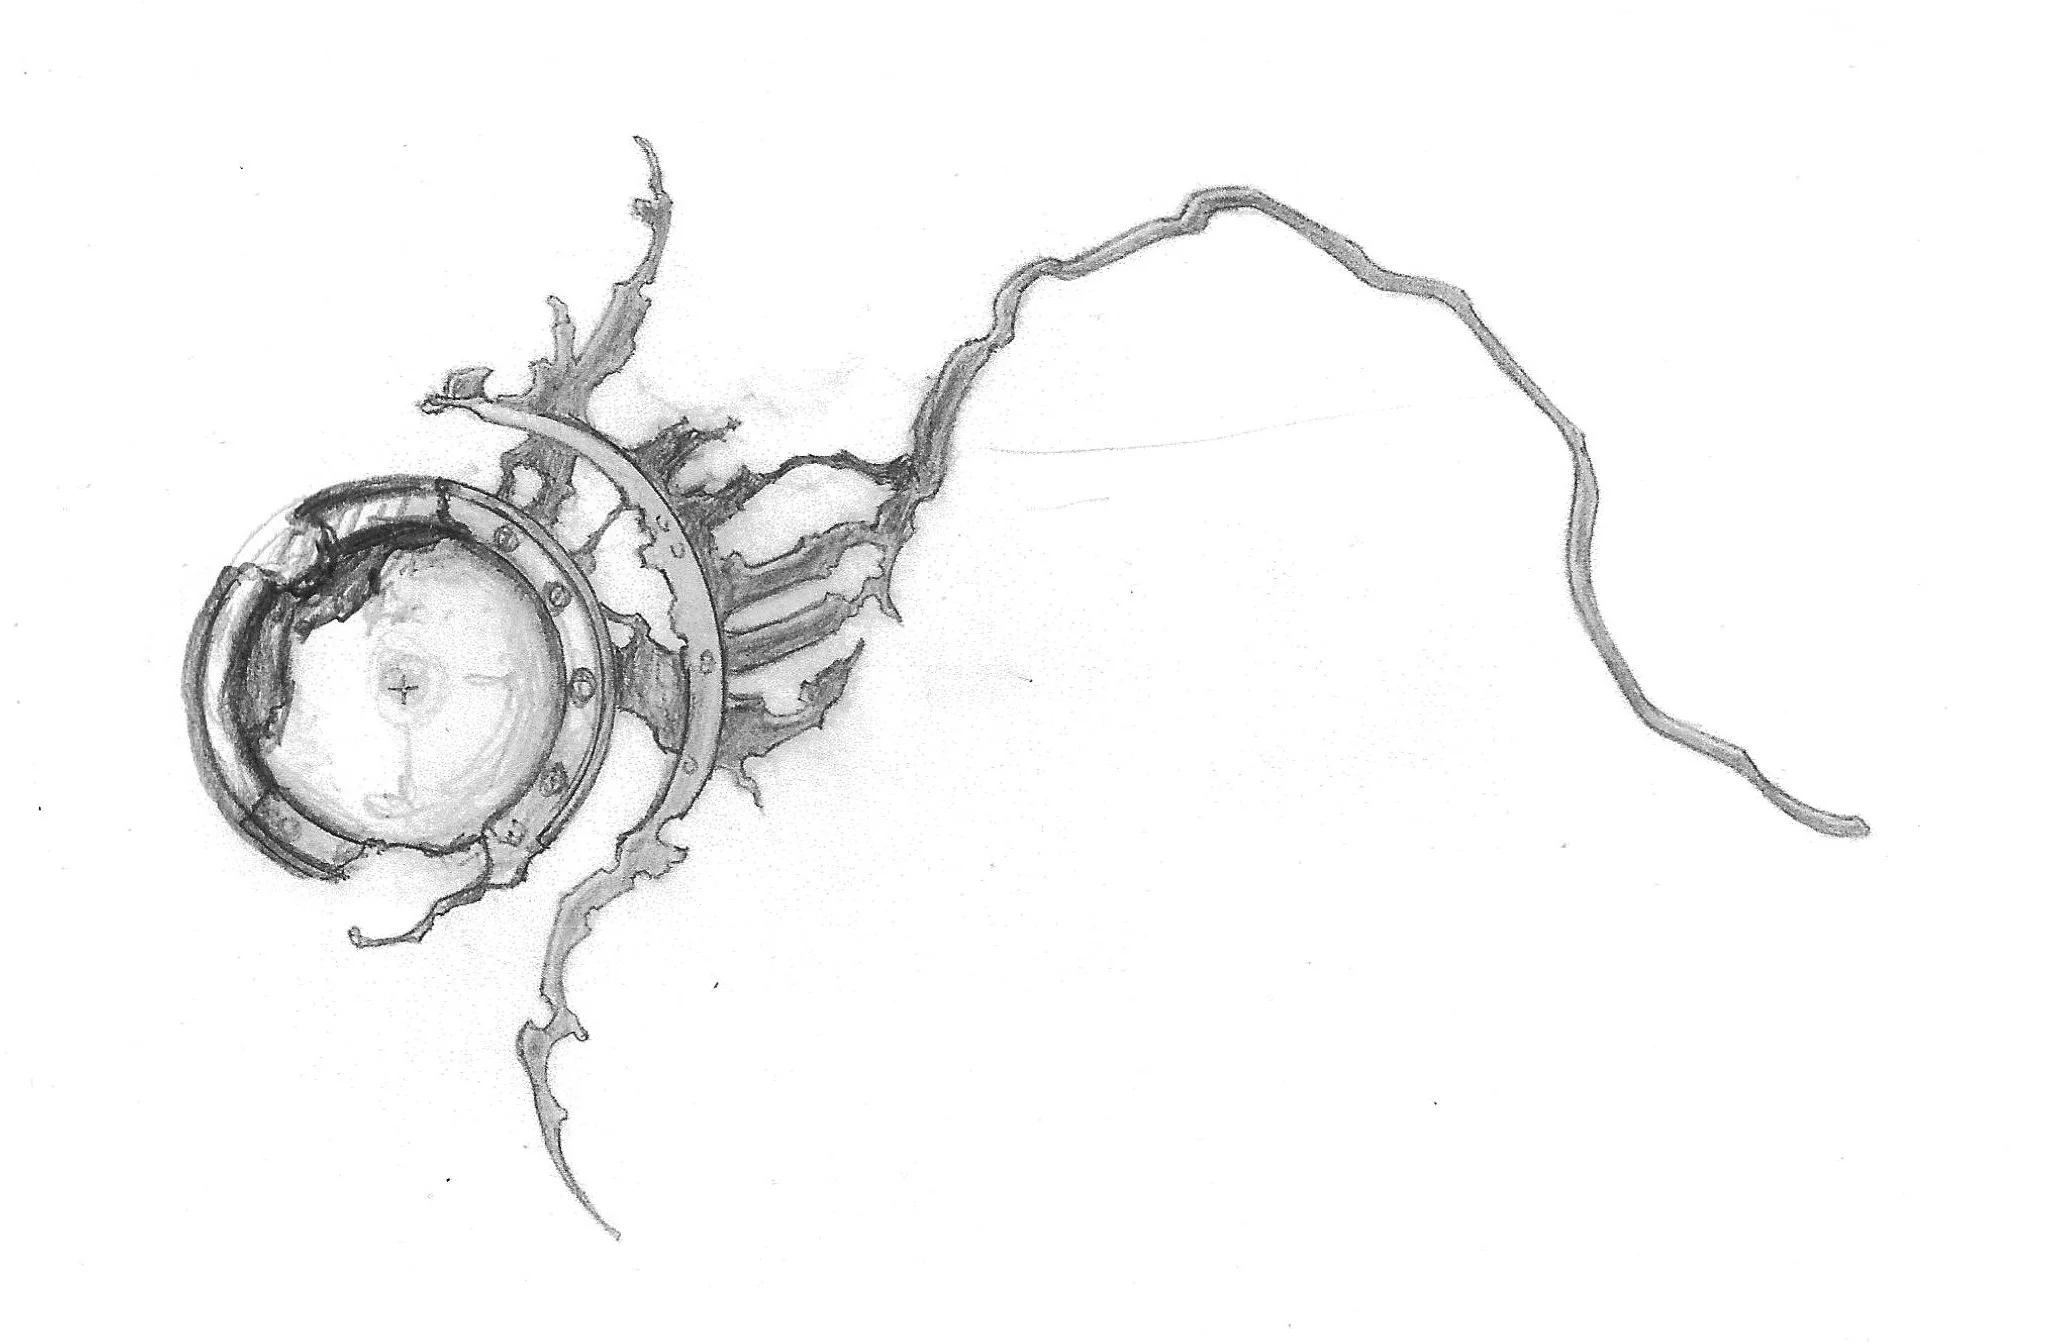
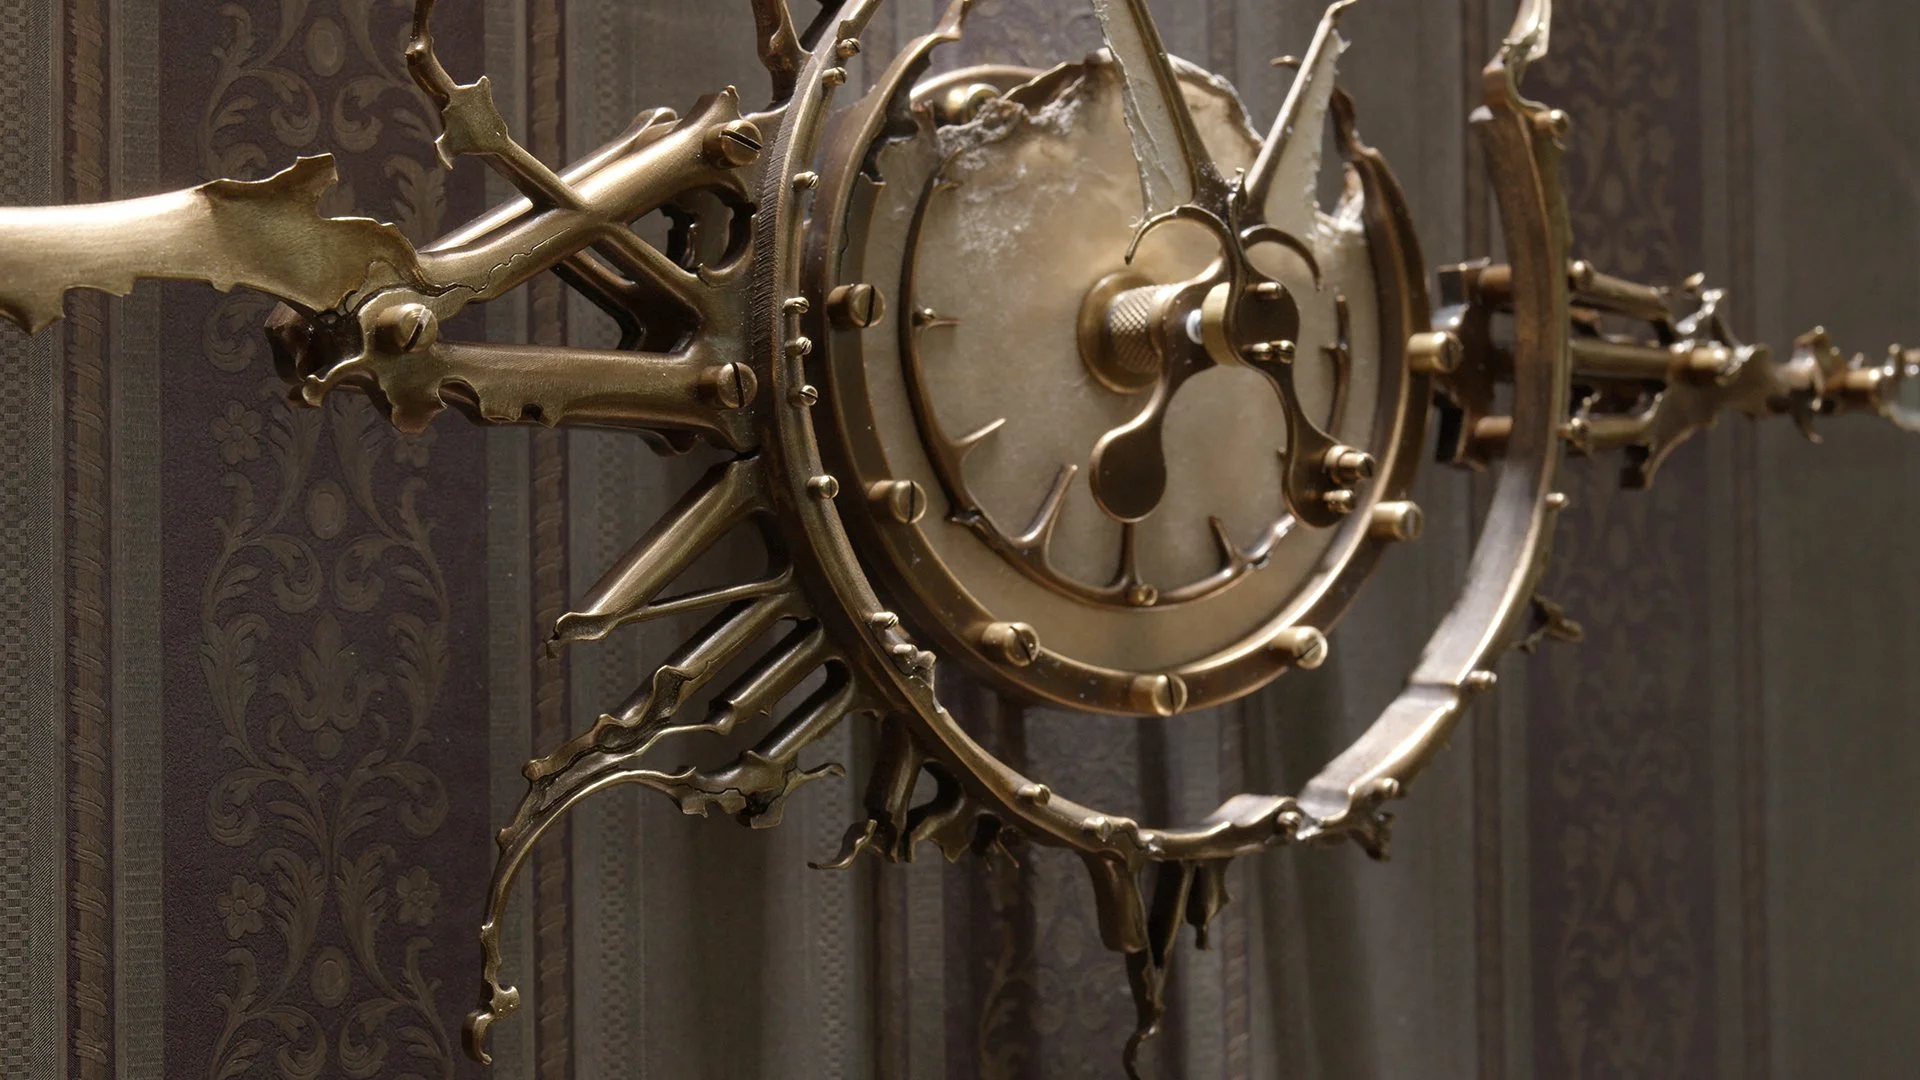
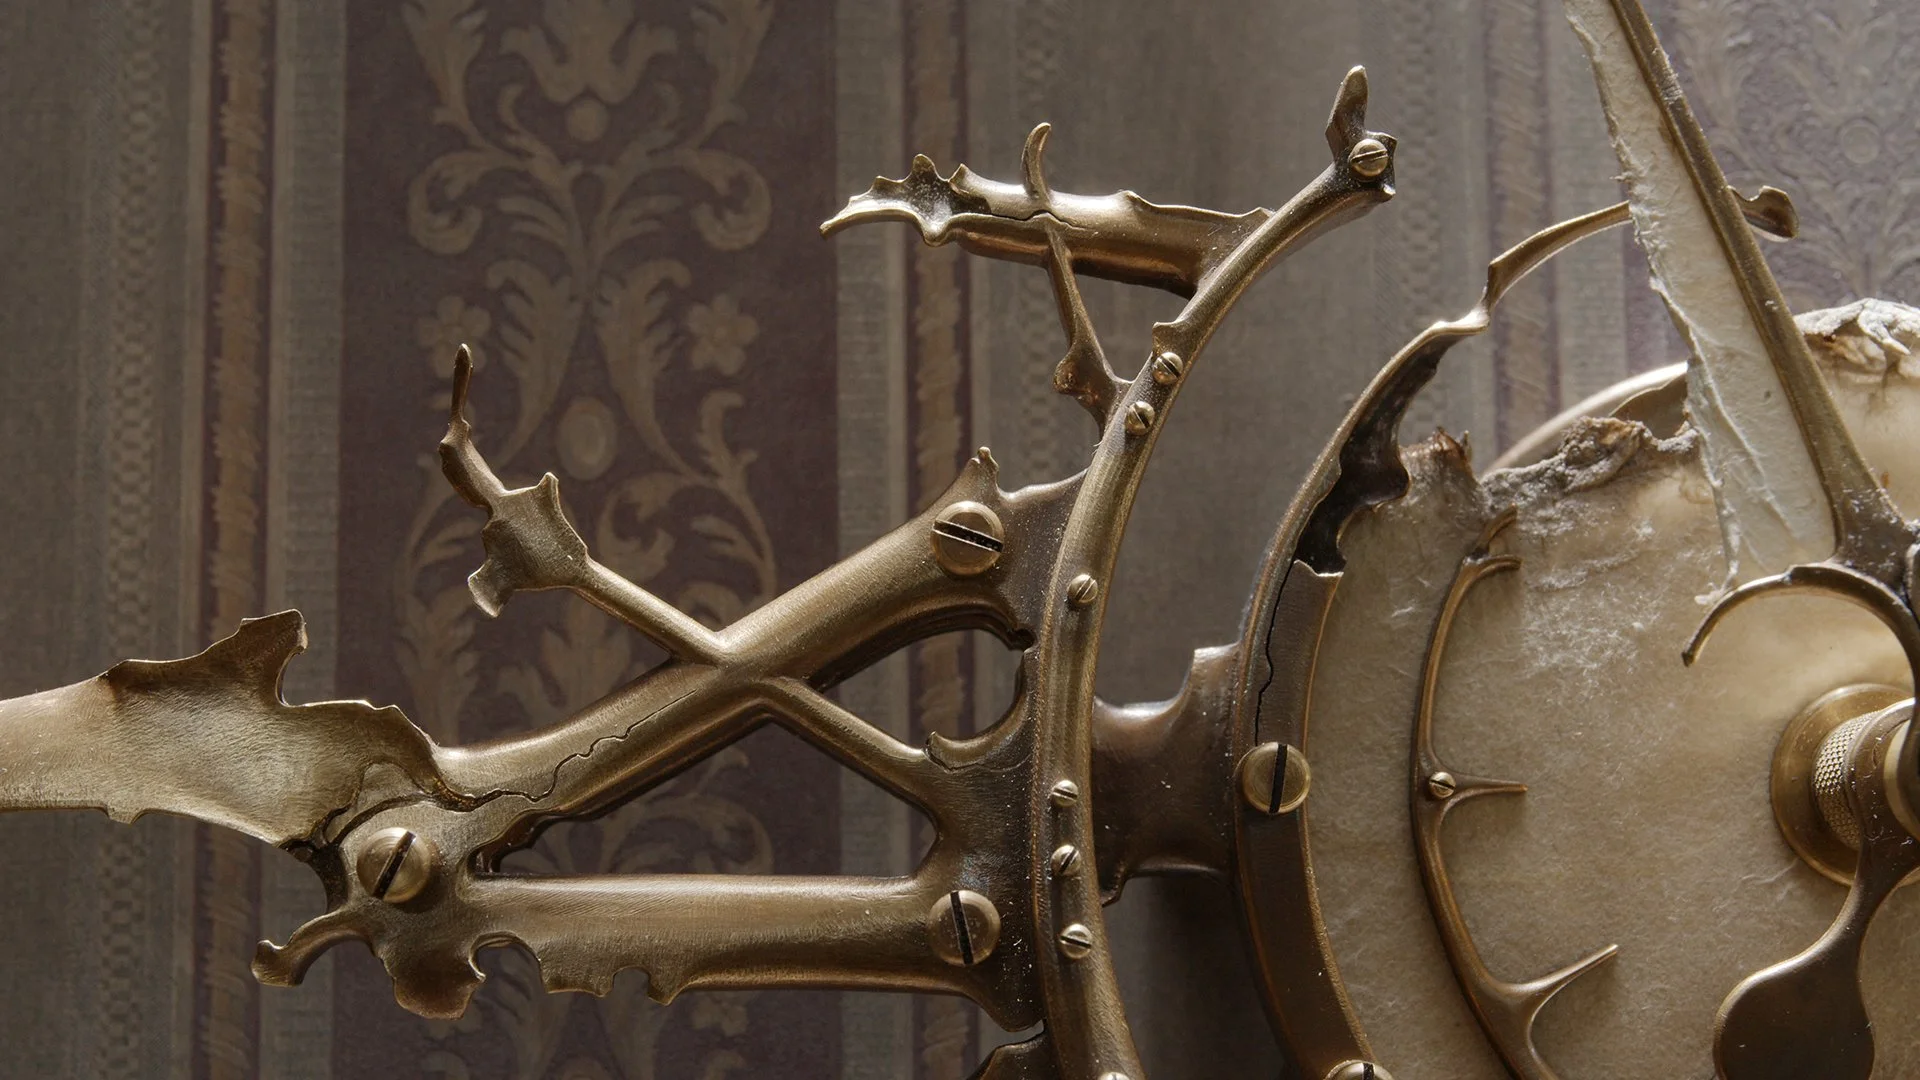
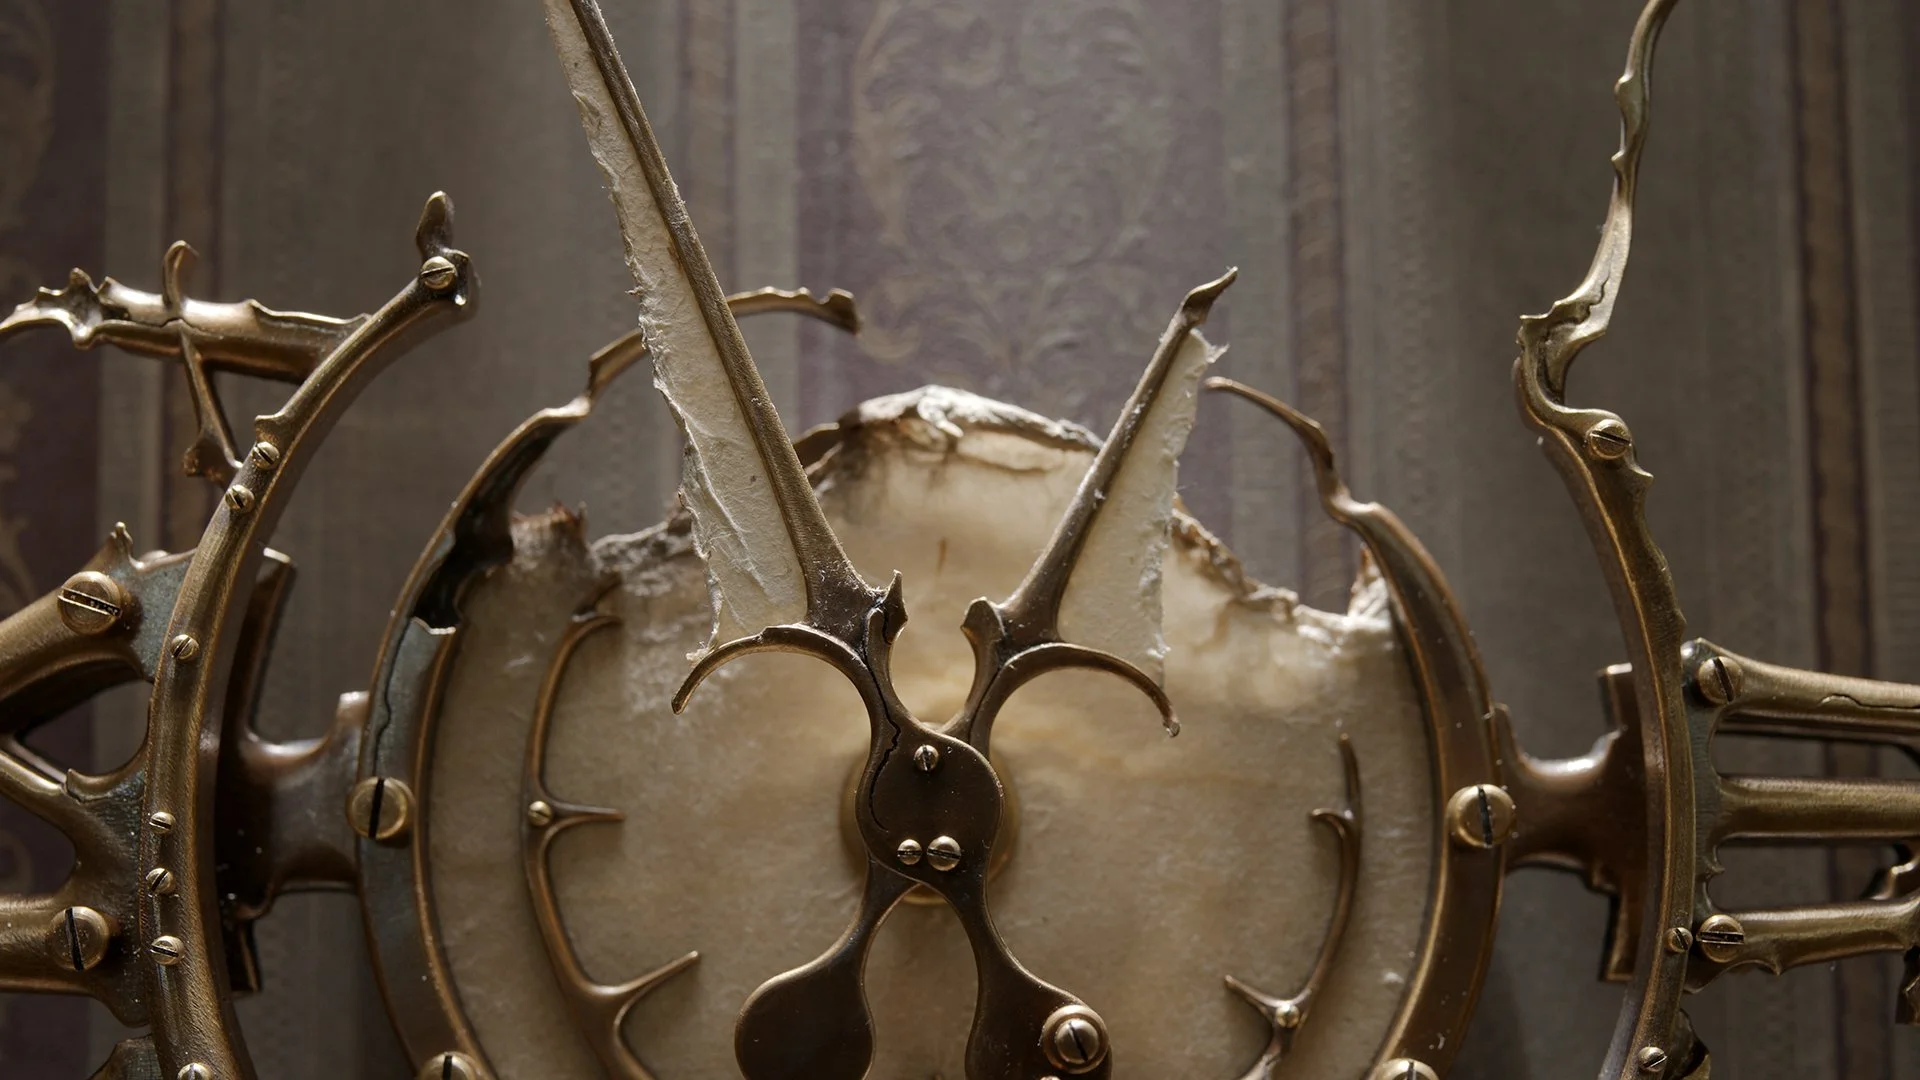
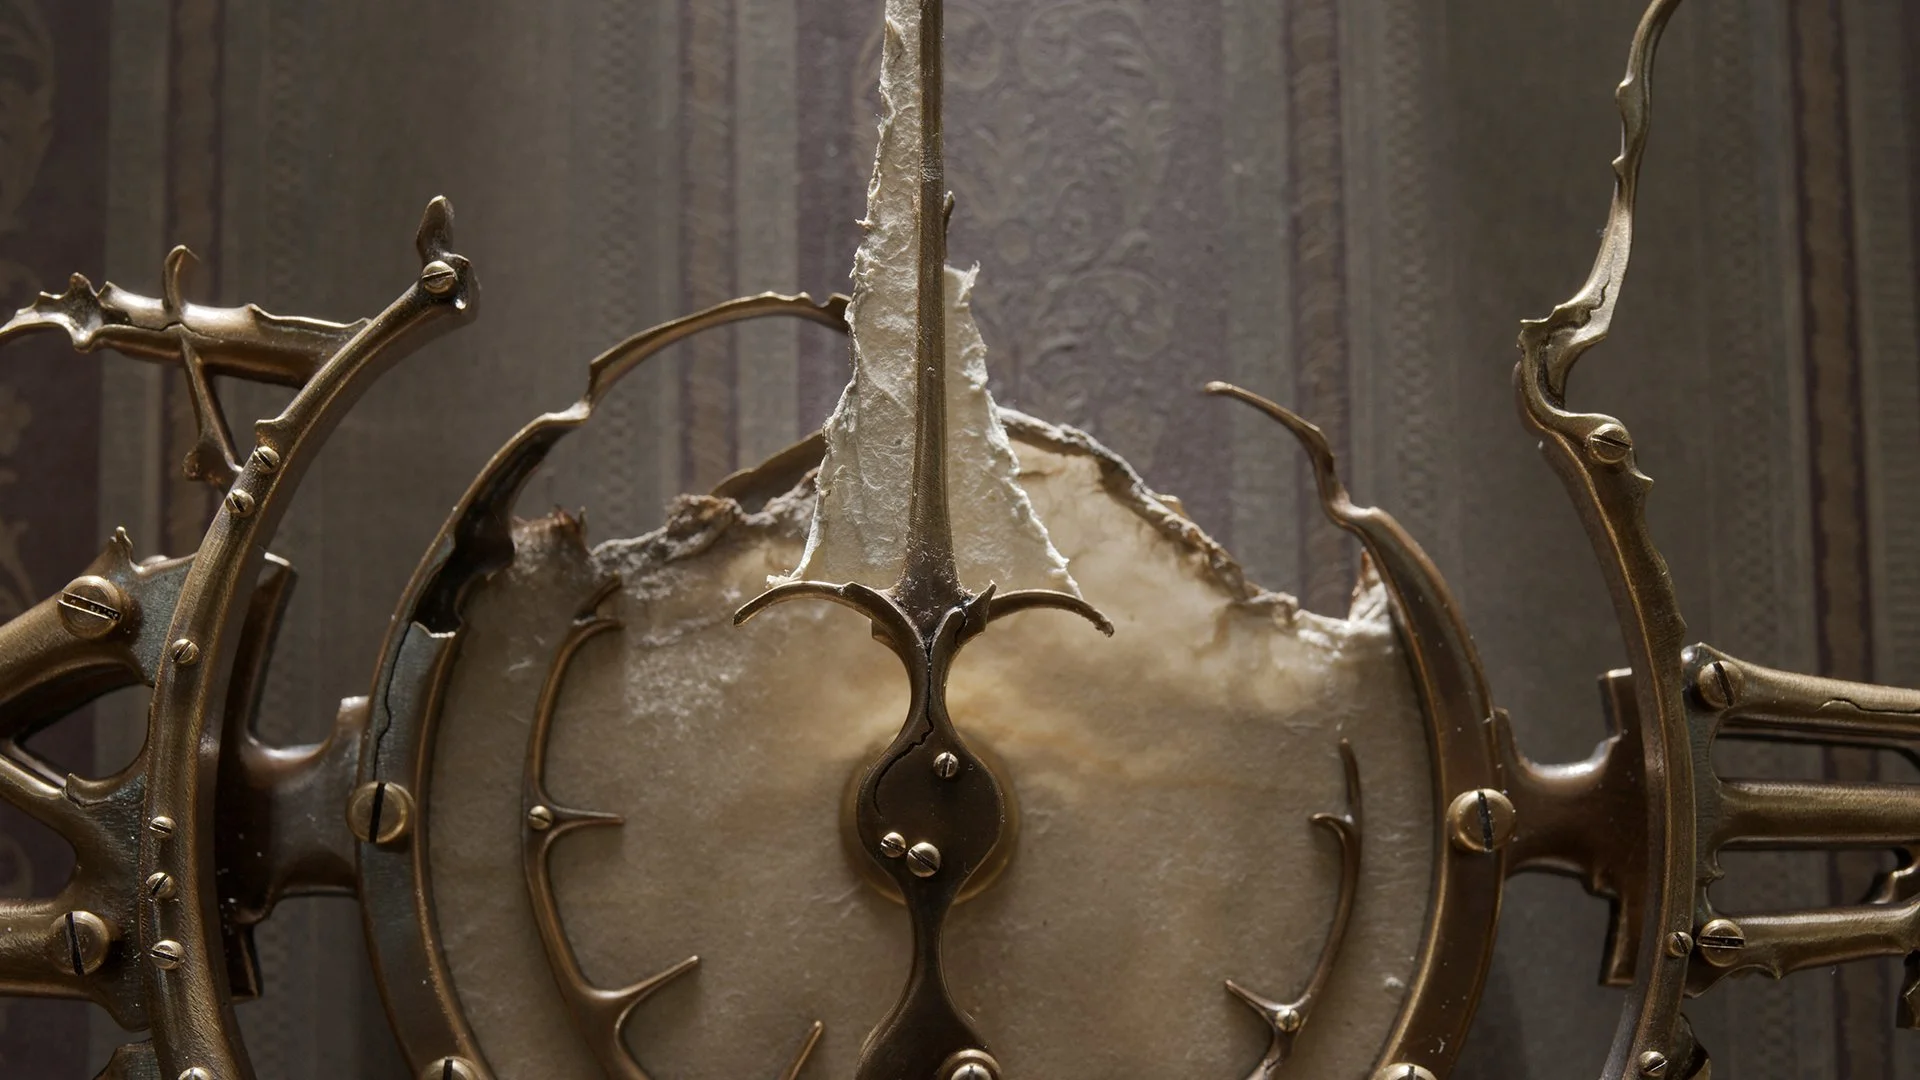
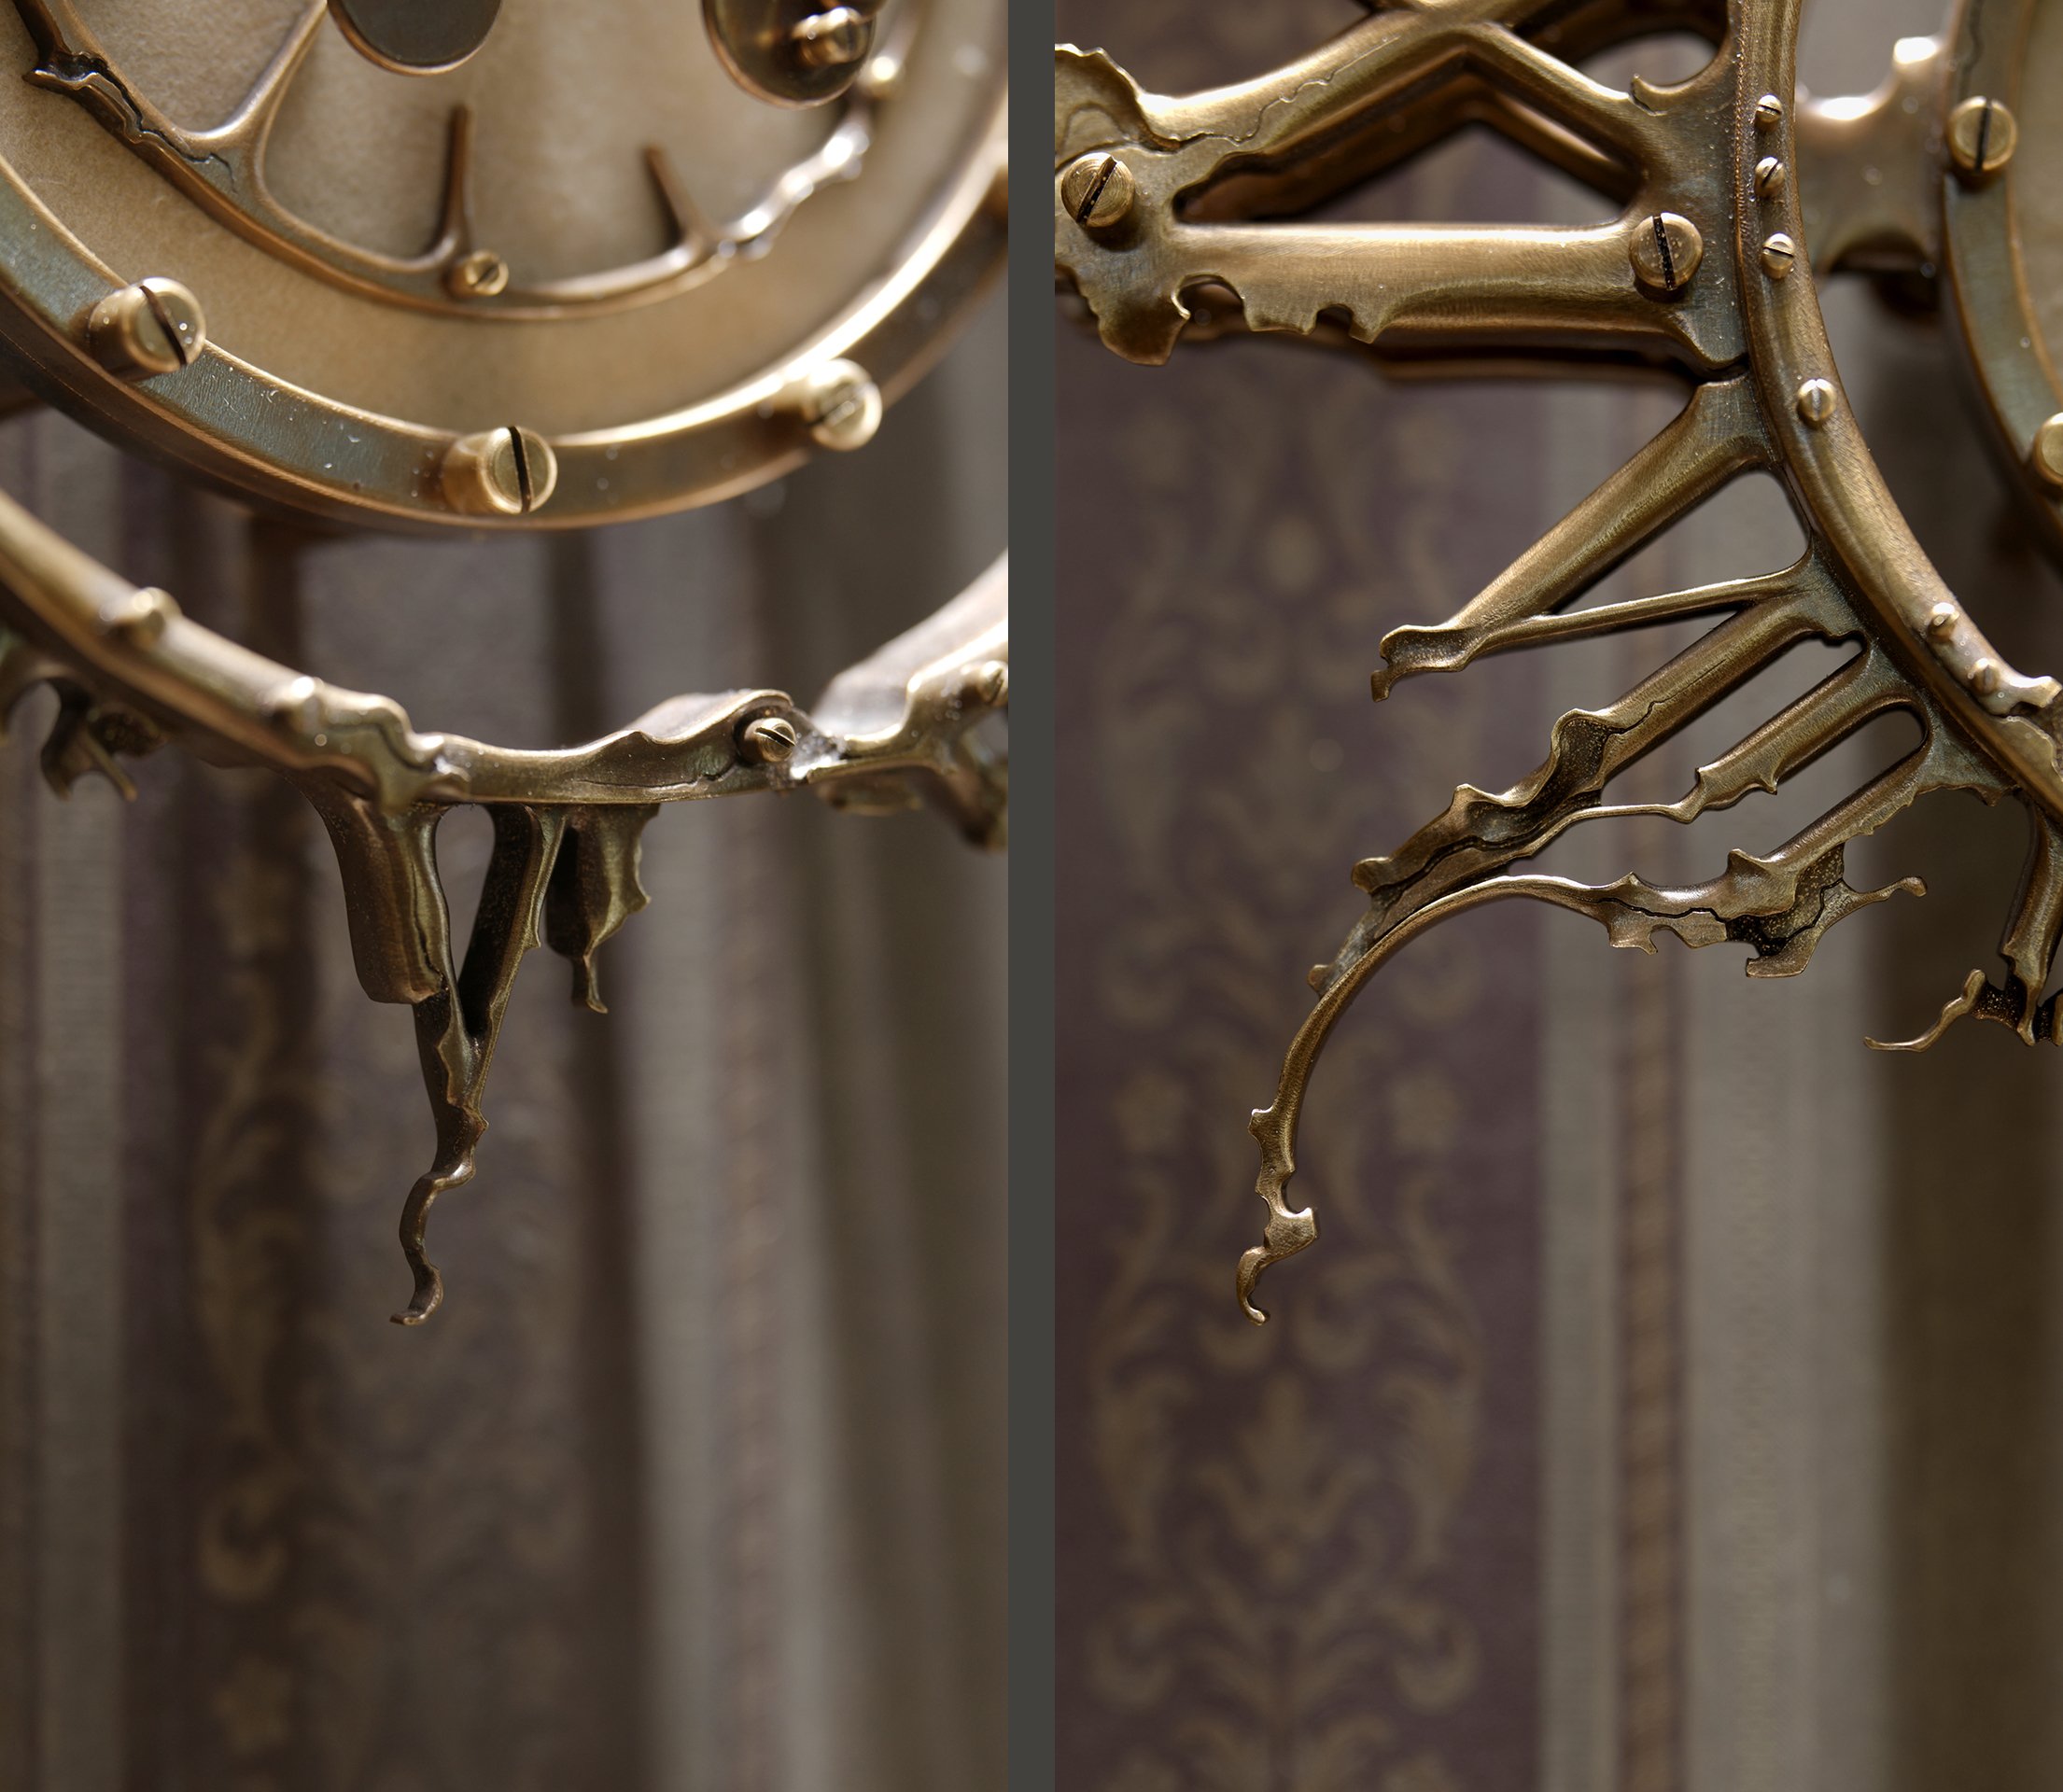
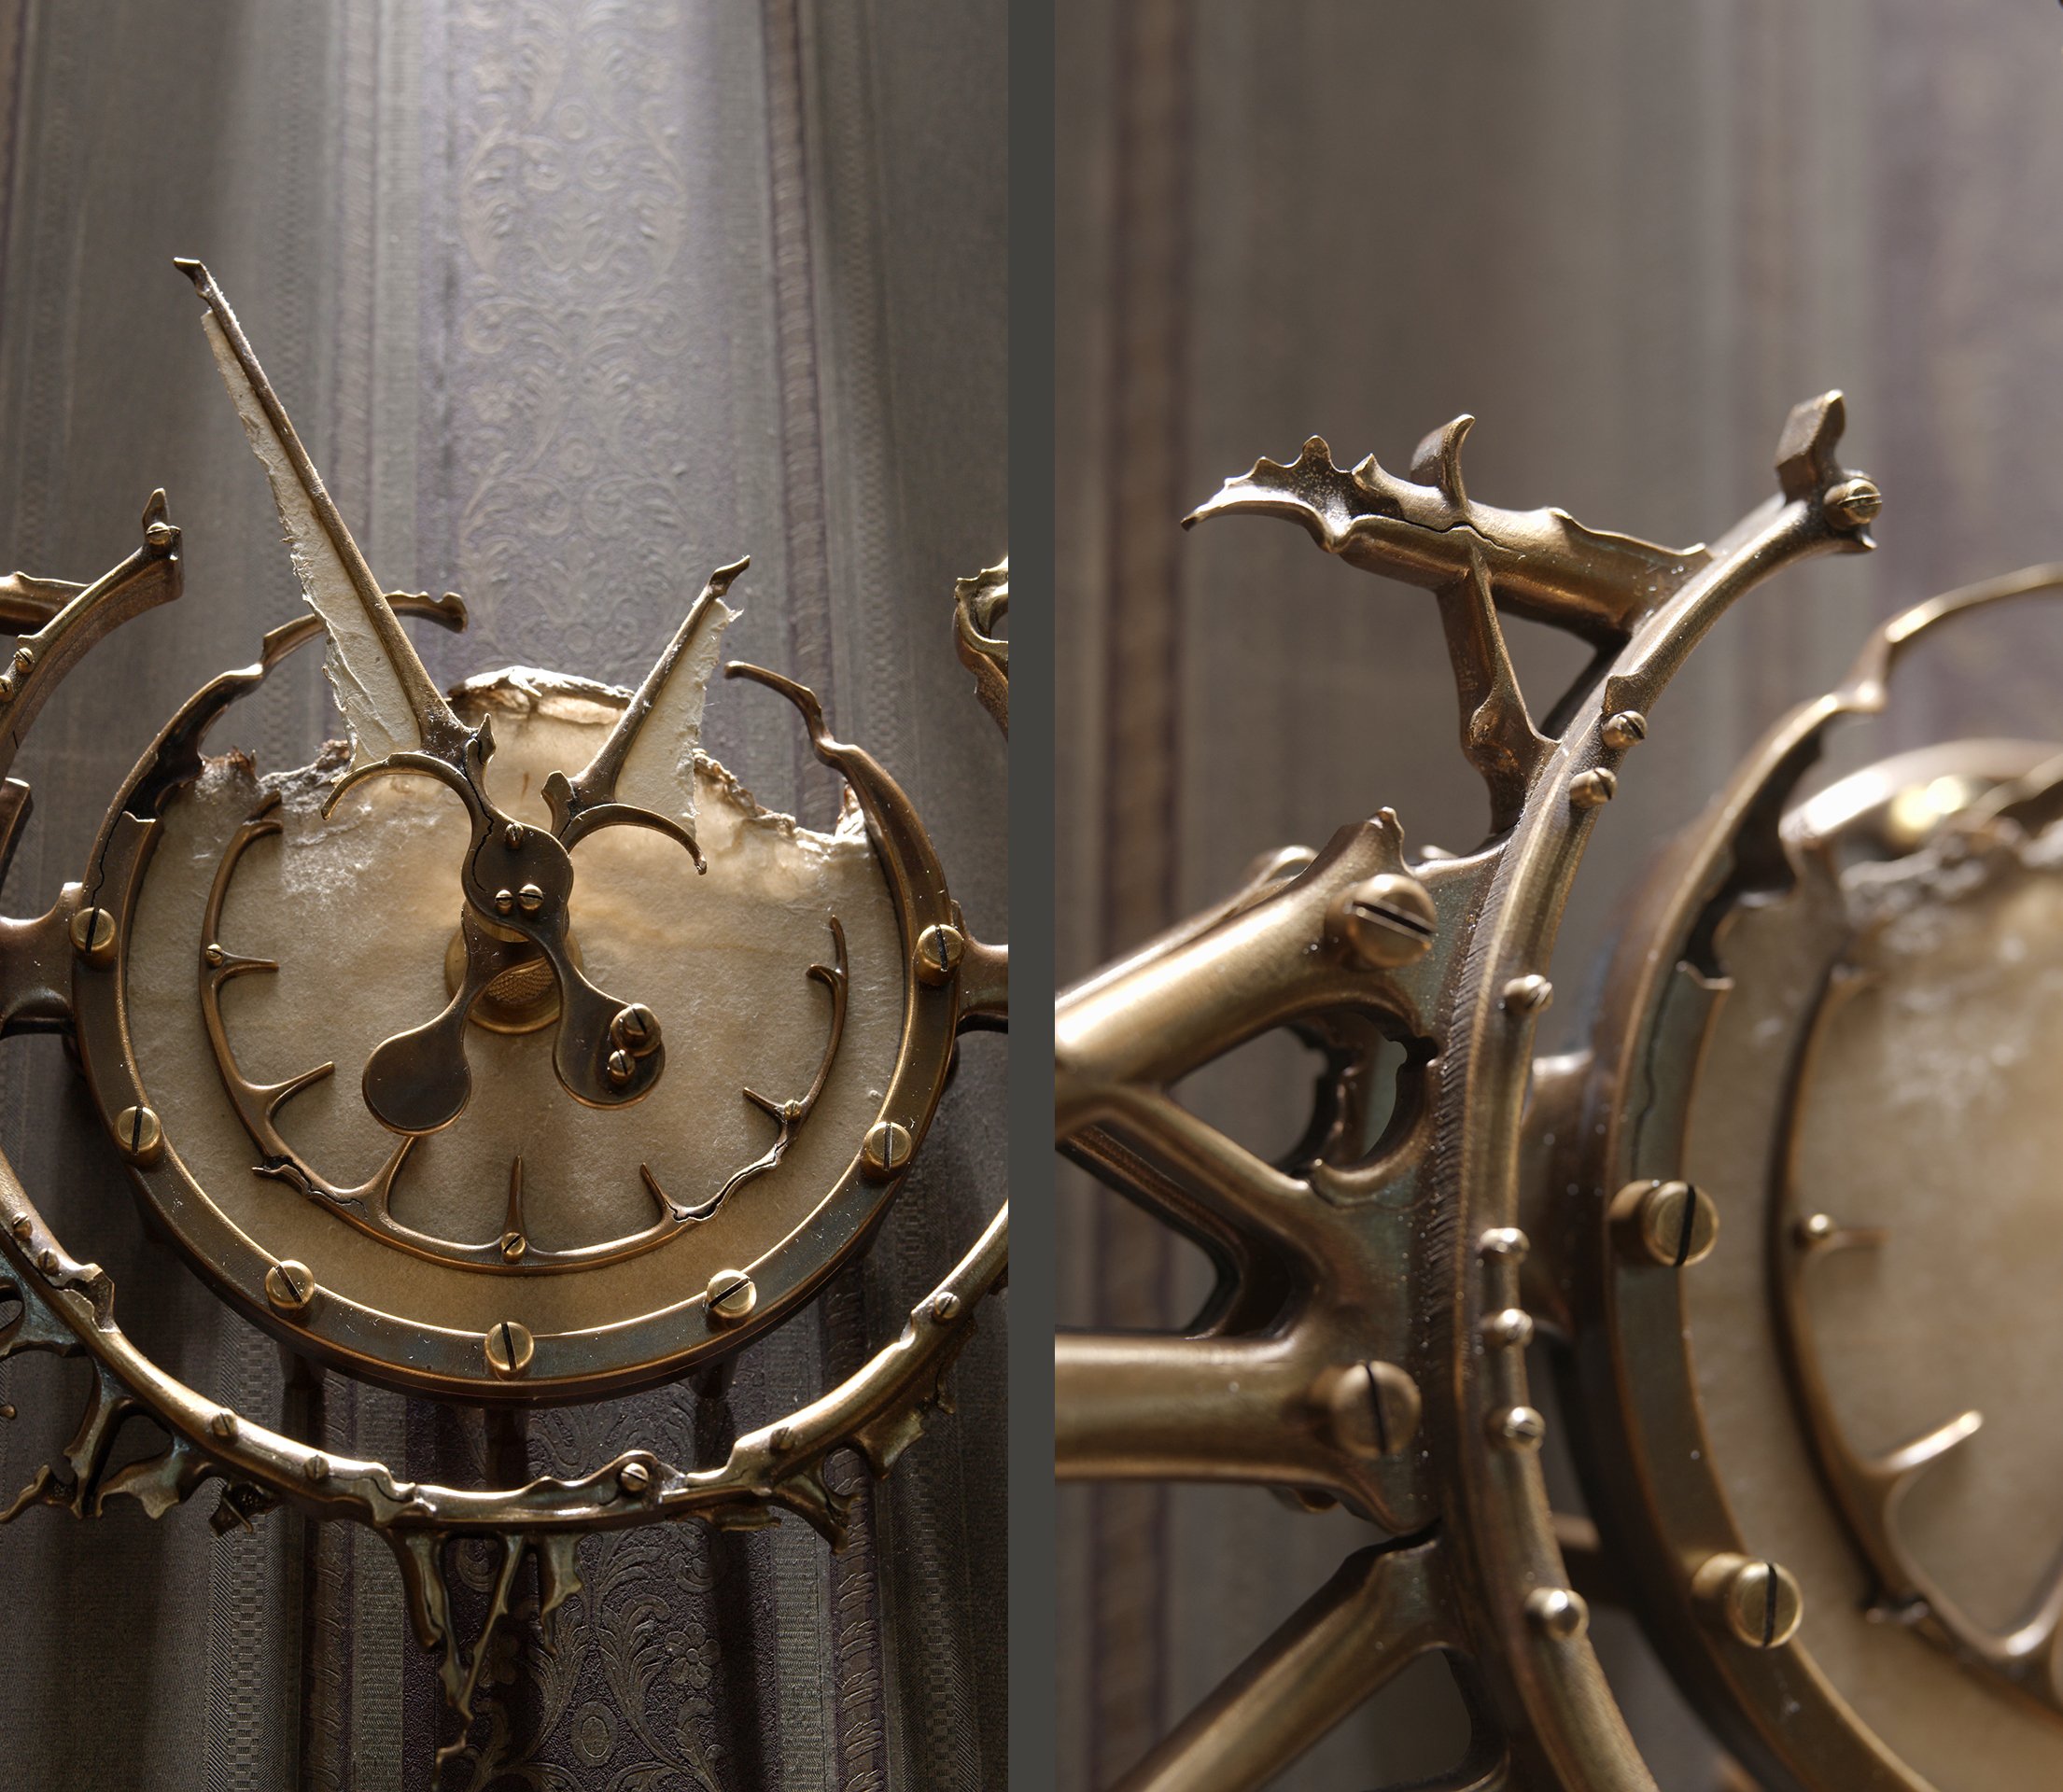
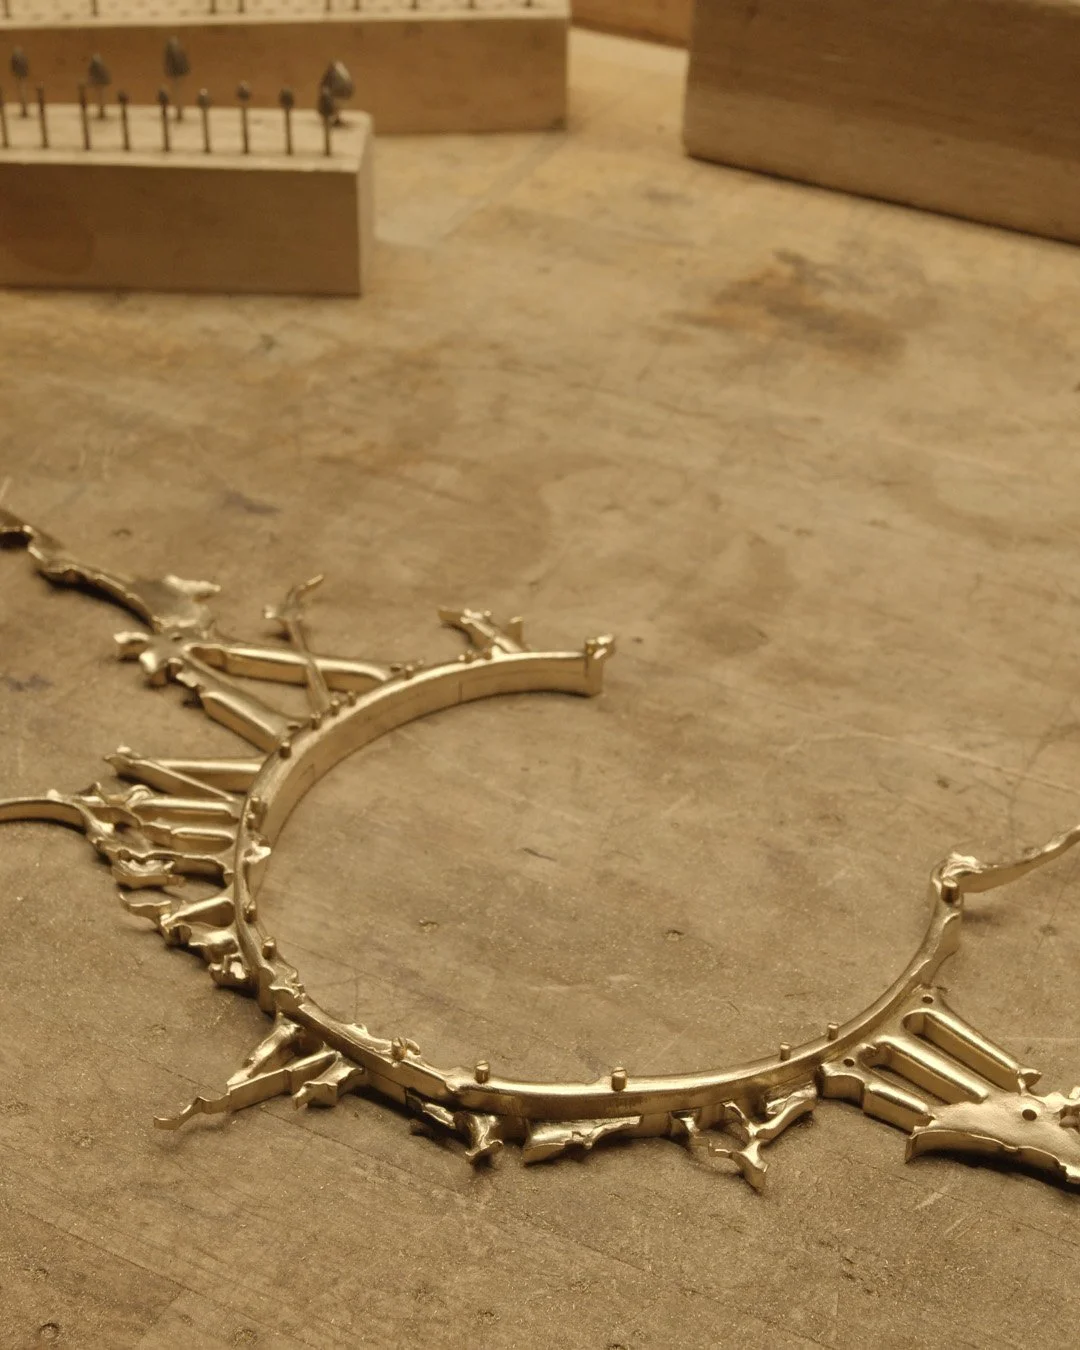
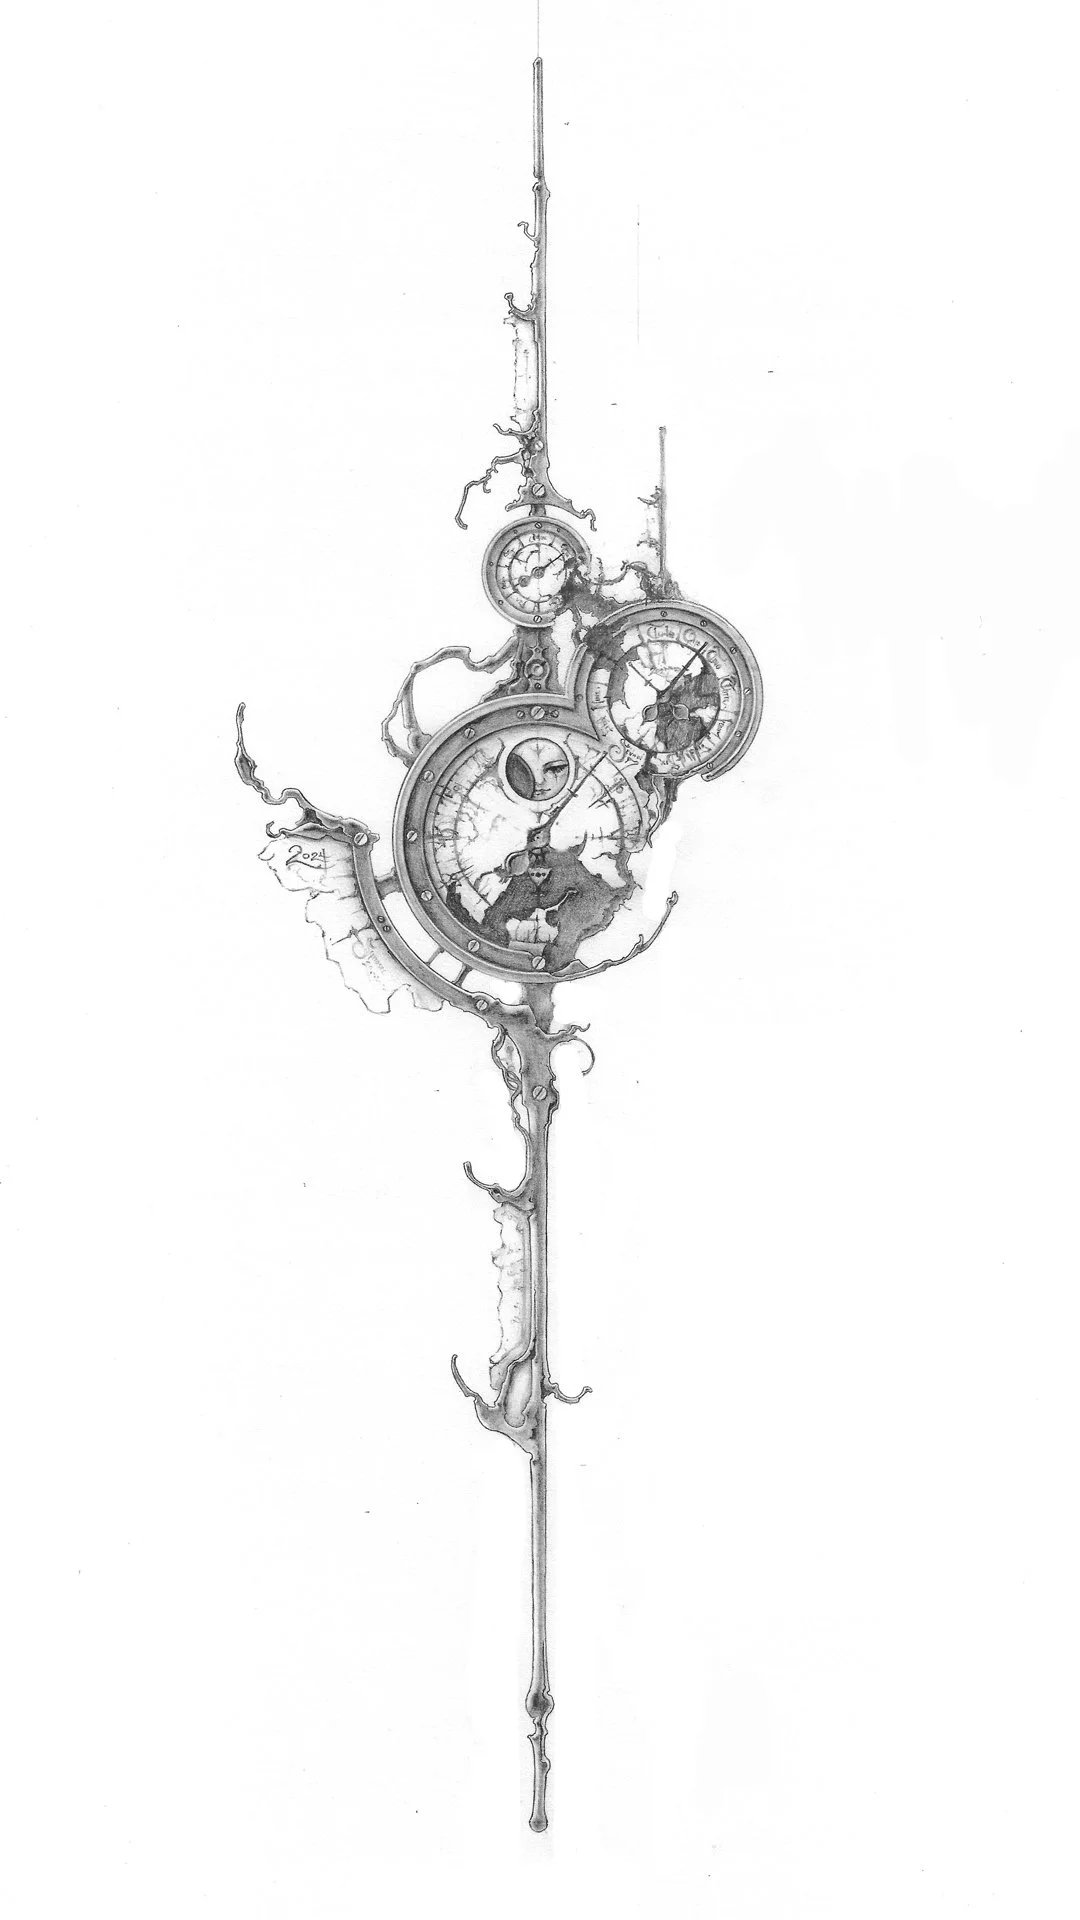
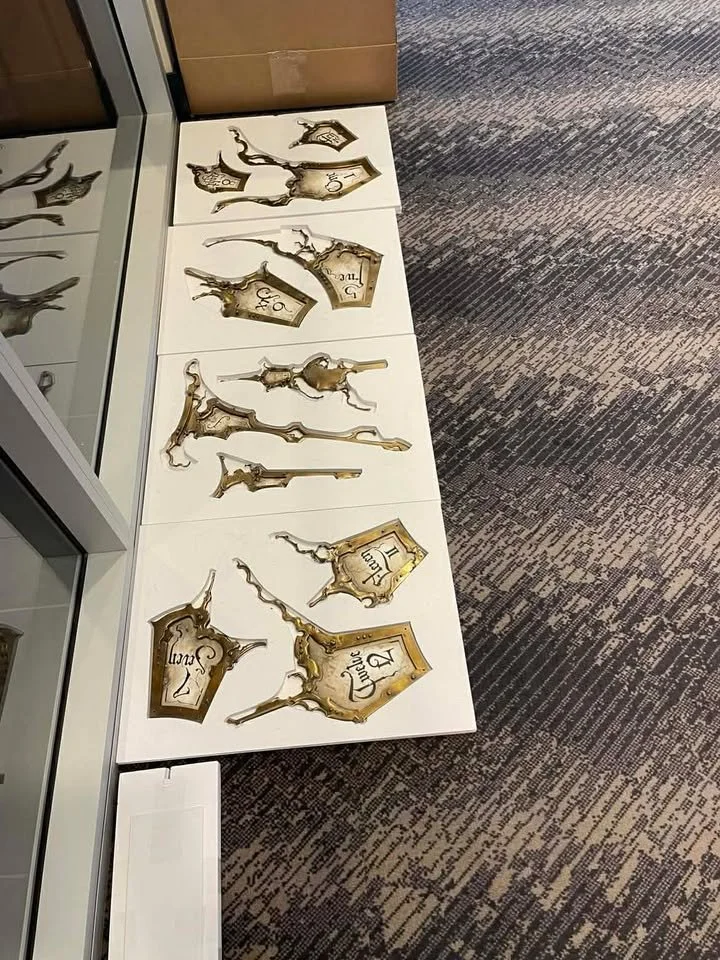
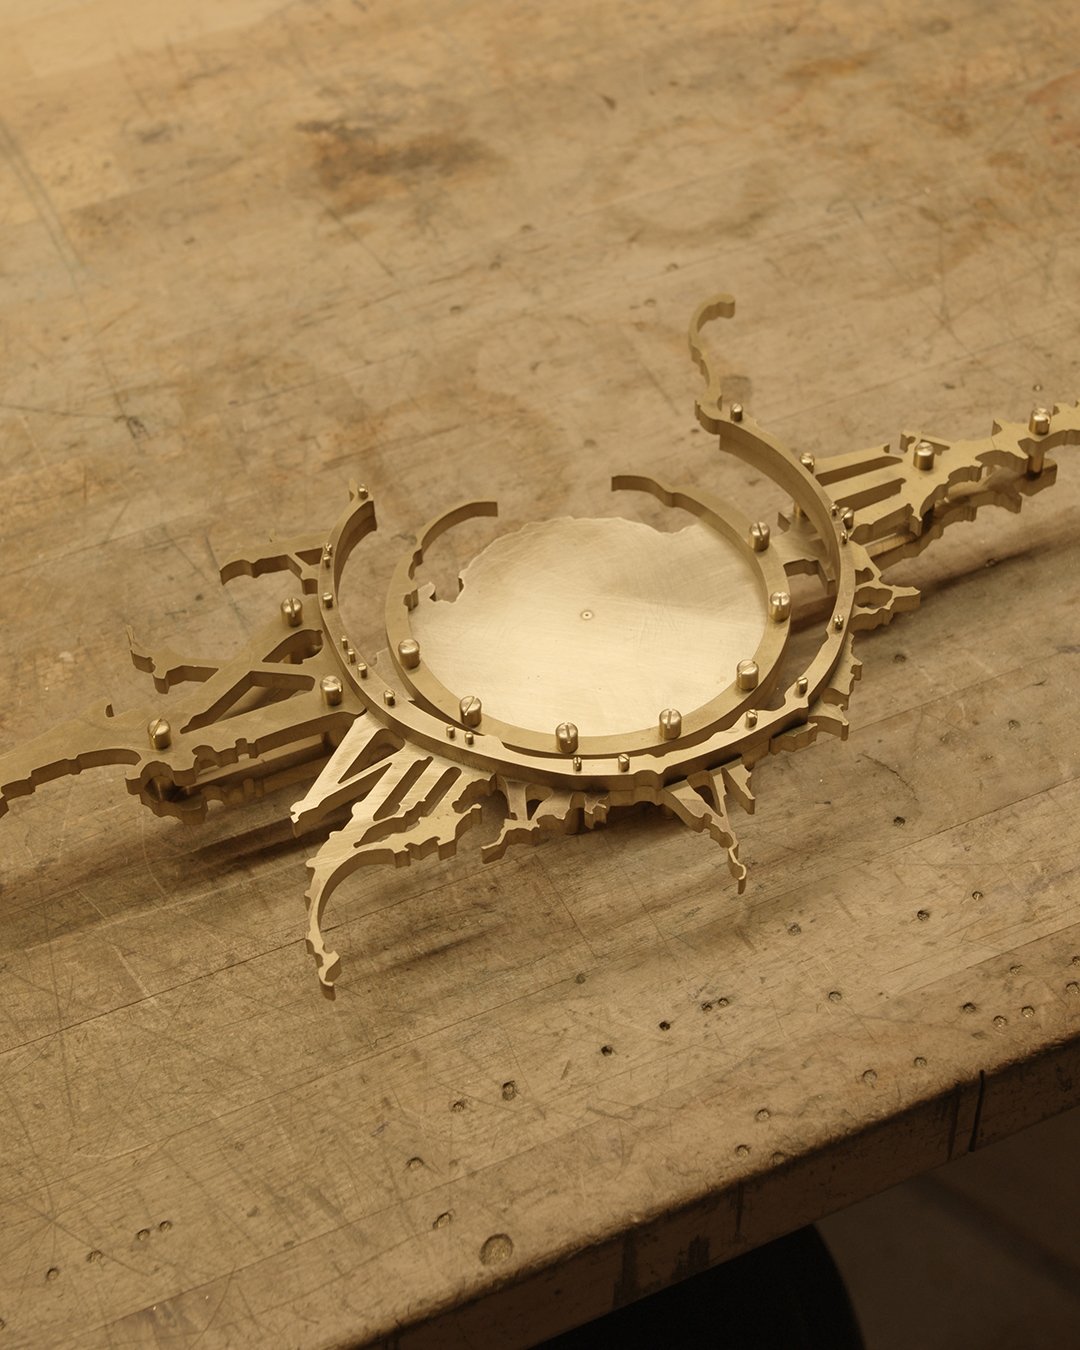
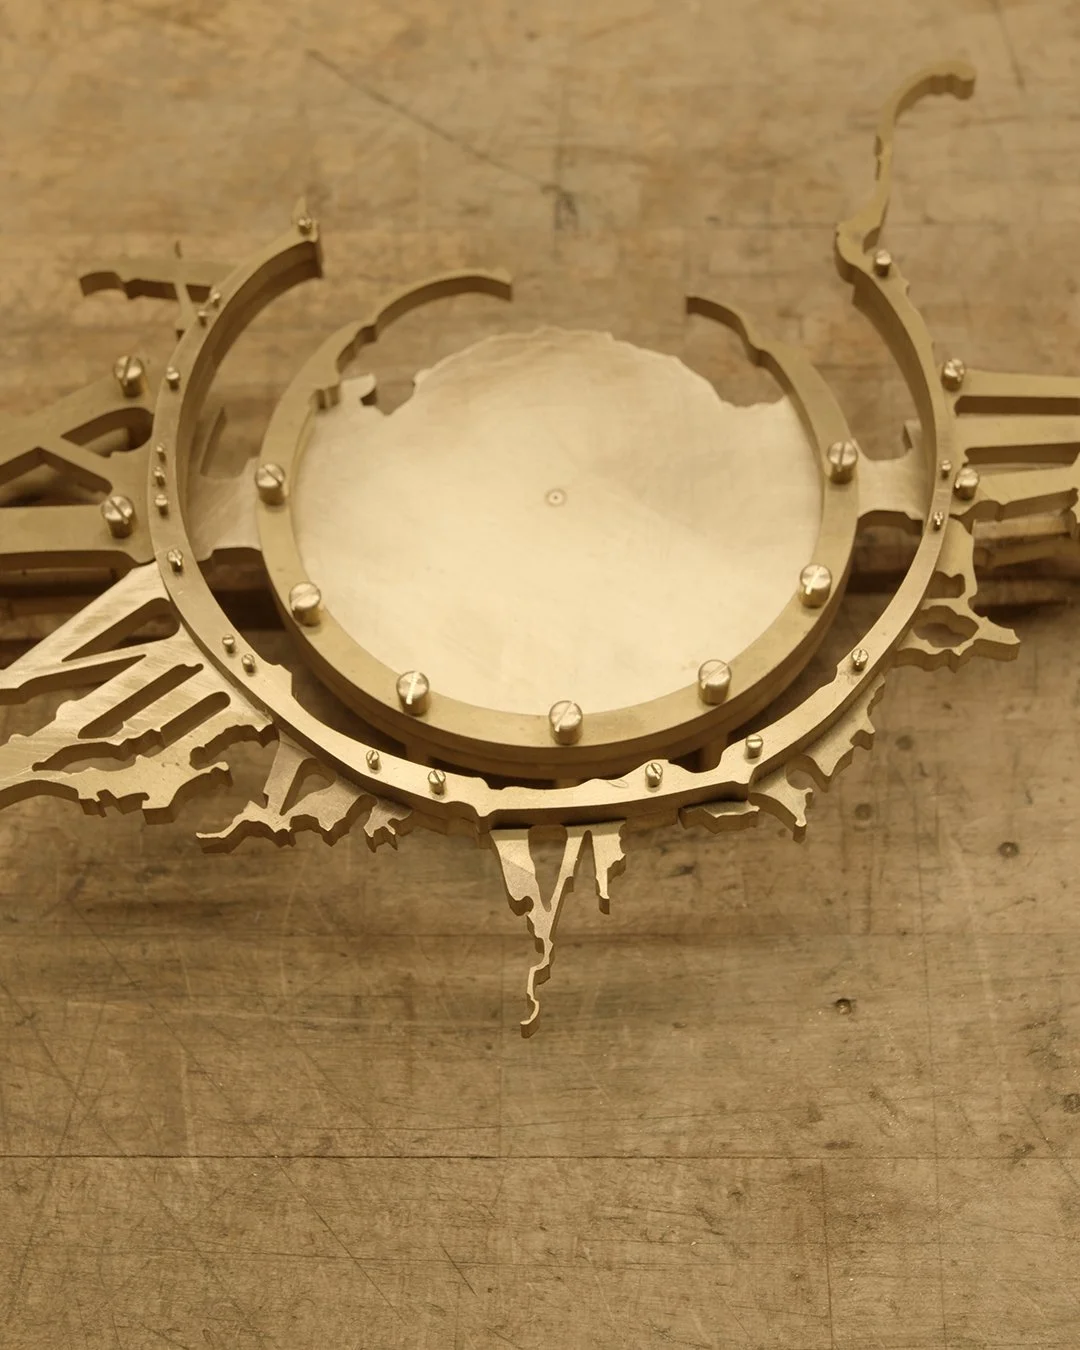
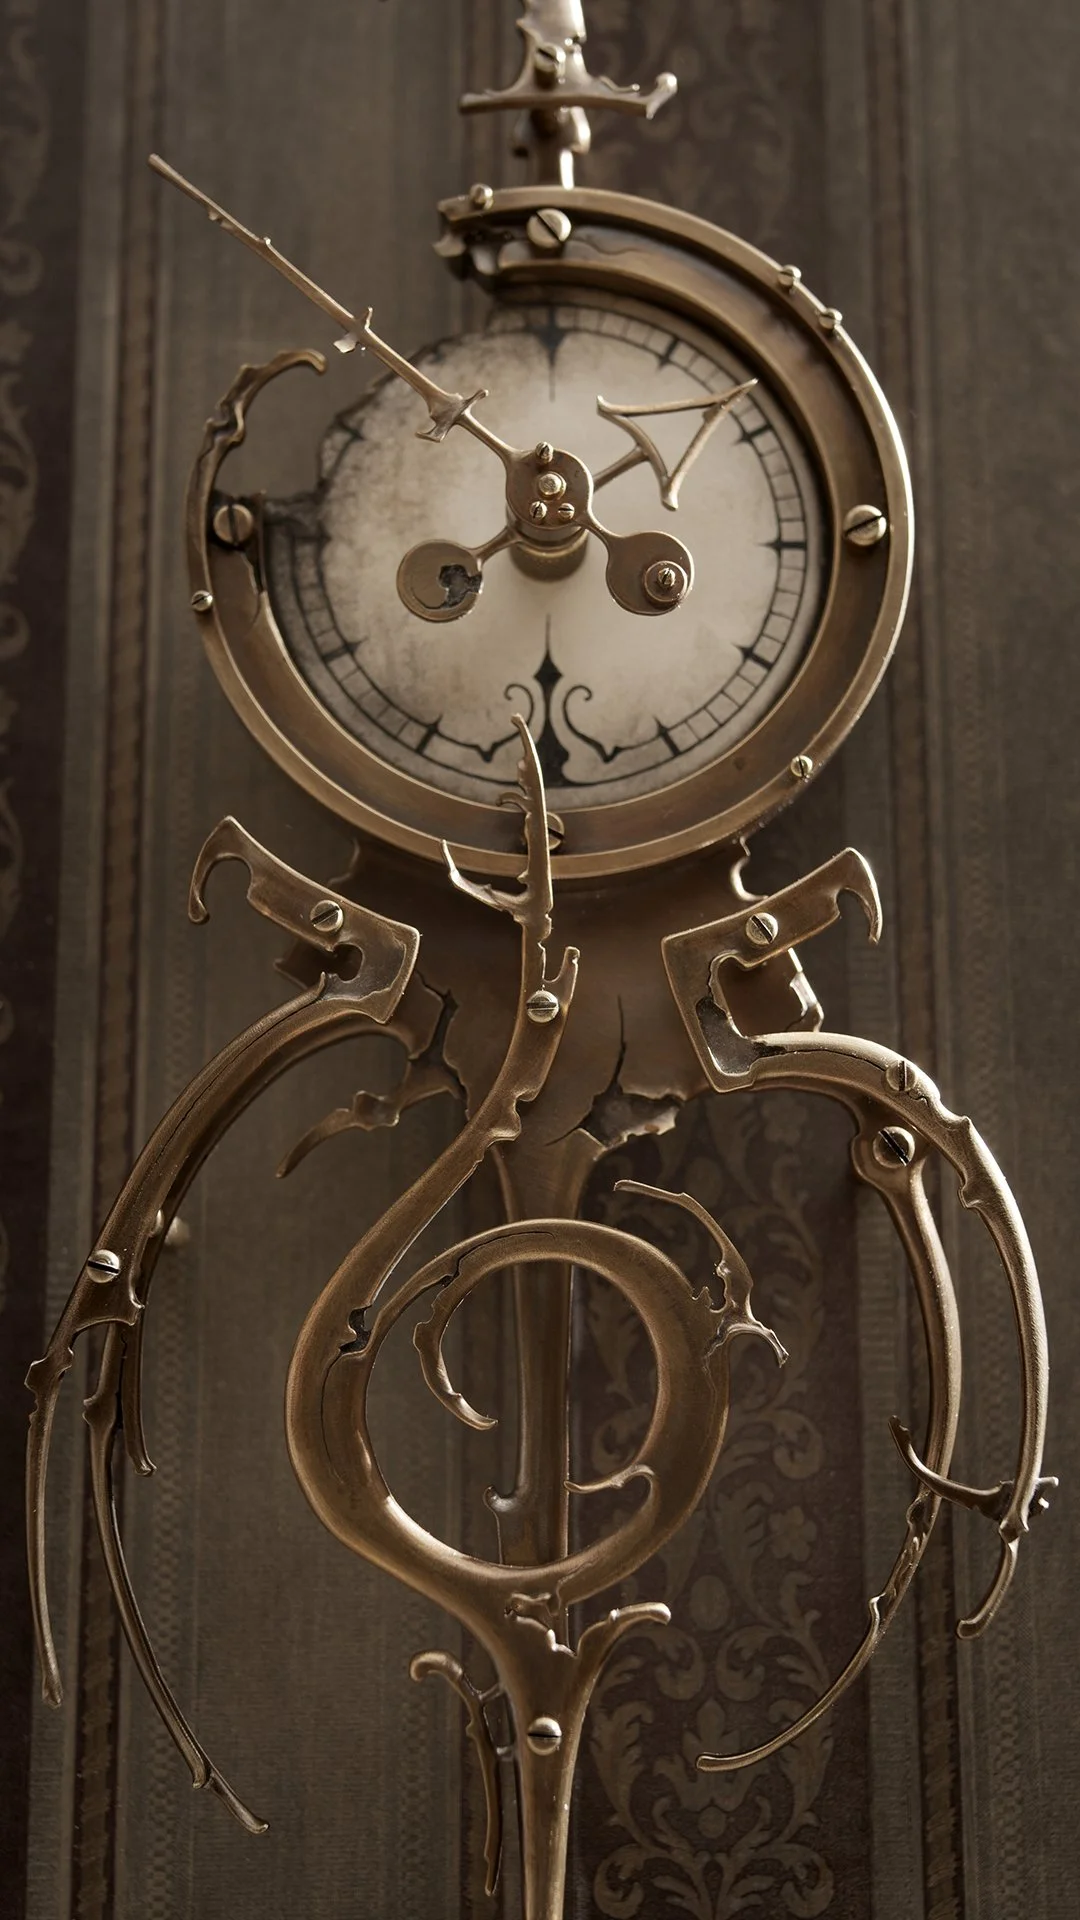
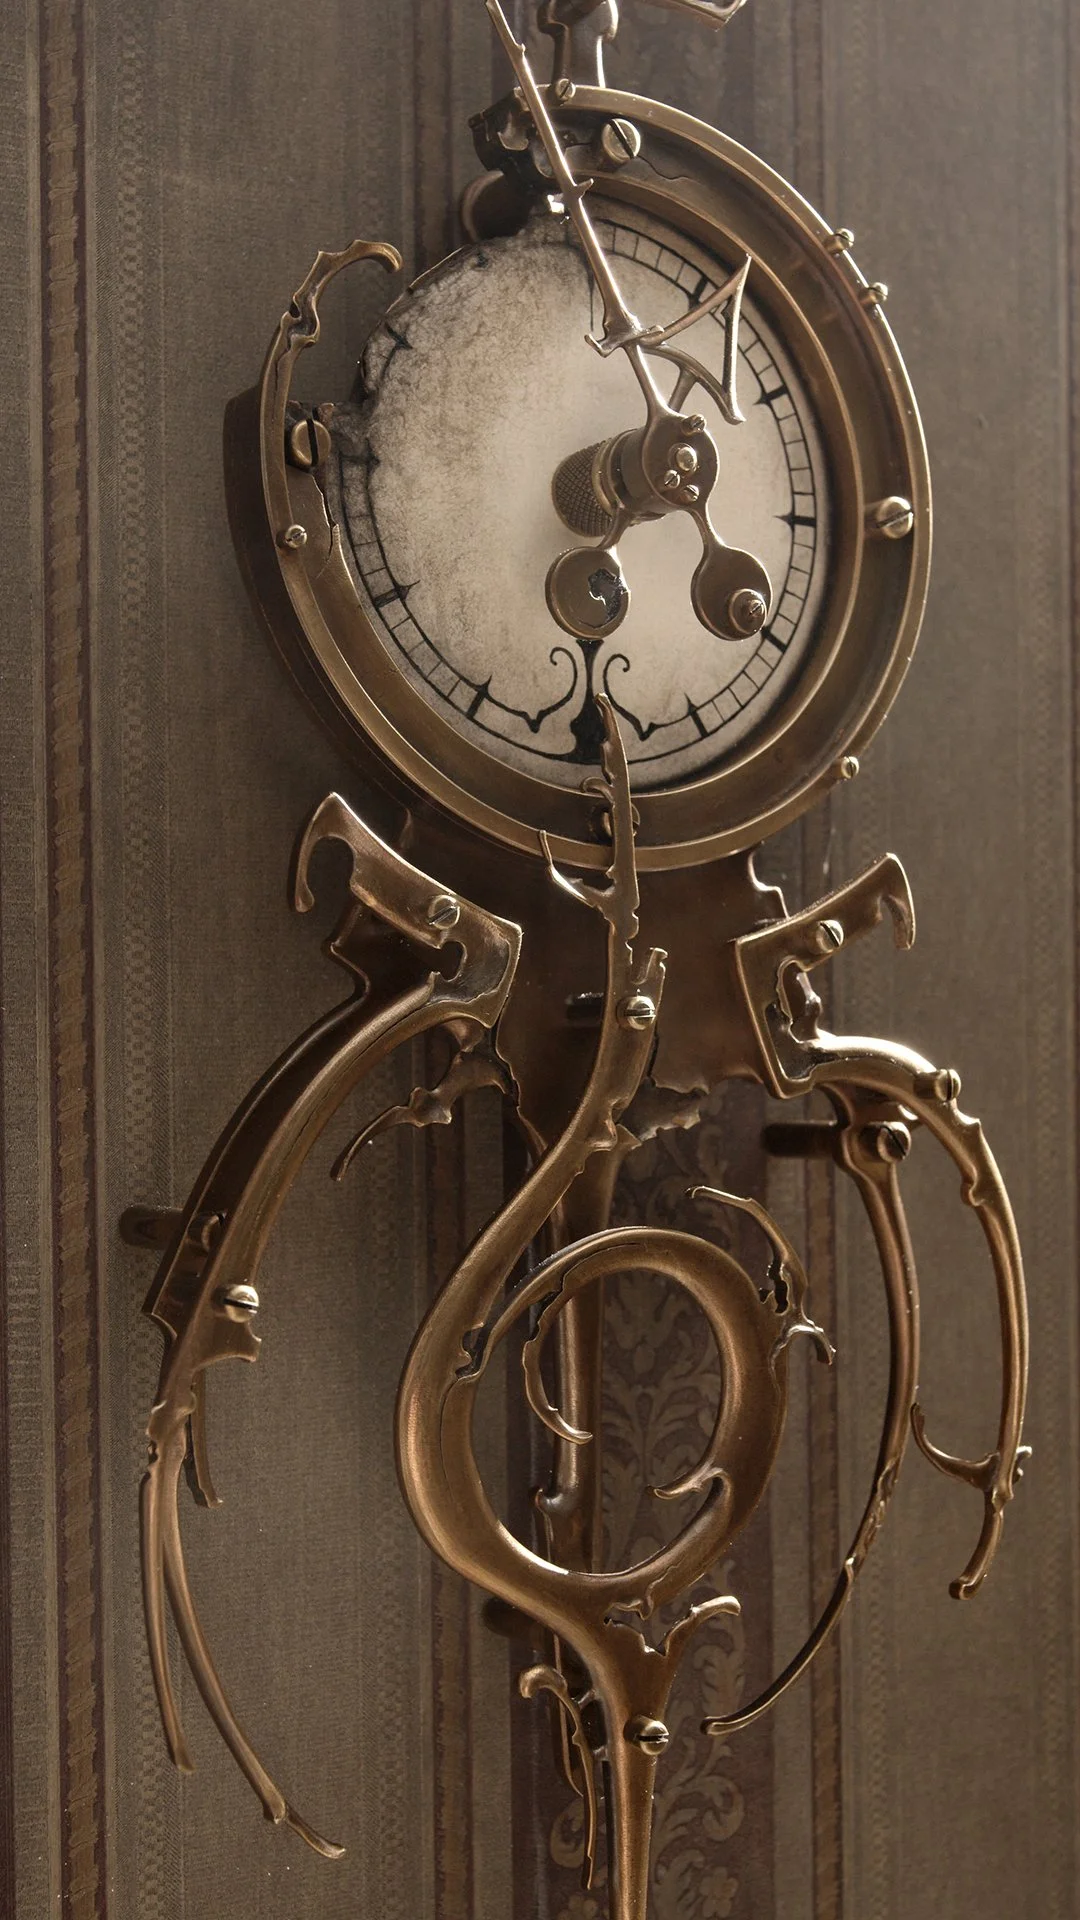
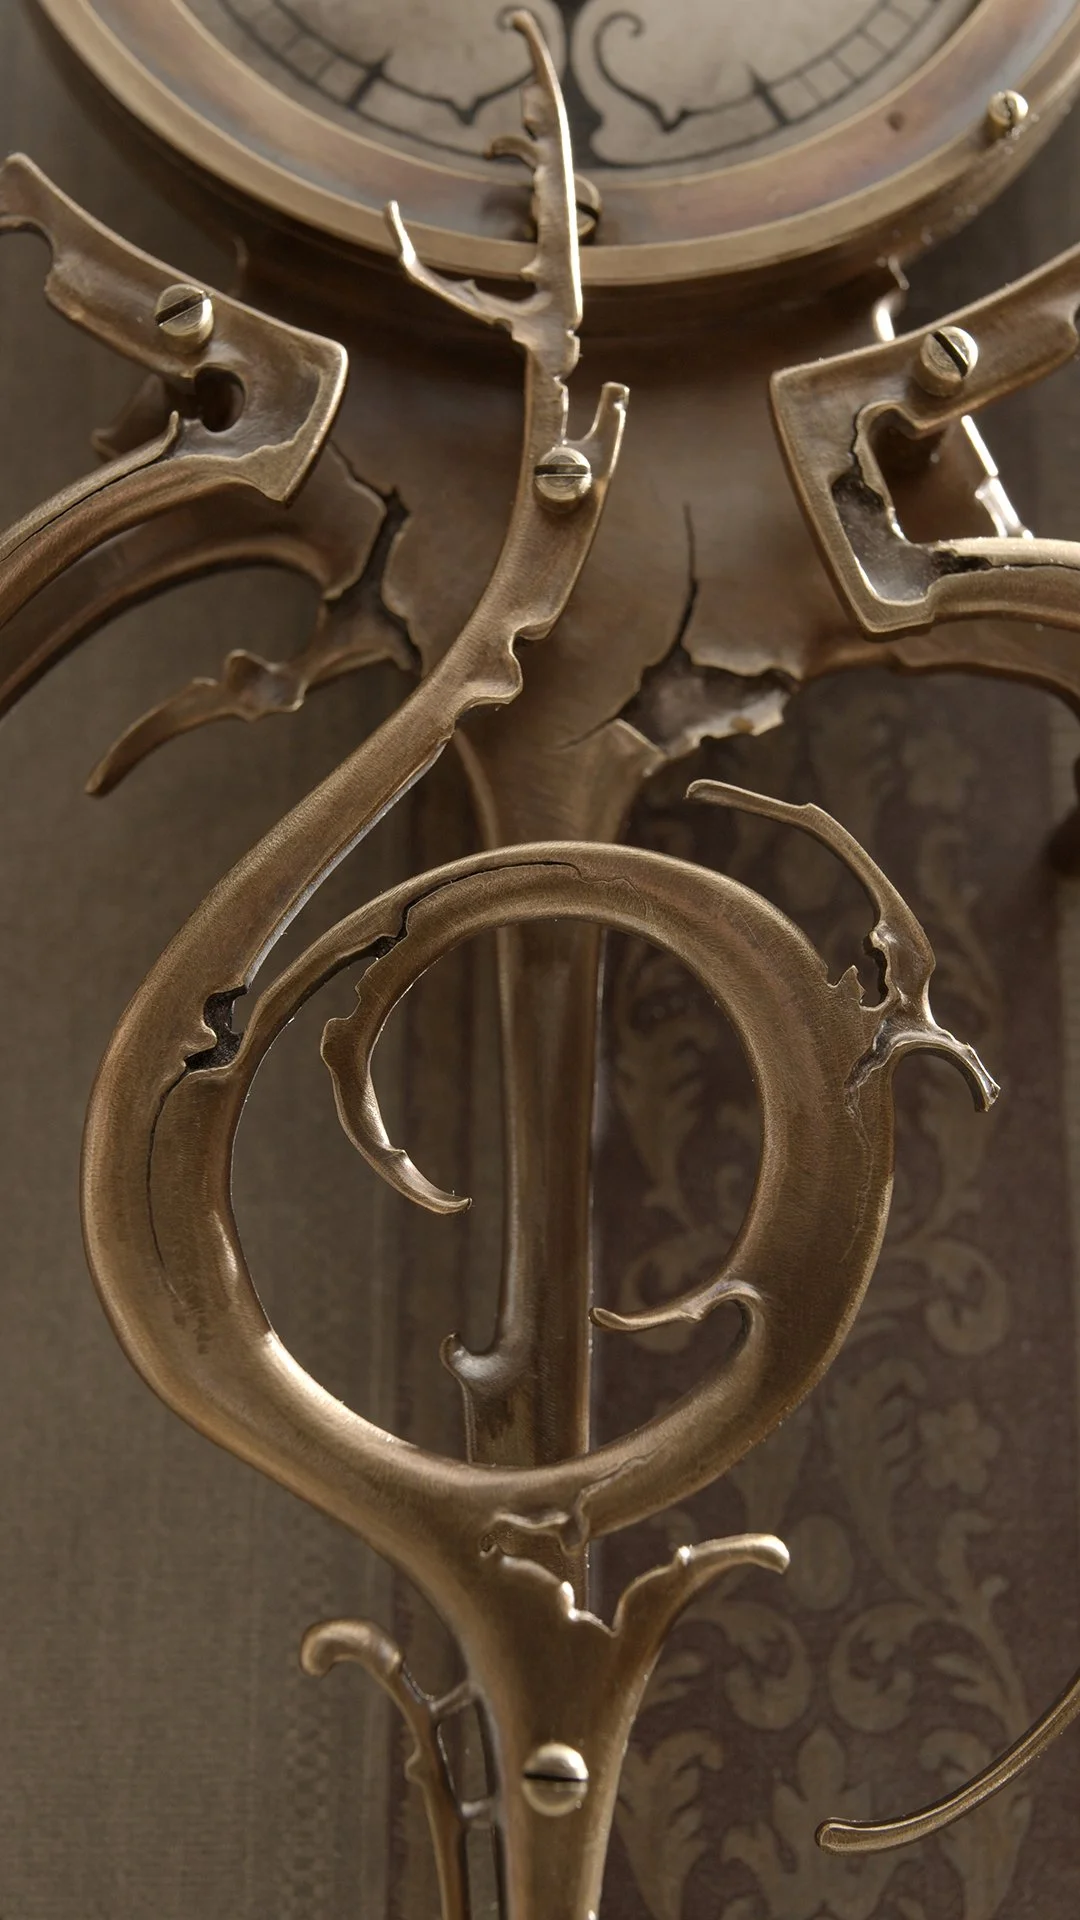
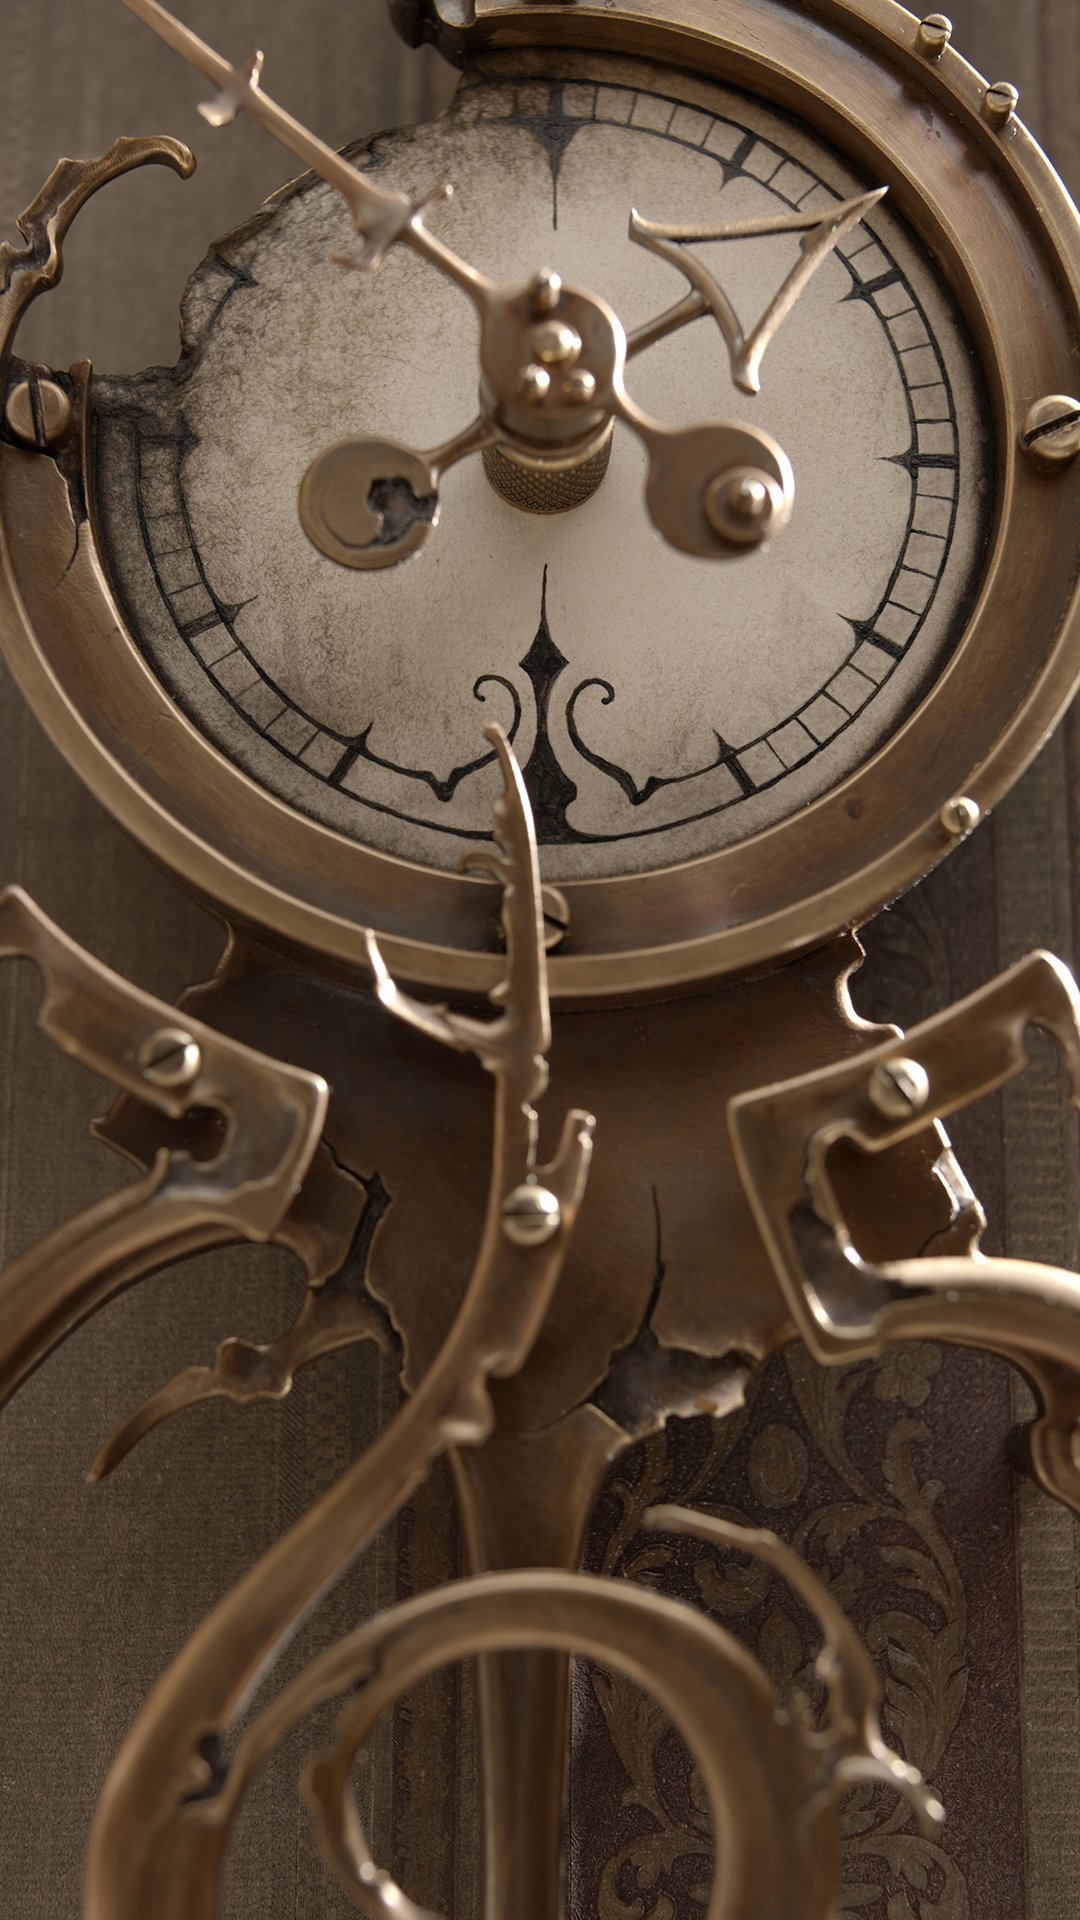
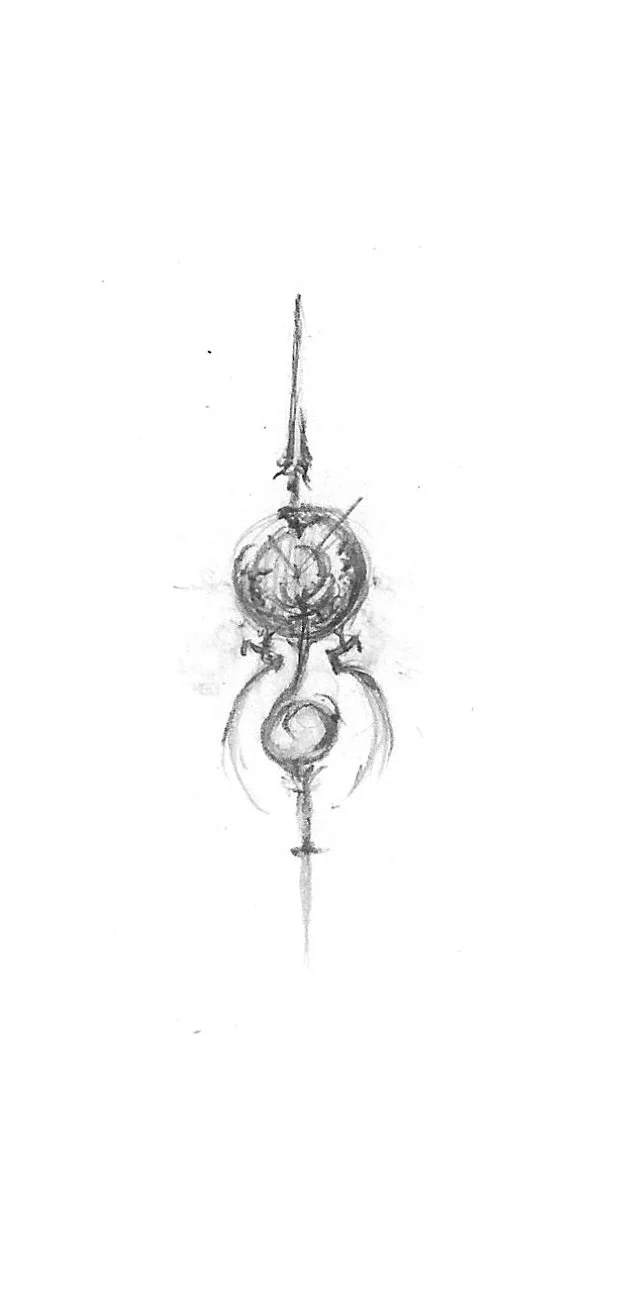
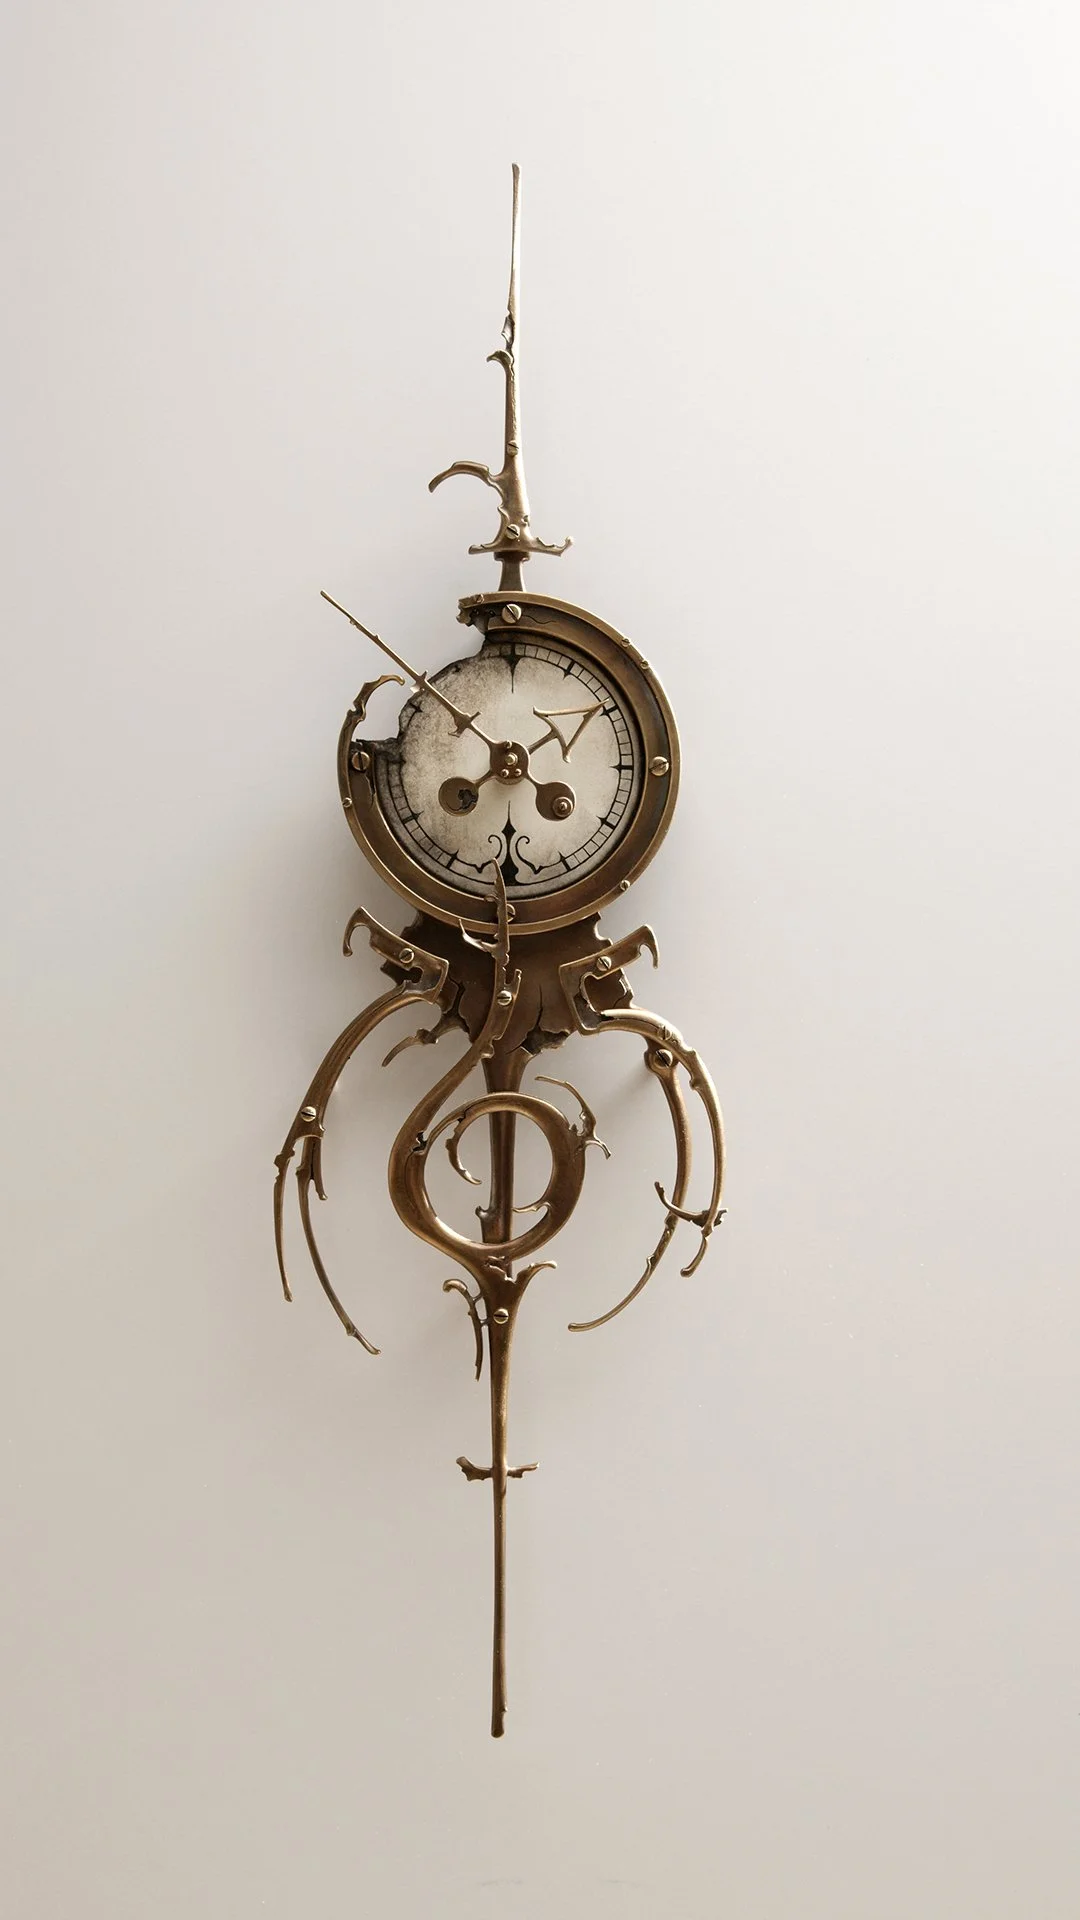
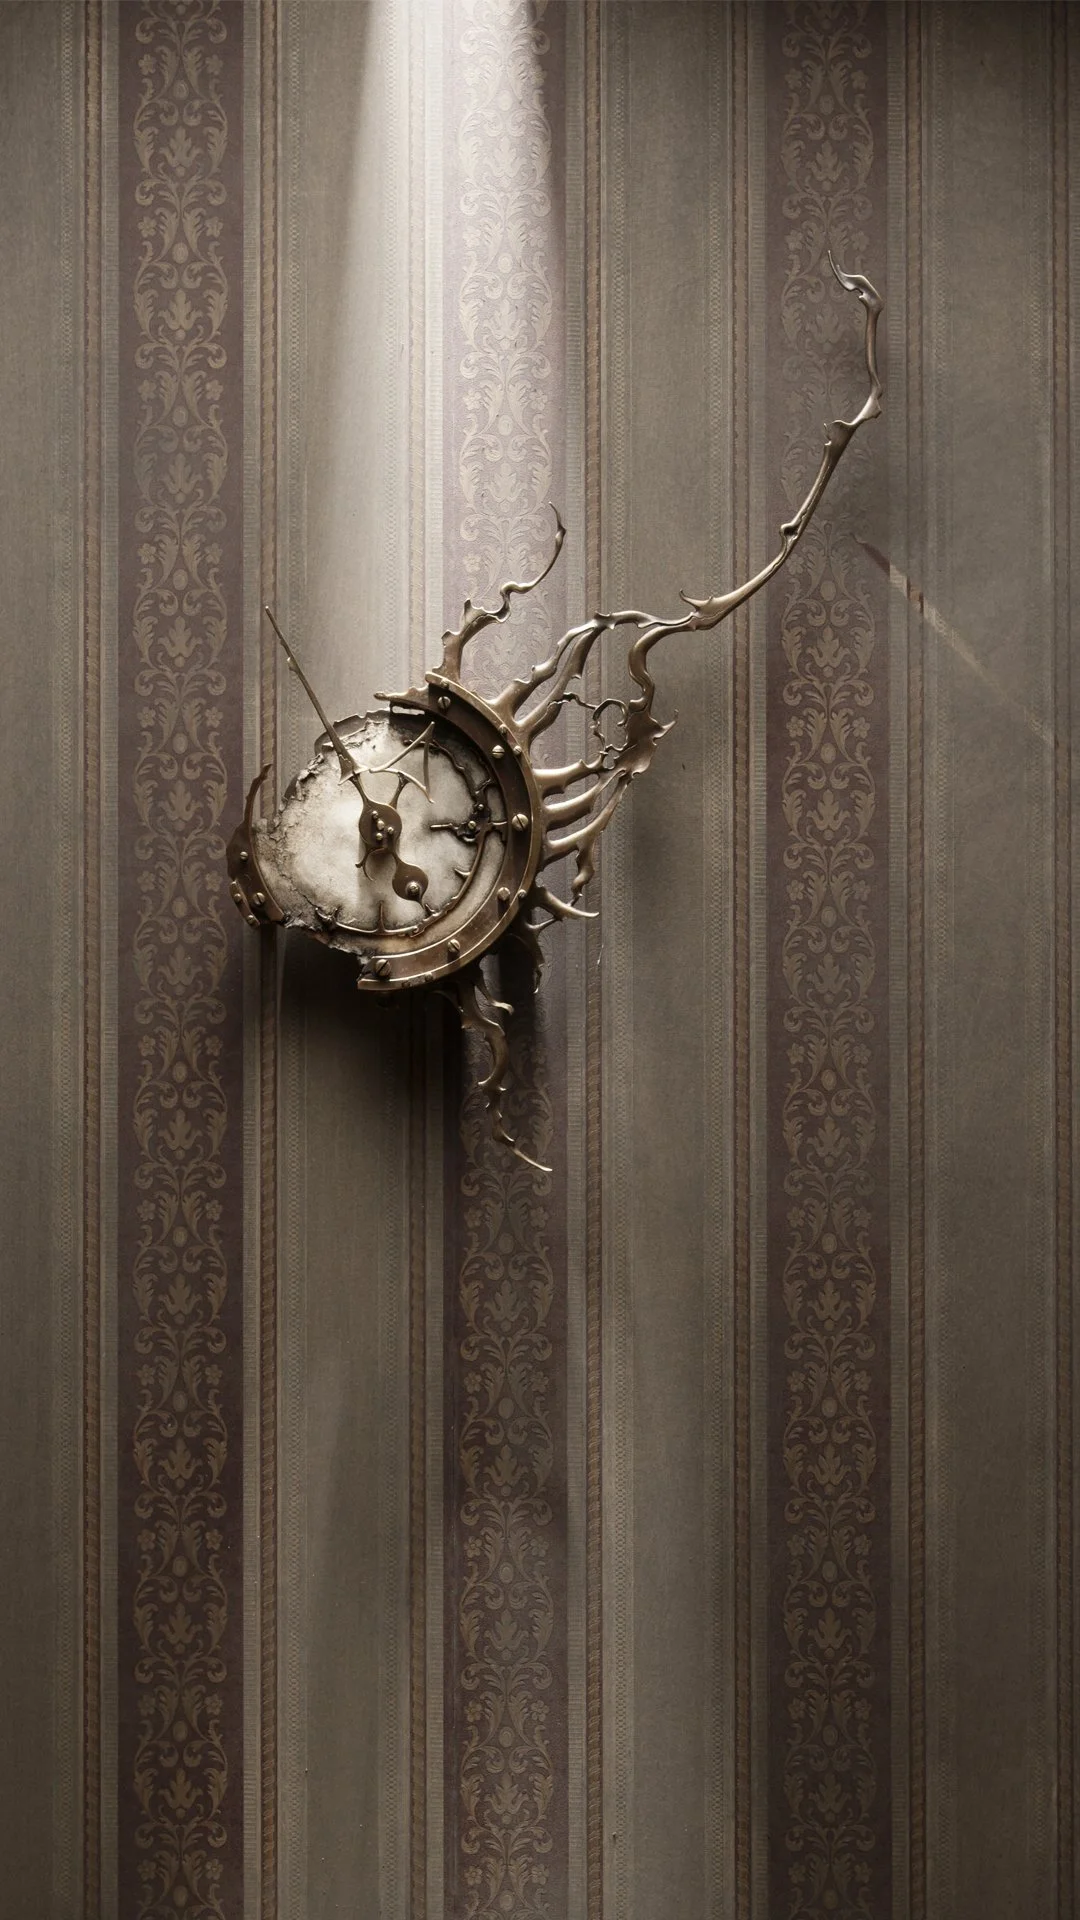
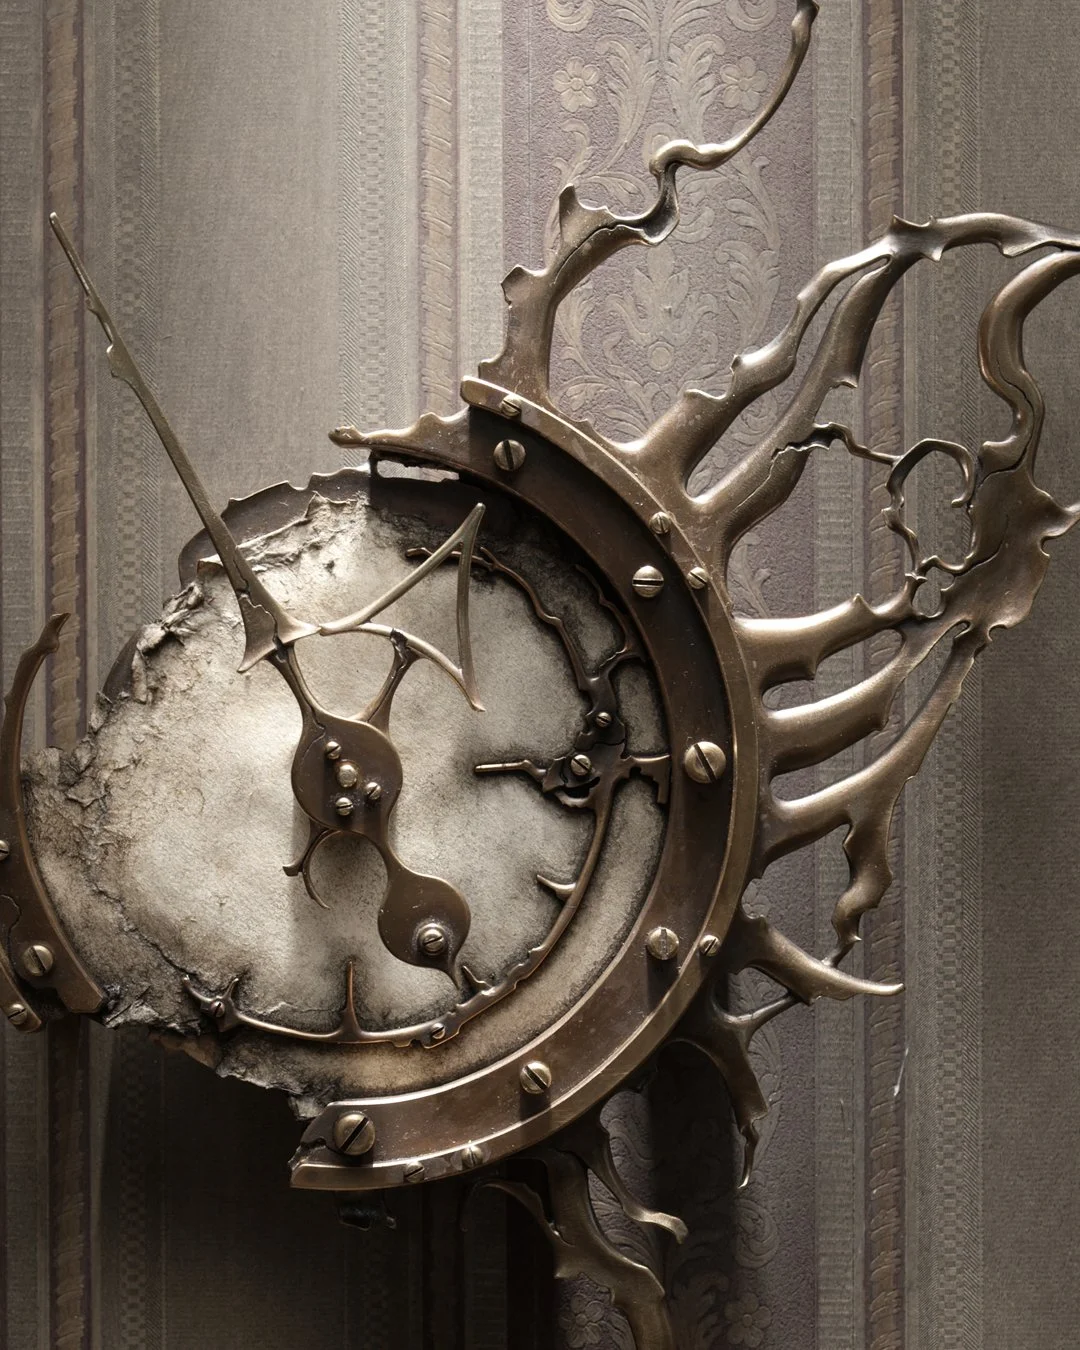
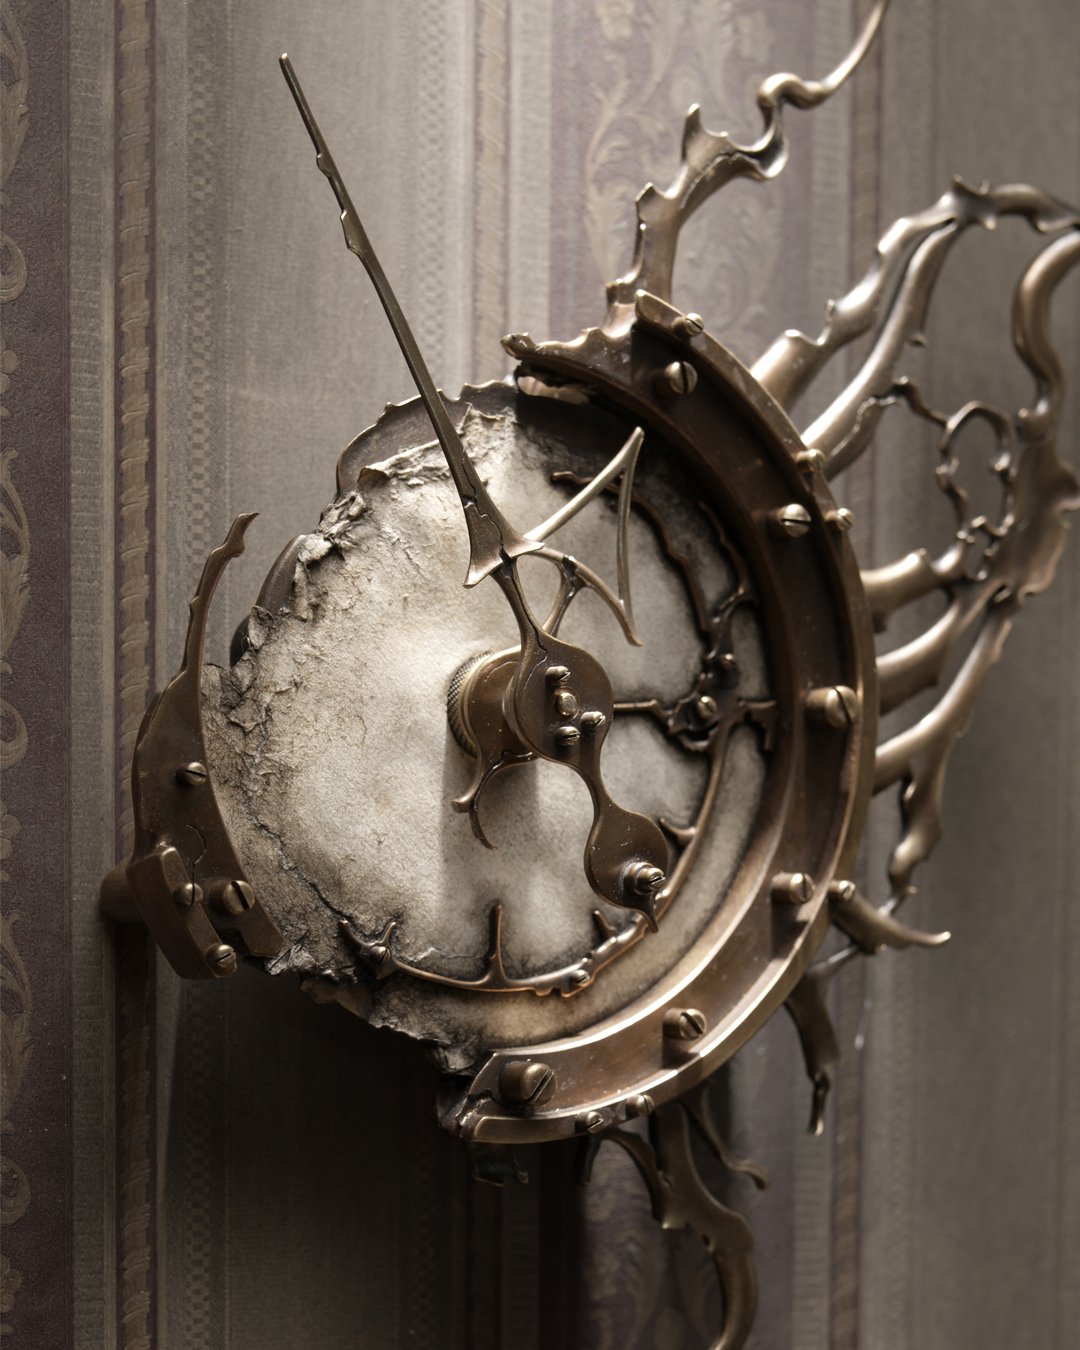
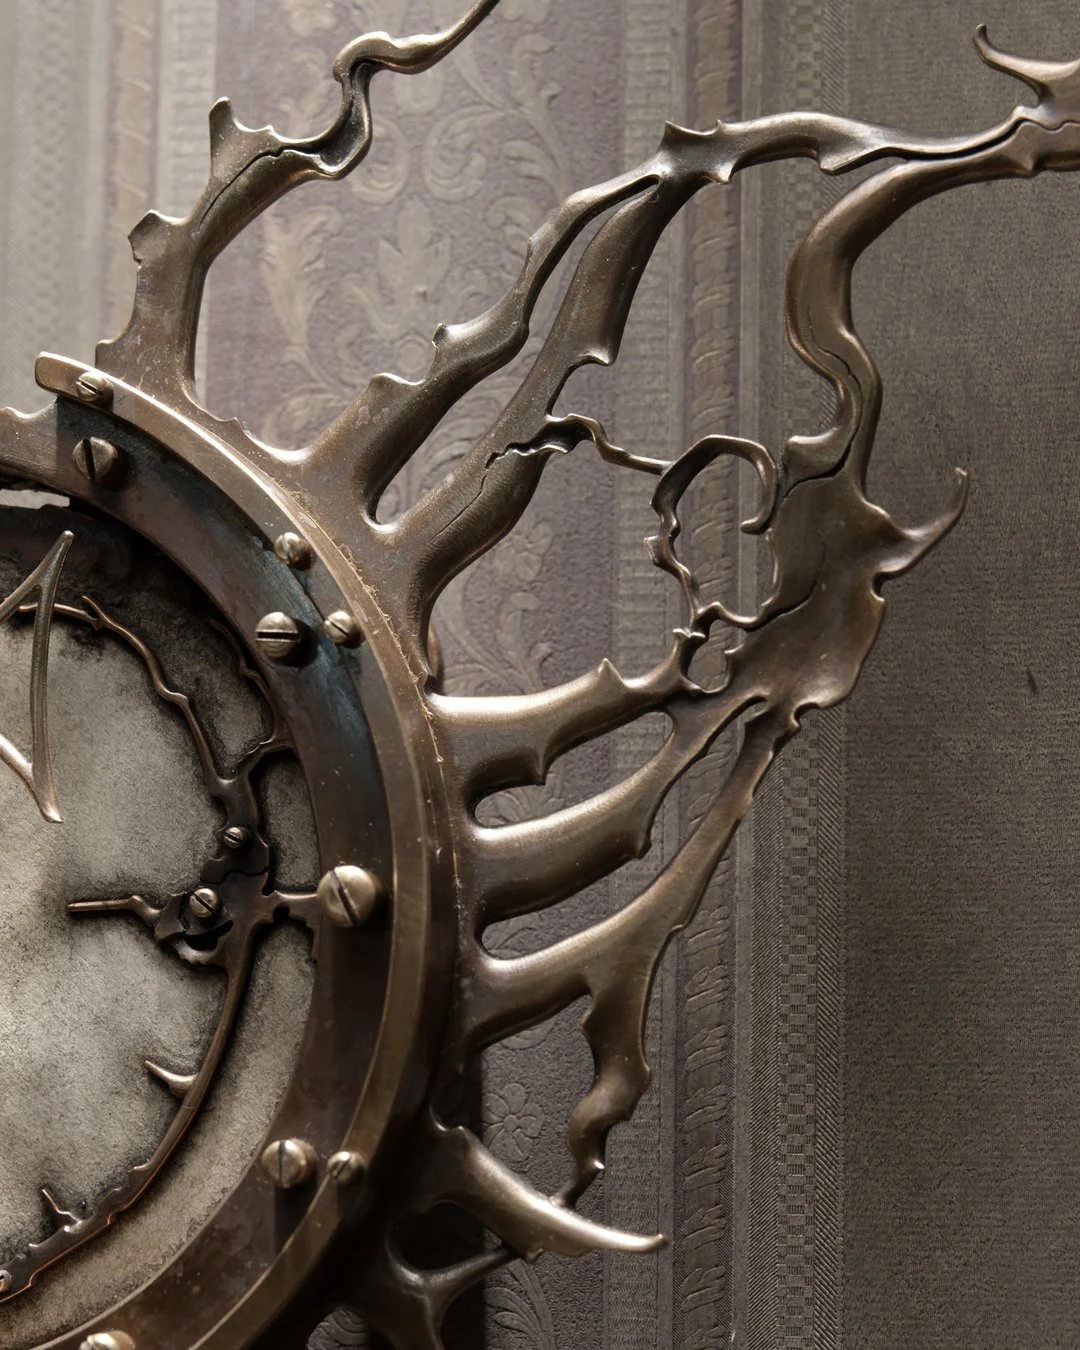
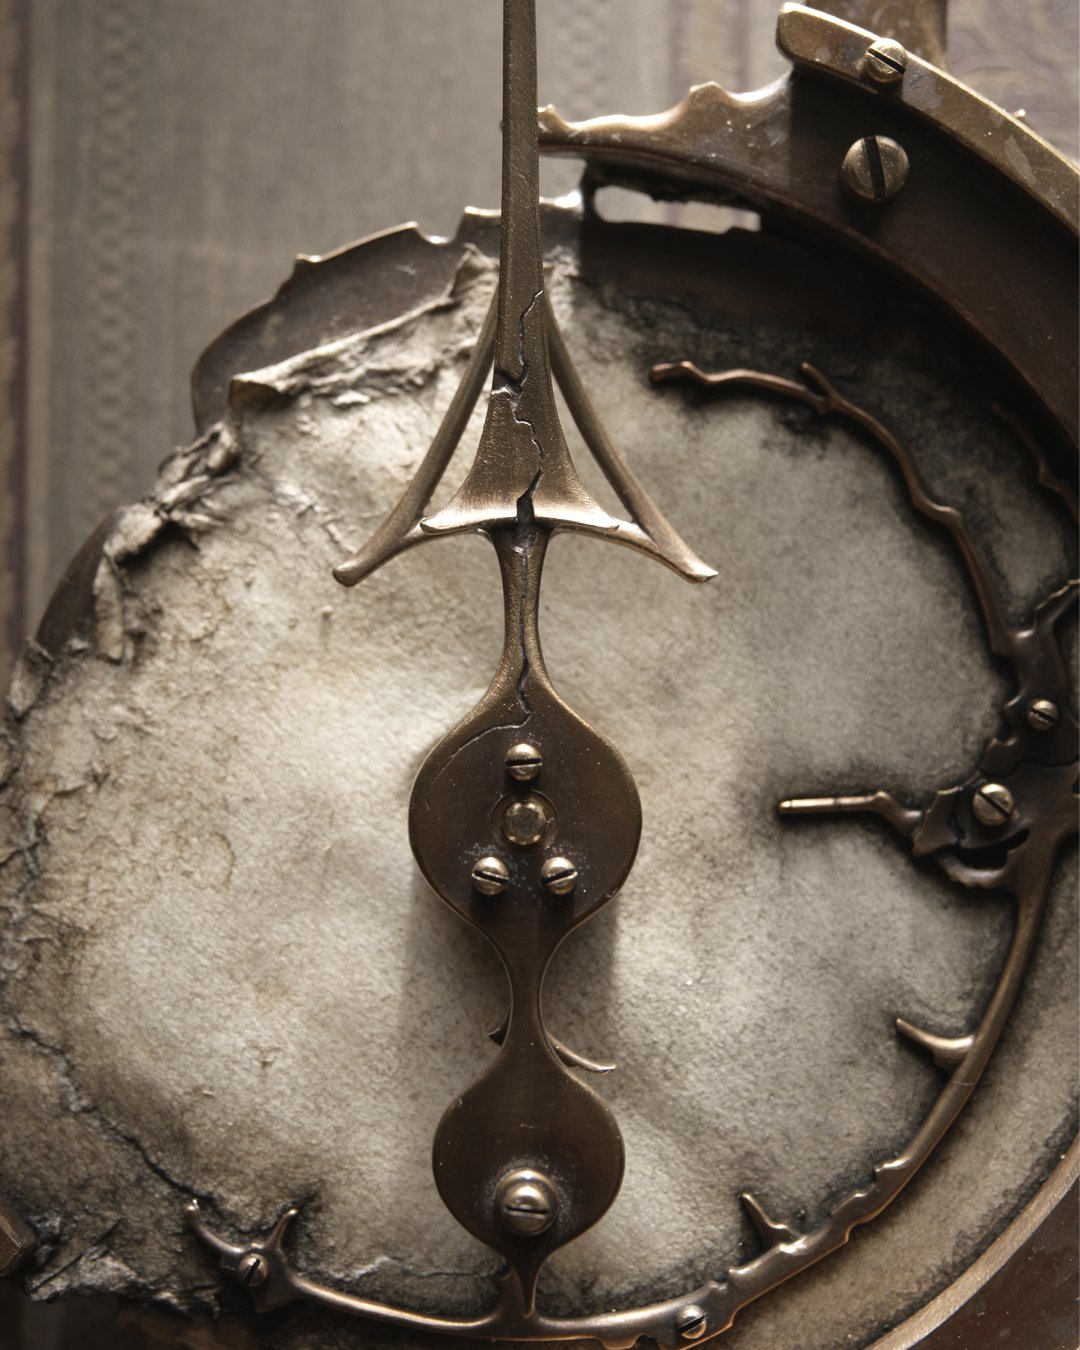
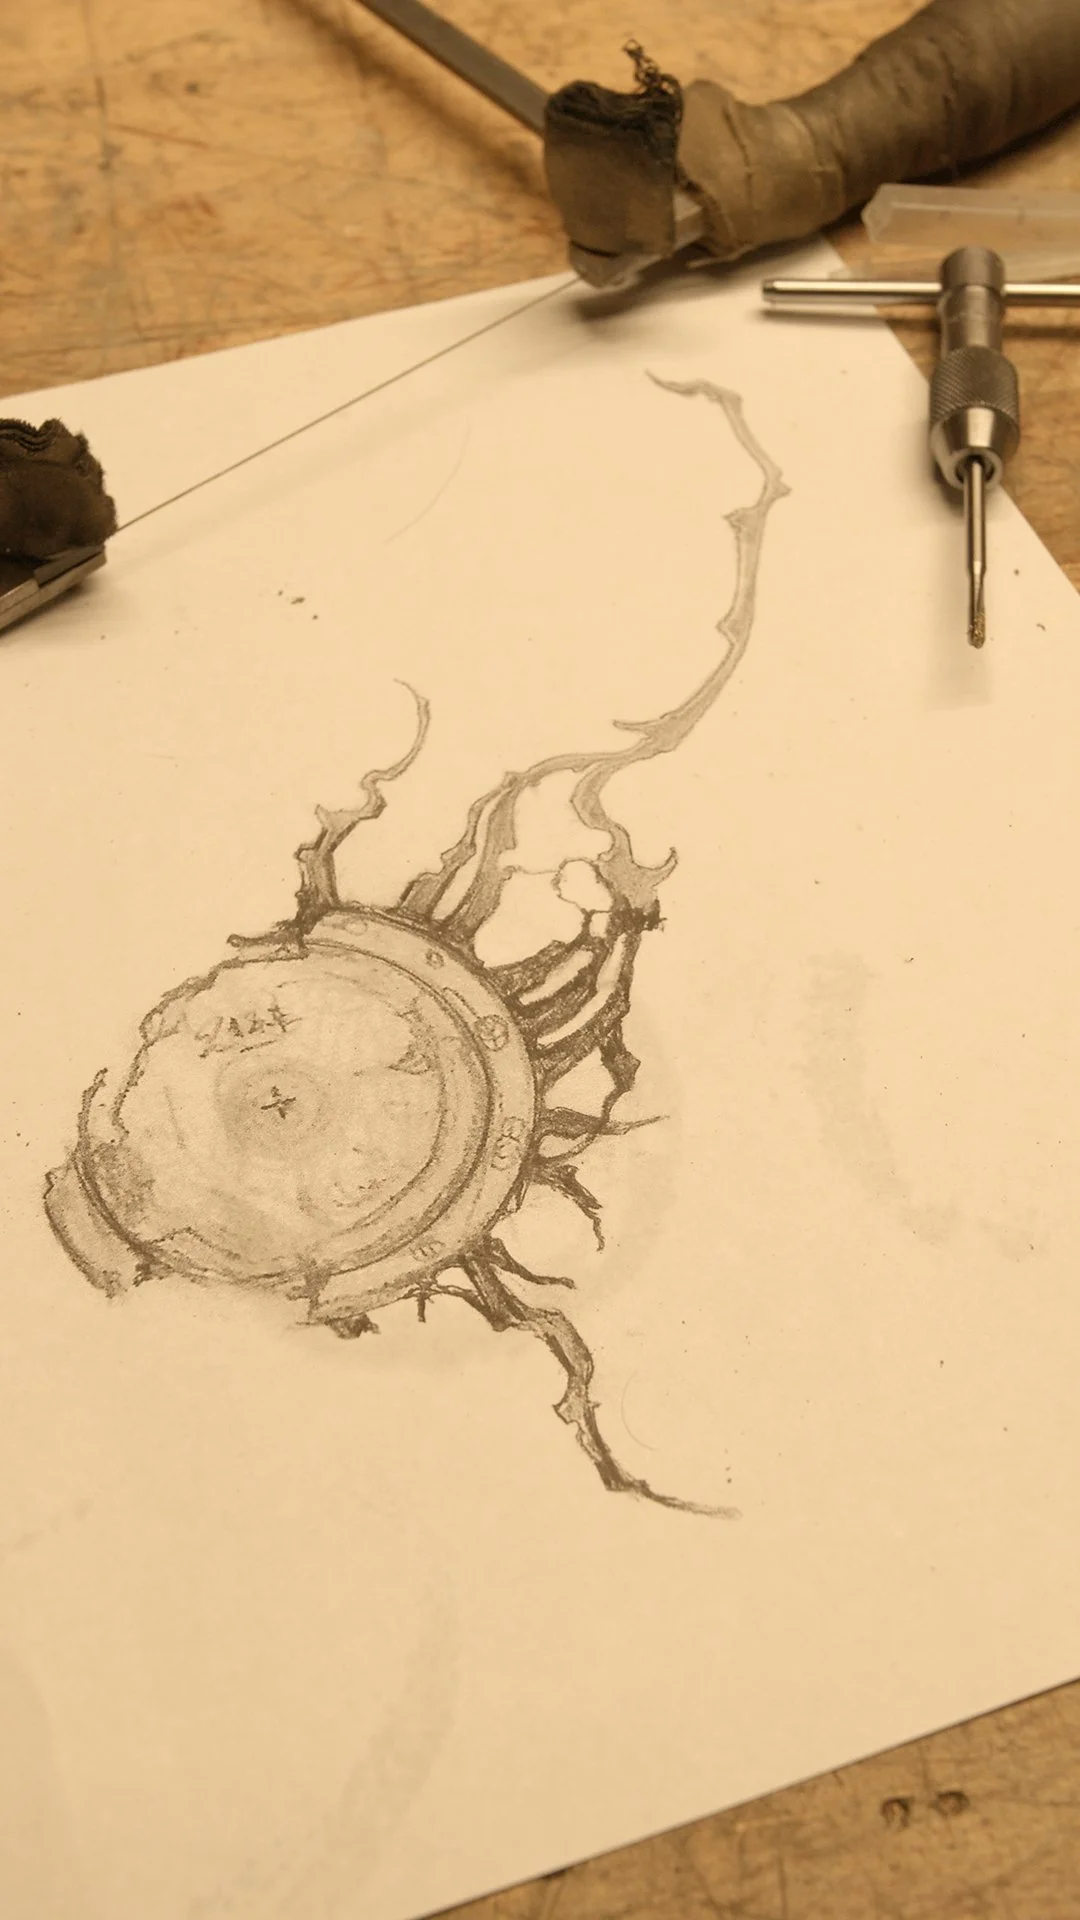
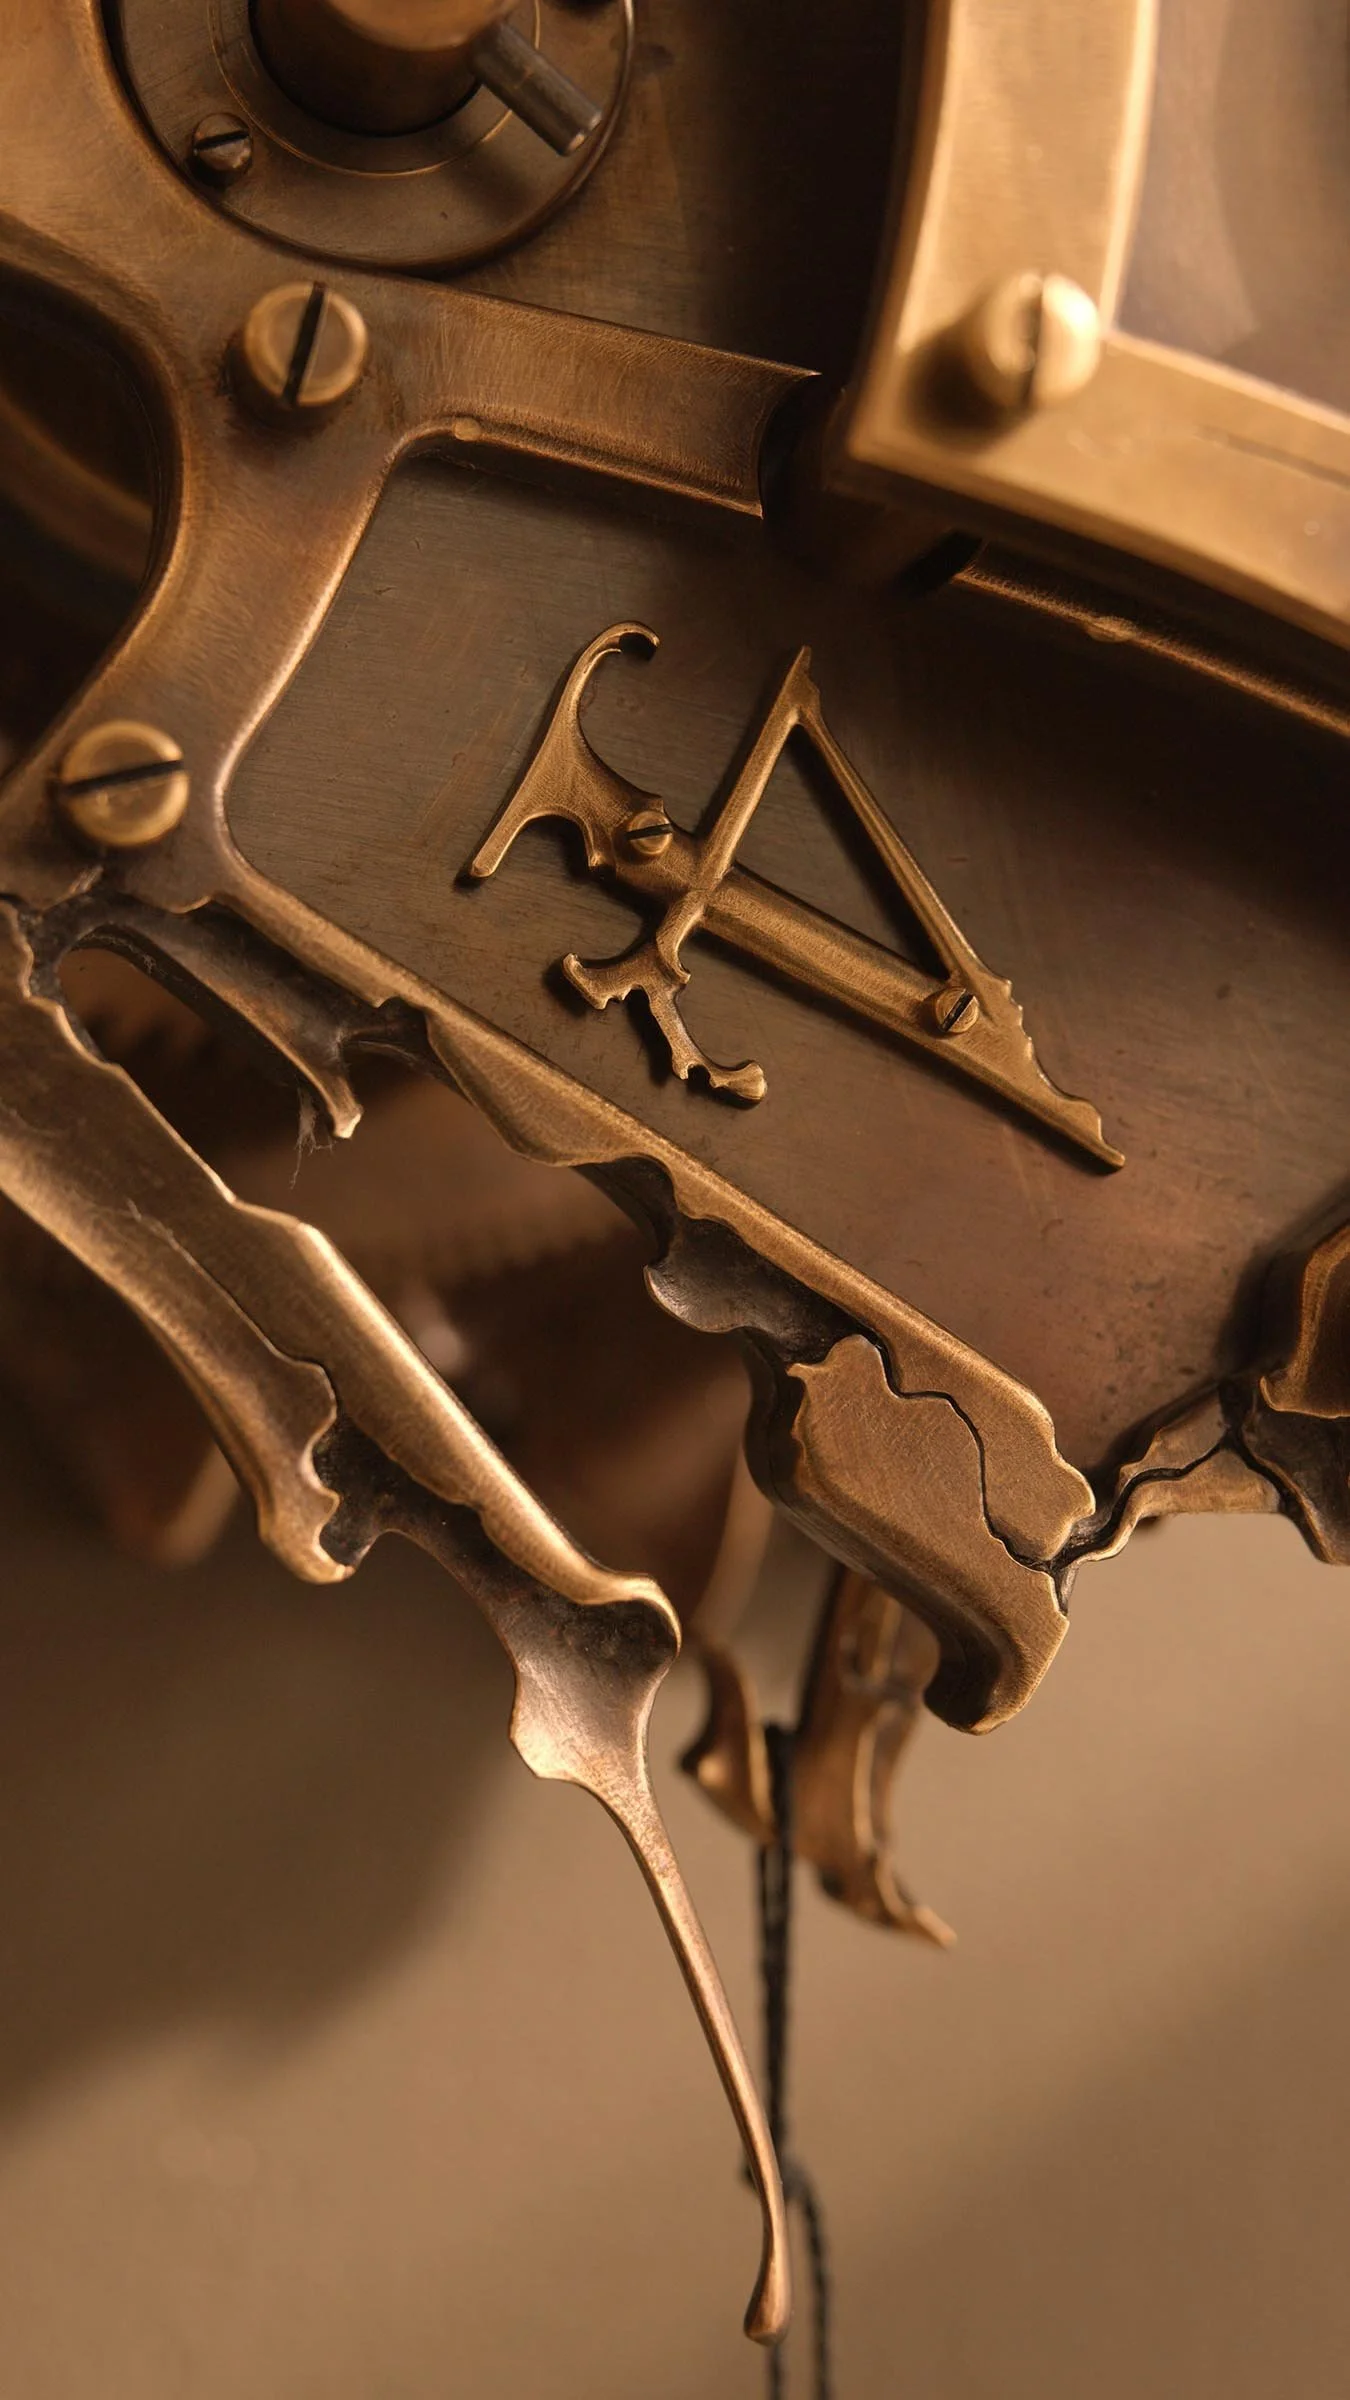
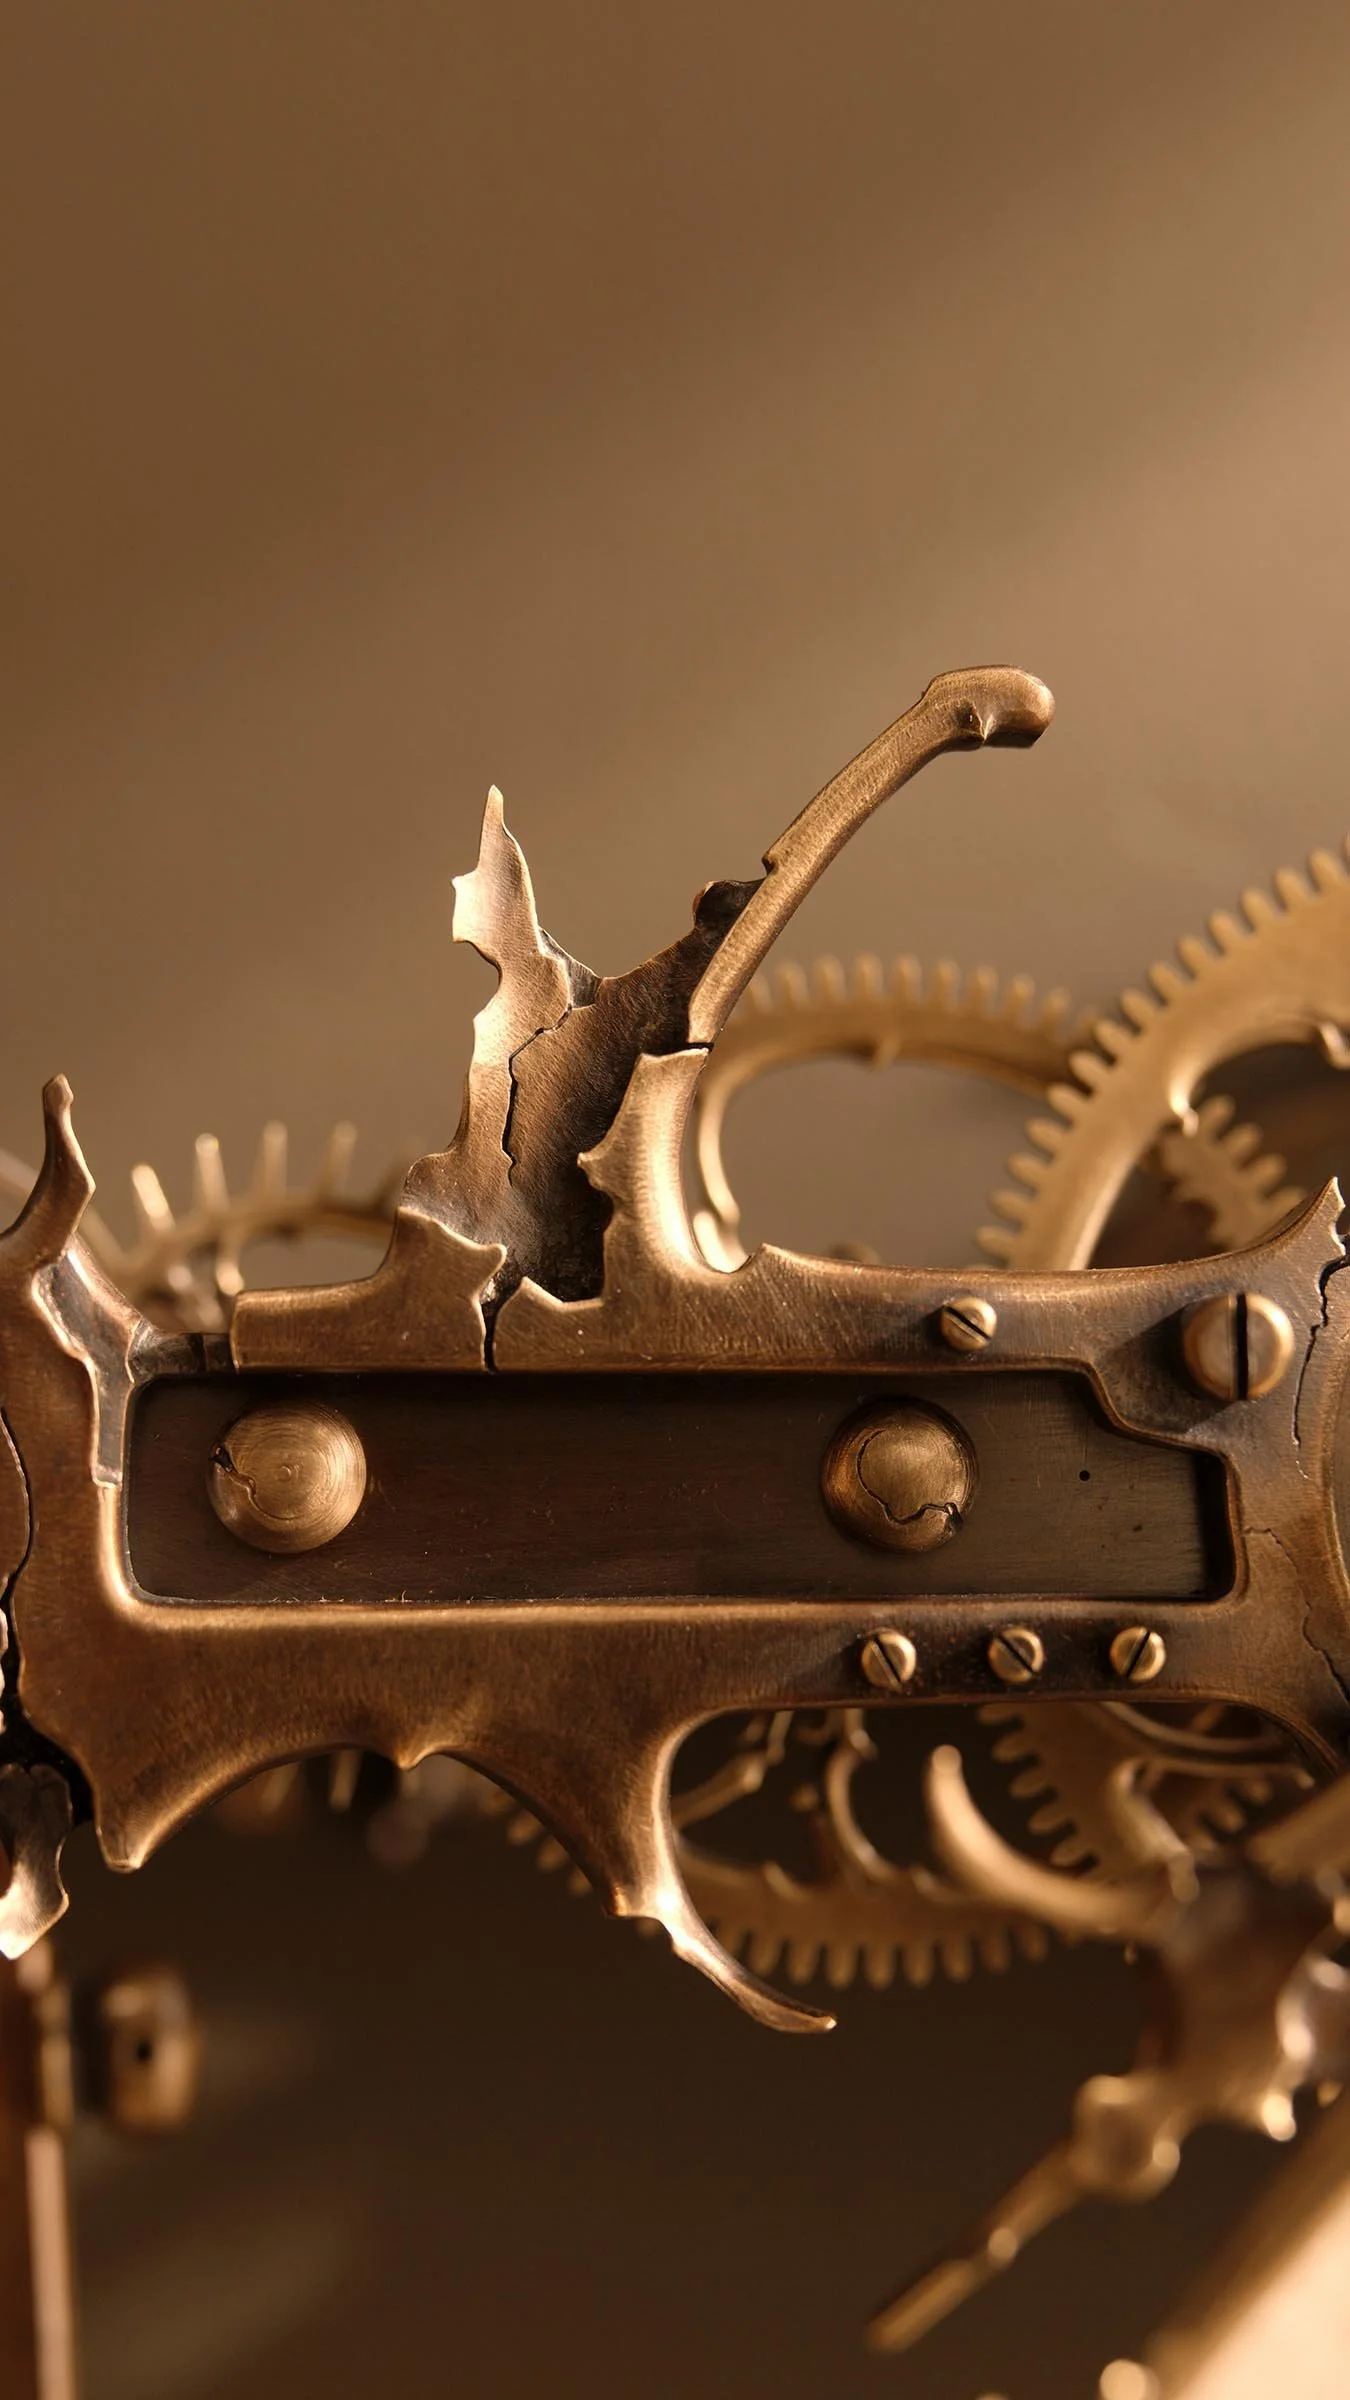
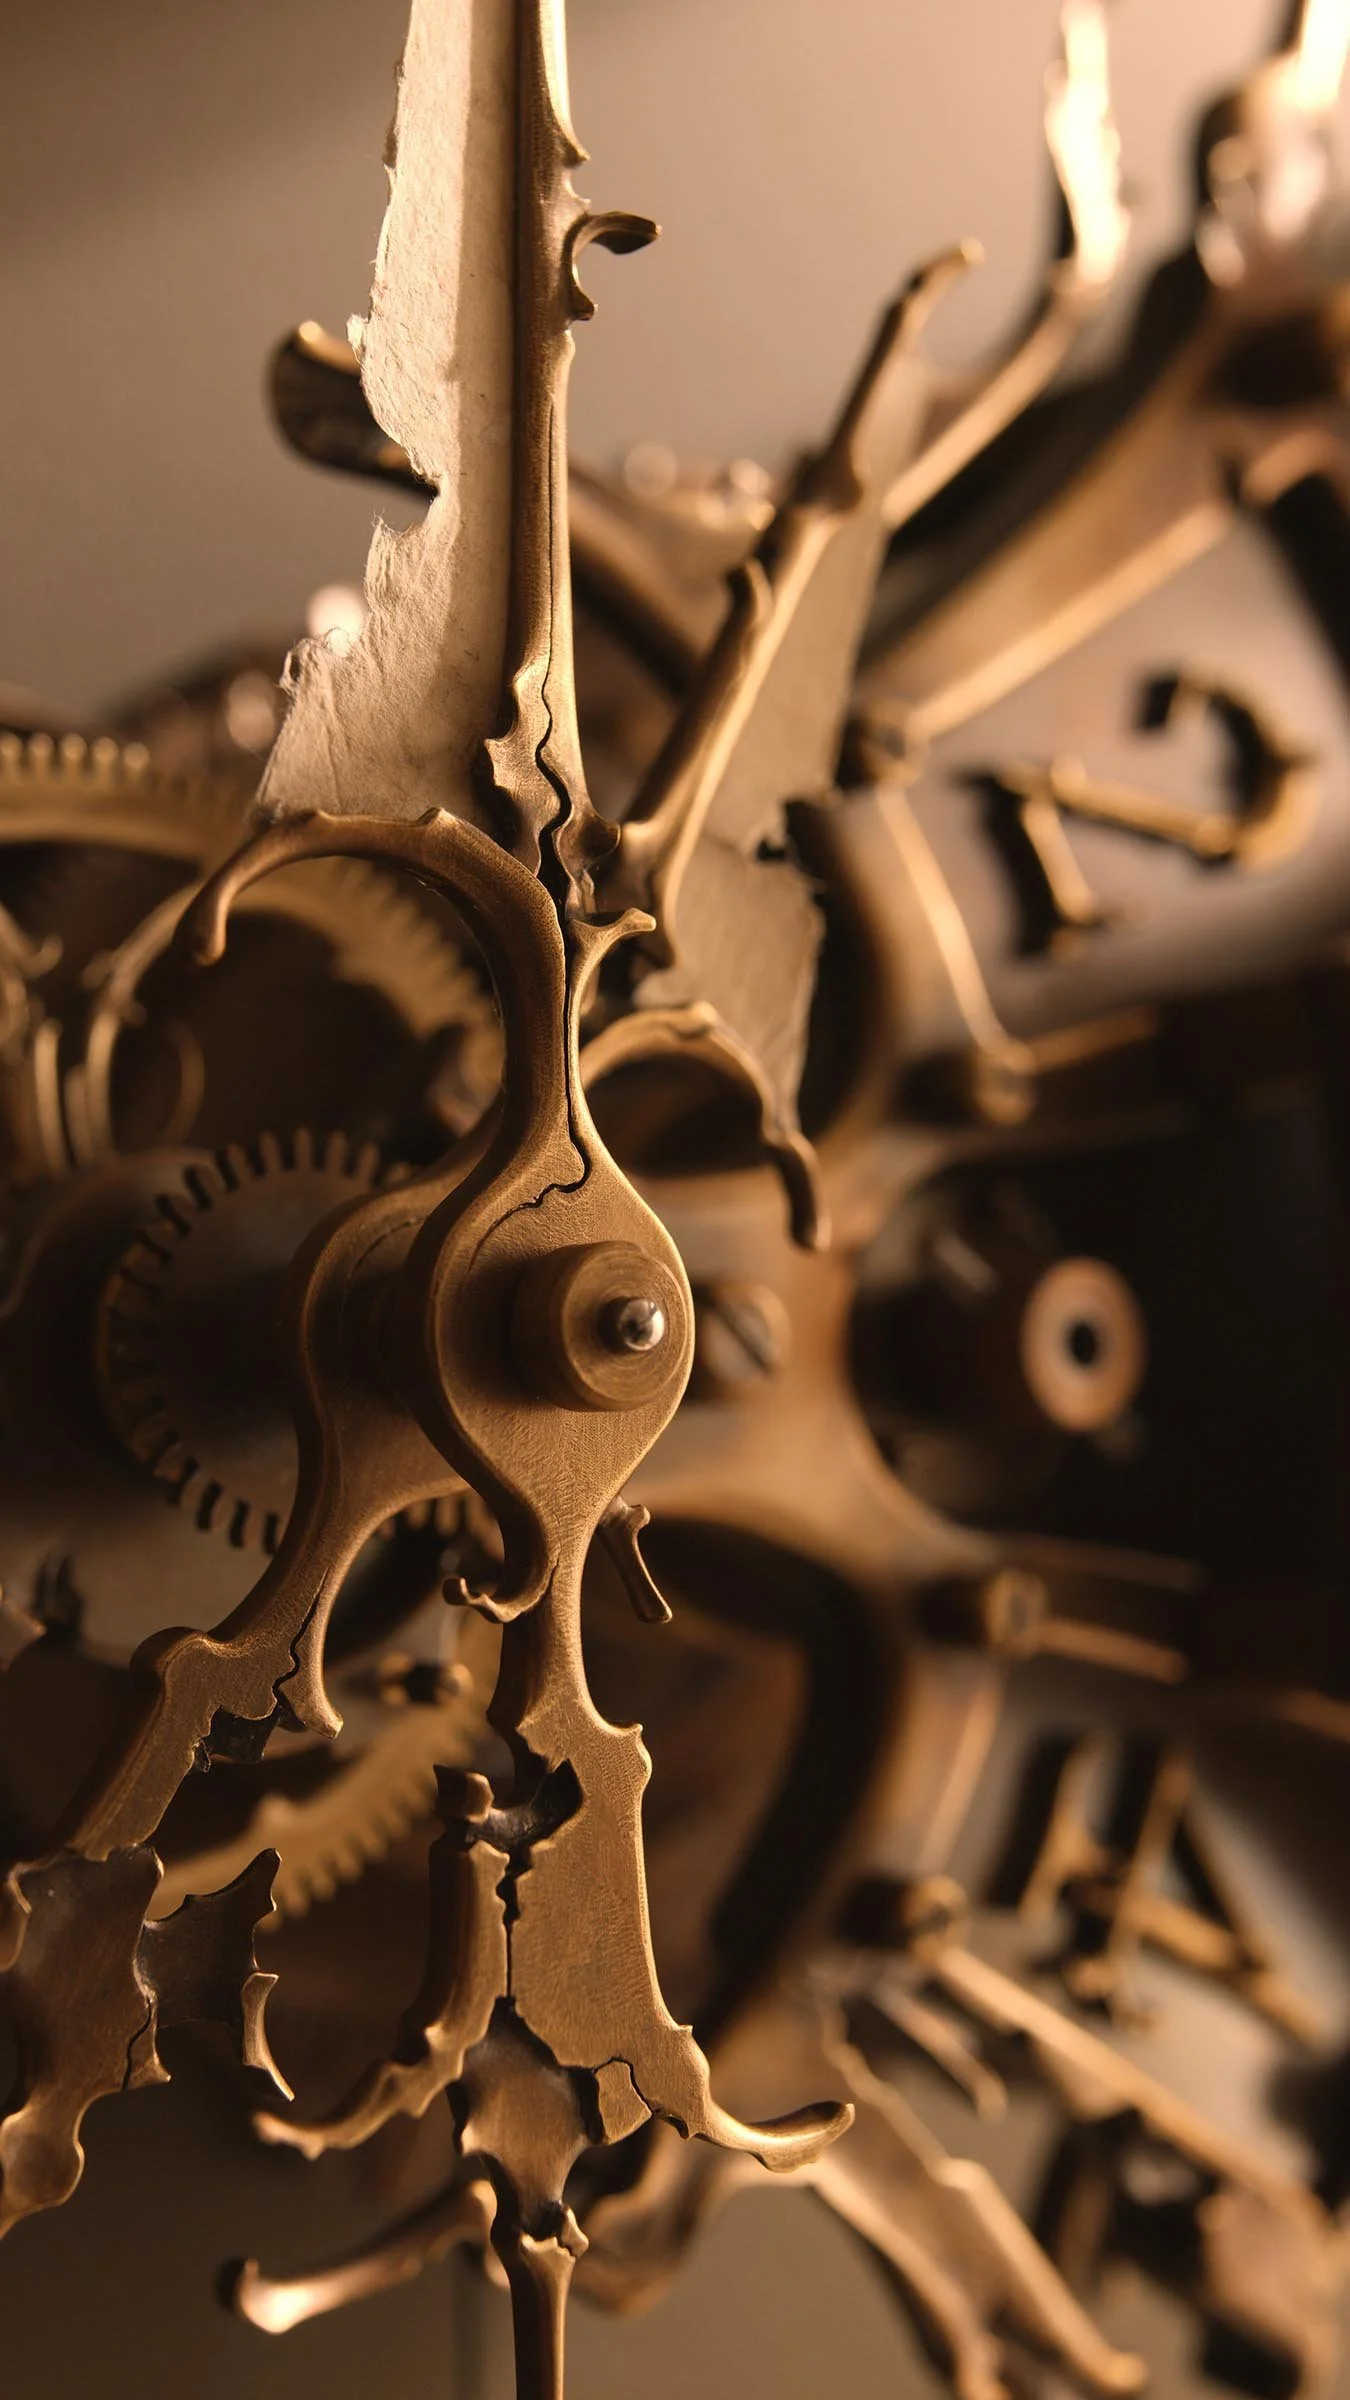
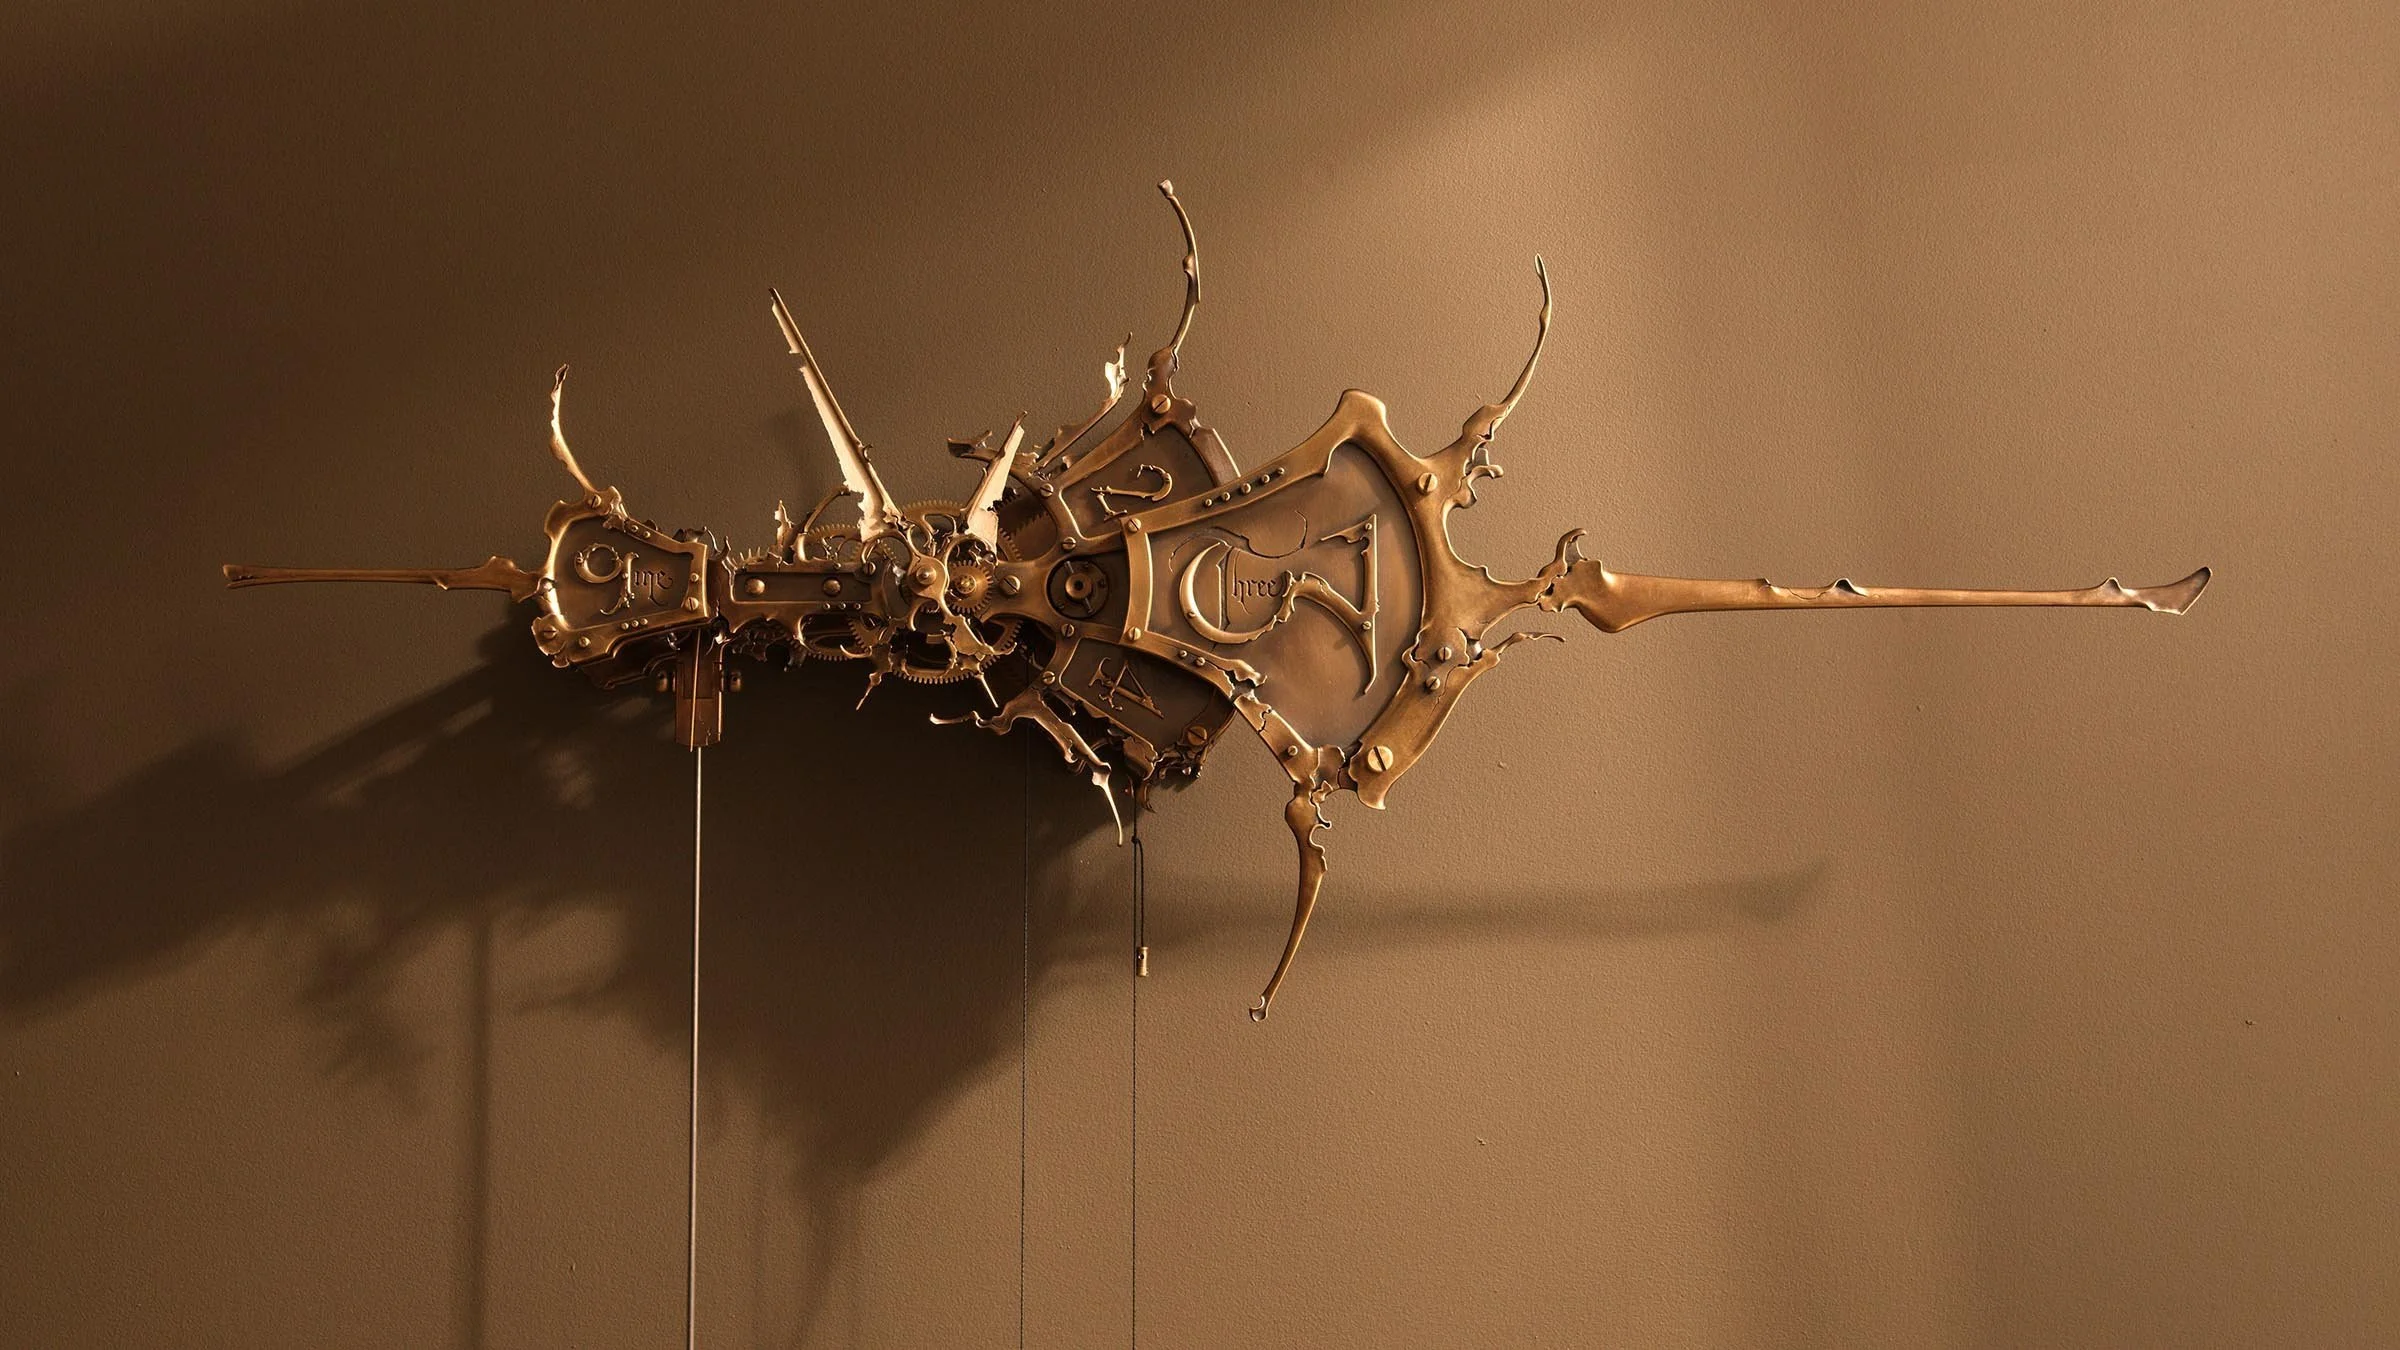
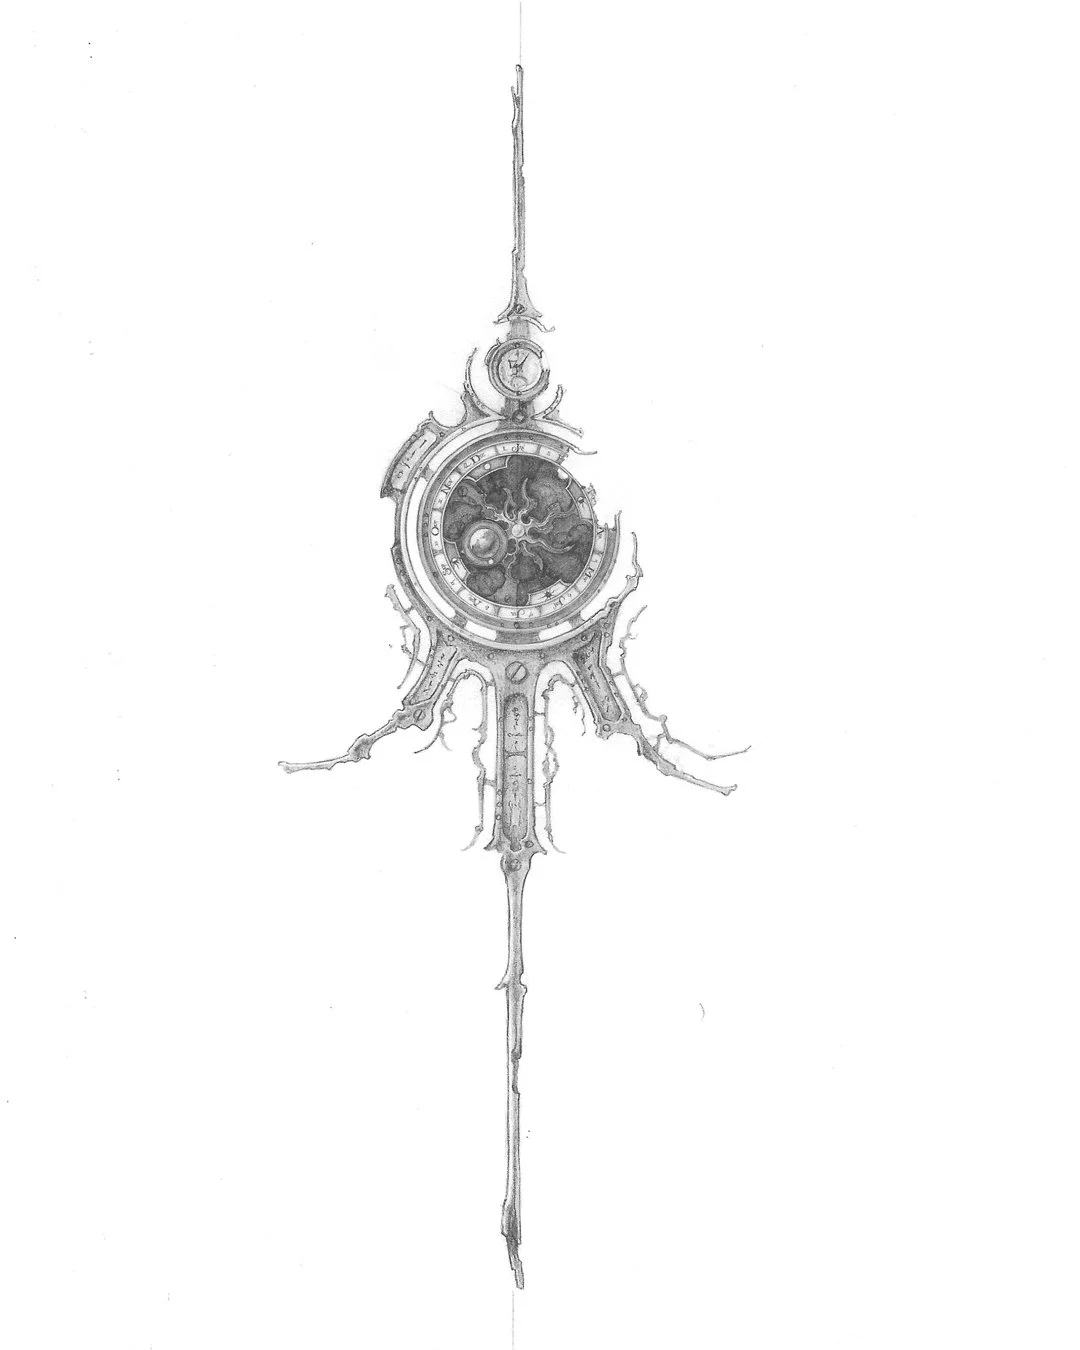
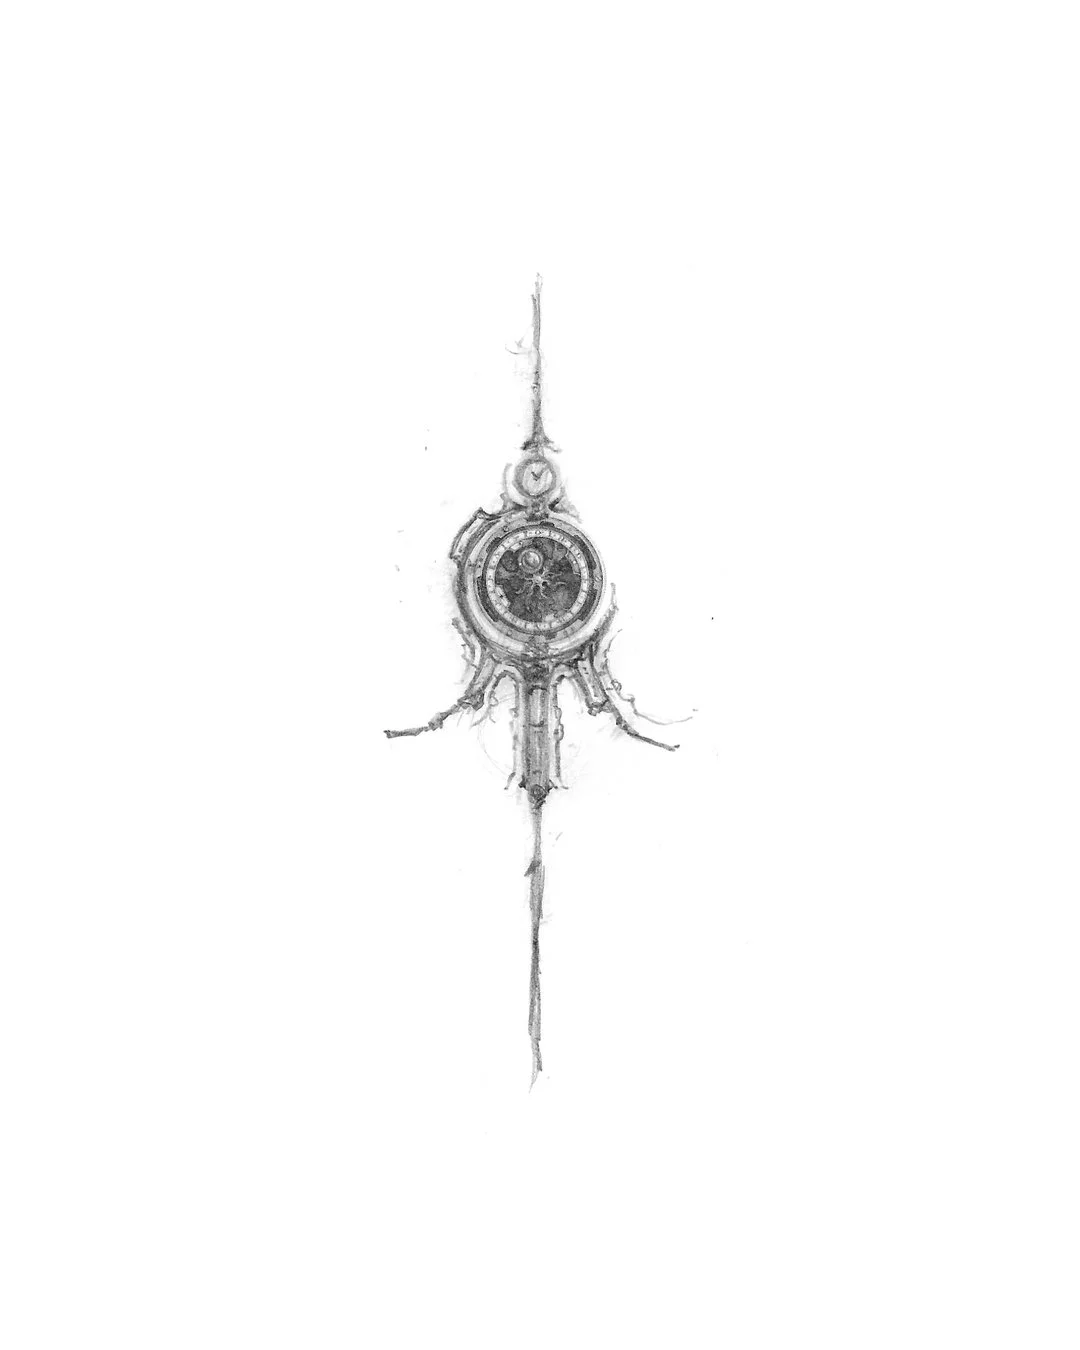
When it comes to these ultra thin horizontal designs, I clearly can’t help myself. It’s what continues to appear under my pencil, and I like them, so I keep making them. This is the latest clock that falls into that category. One new element I stumbled onto when designing this one is the way the romans kind of erode and taper into illegible ruins around the 4-5:00 position. I really like that effect, and this might be the start of a look that gets used in future work.
“Thin Horizon” is a unique 1 of 1 design. It was cut out of brass sheet, assembled with hand-threaded brass screws, and hand sculpted with a rotary grinder. The dial and blades of the hands are acrylic and oil on weathered kitkata rice paper.
This clock is available for purchase. Click the link below.
”Thin Horizon” shop listing

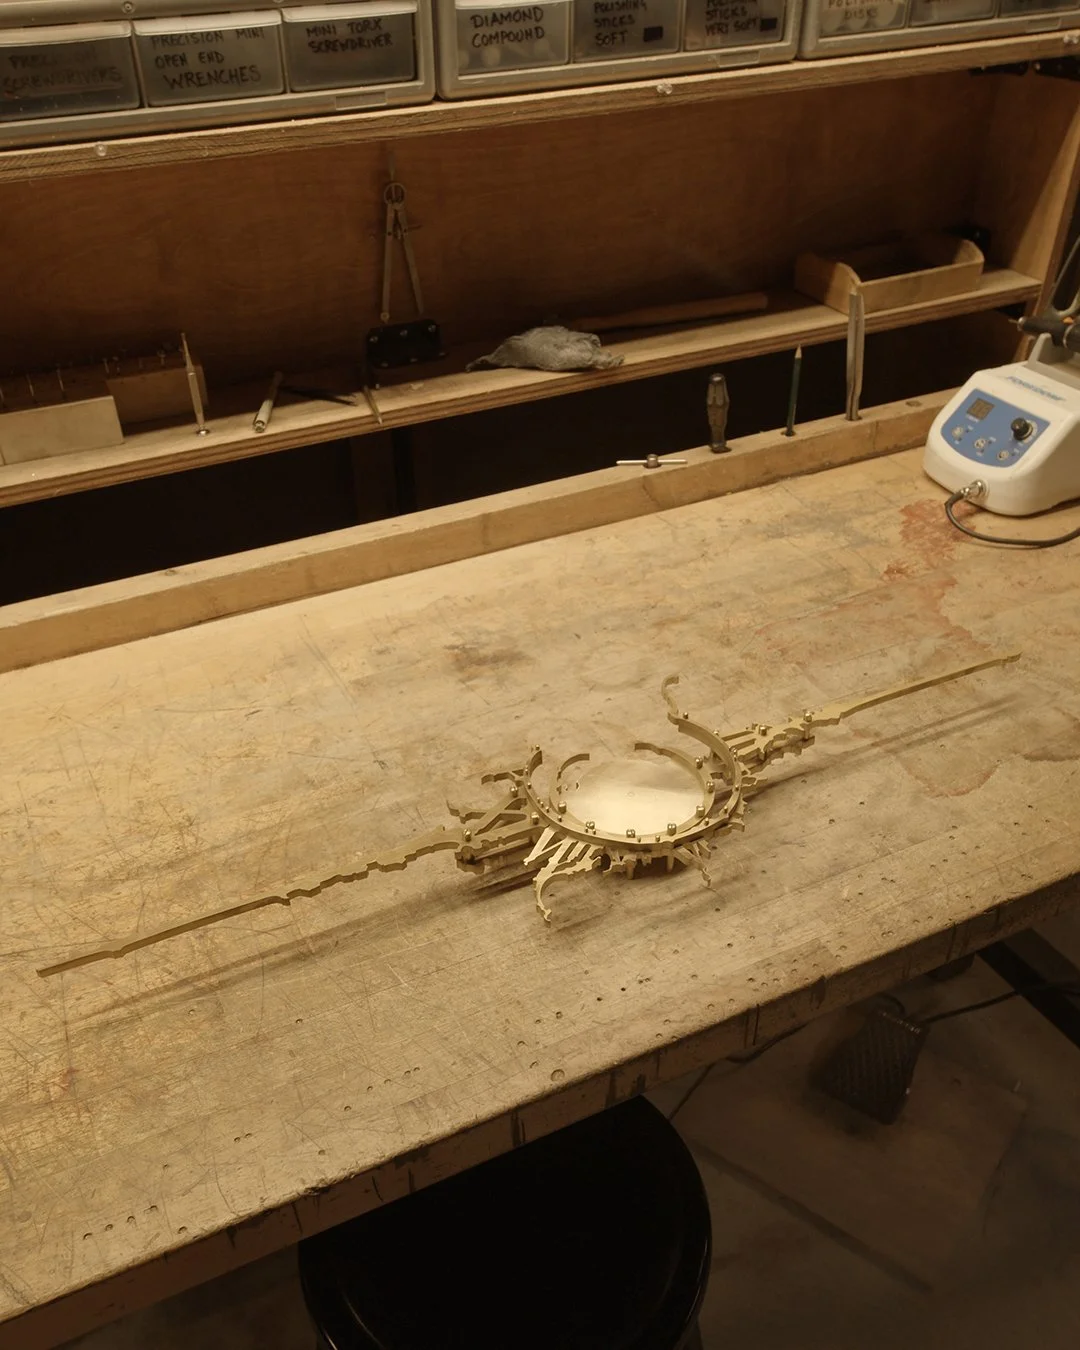
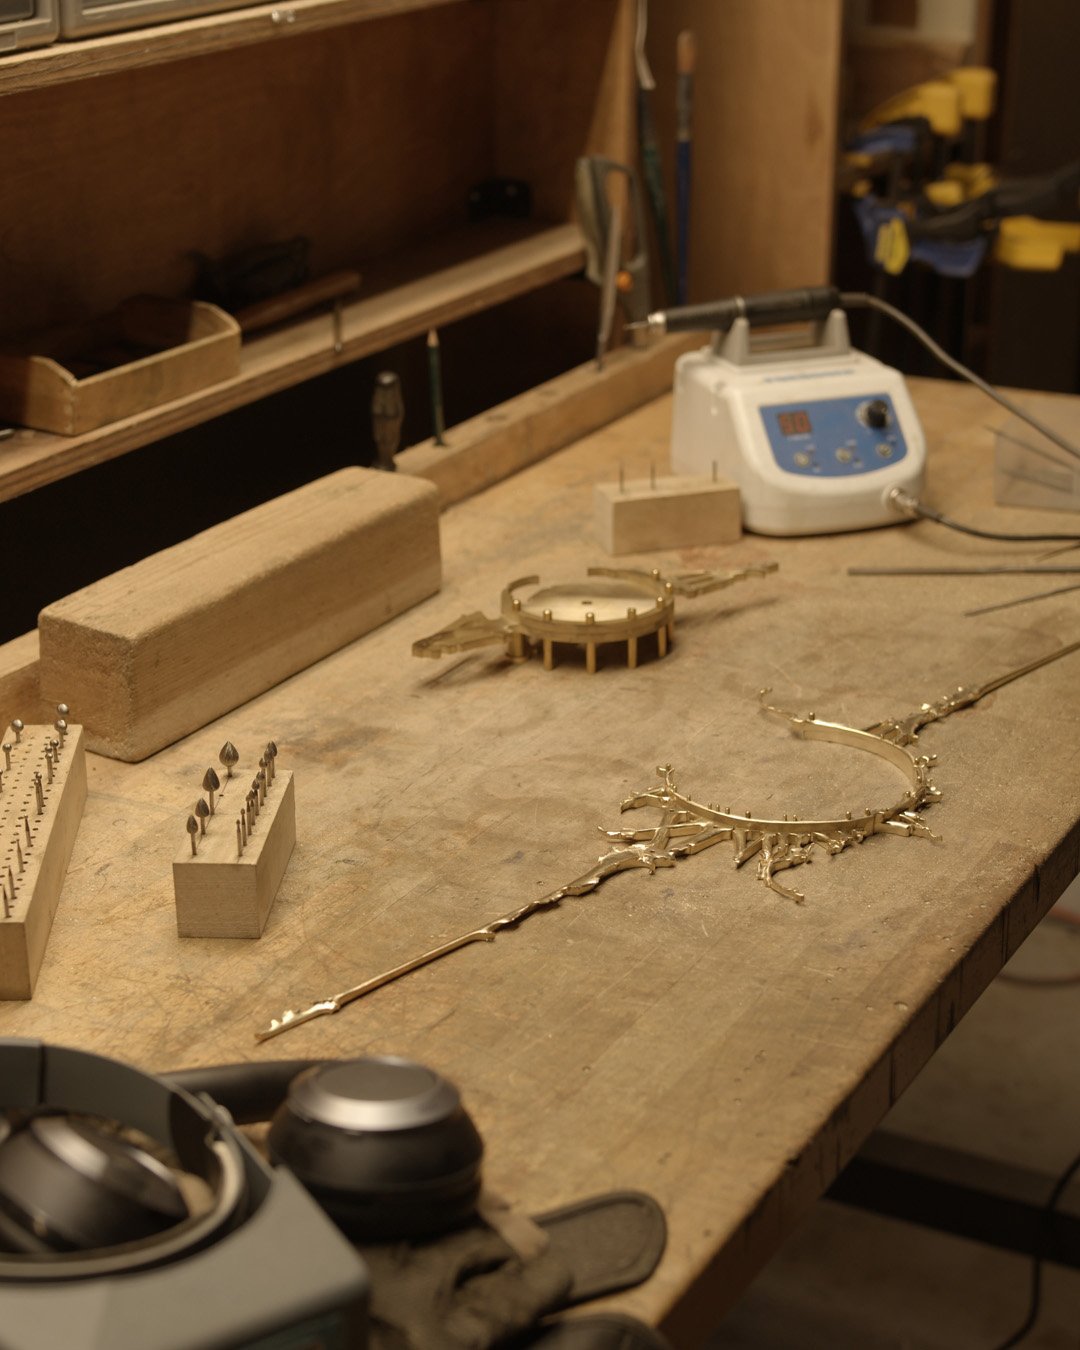
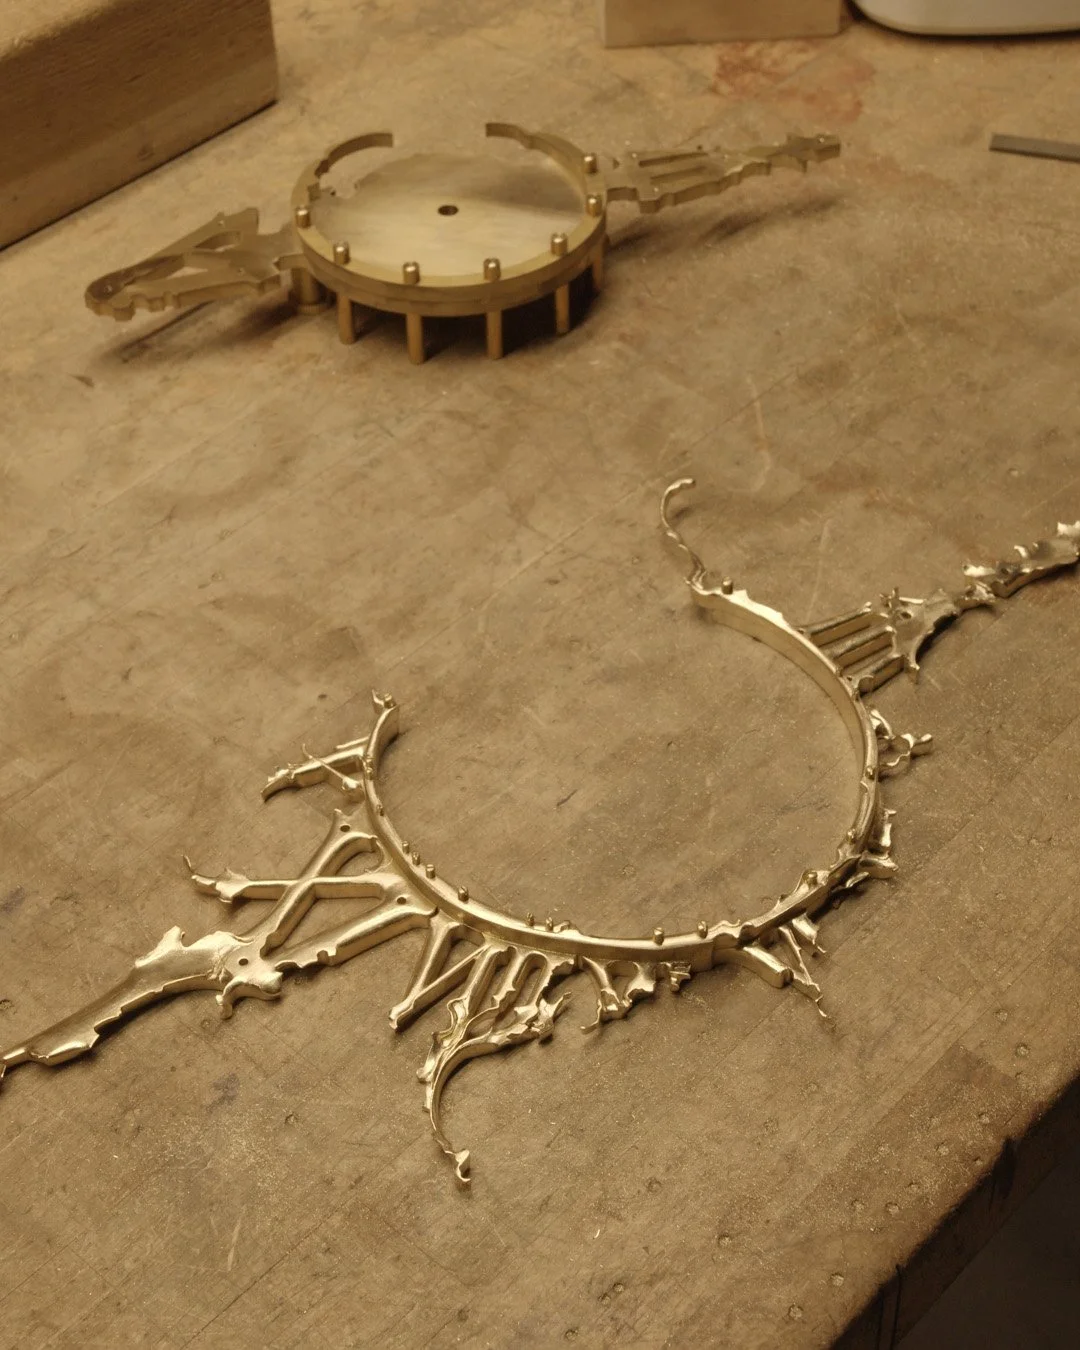
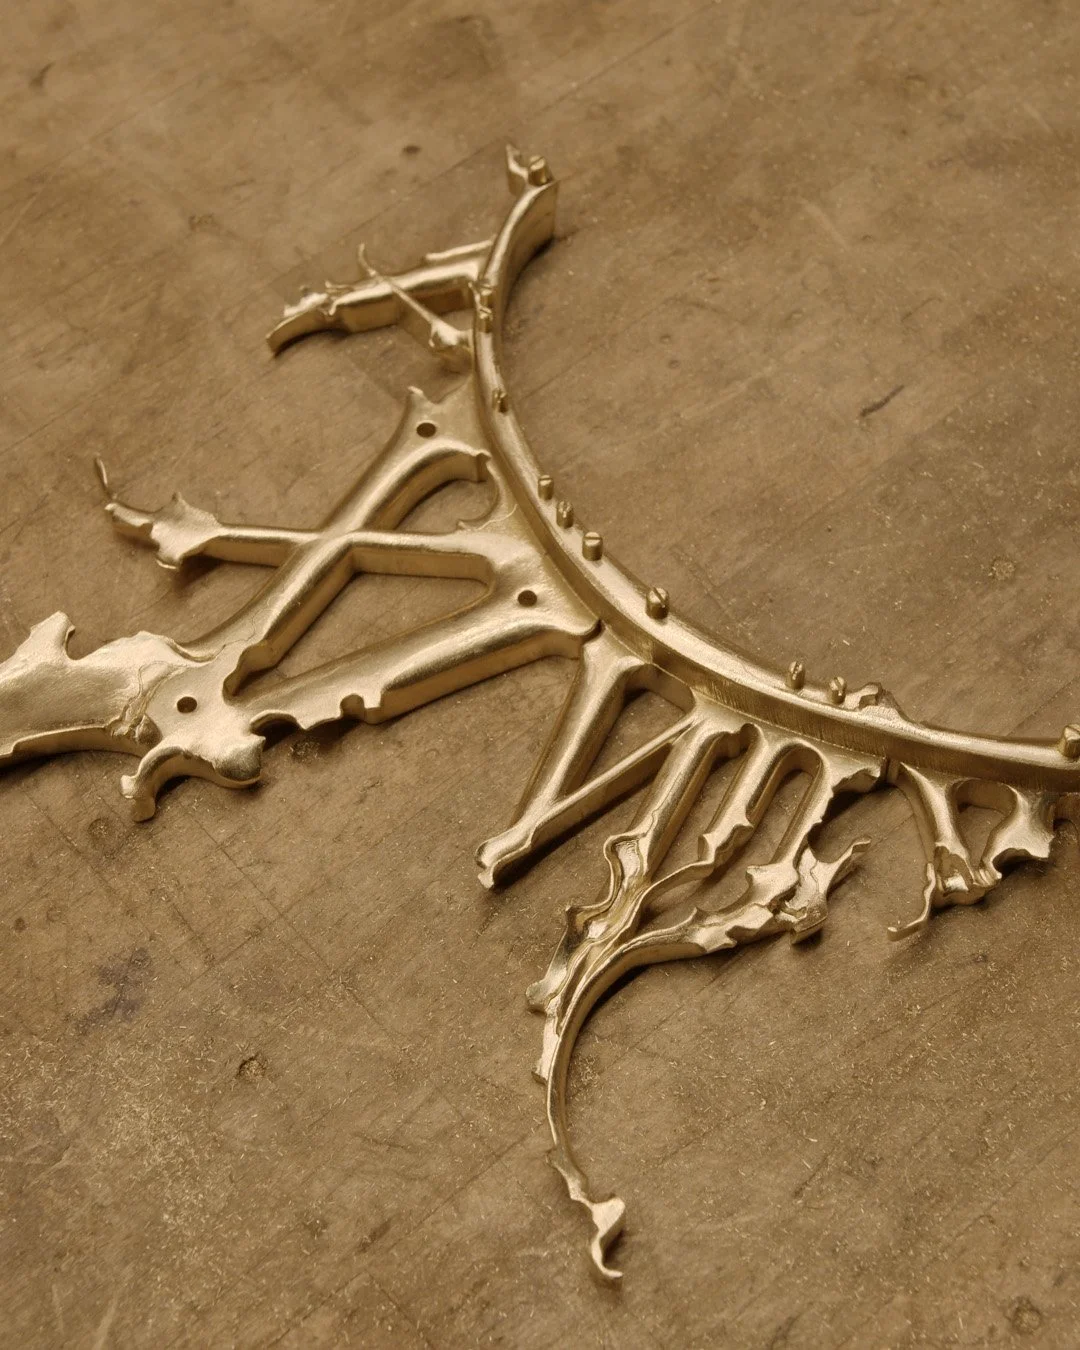
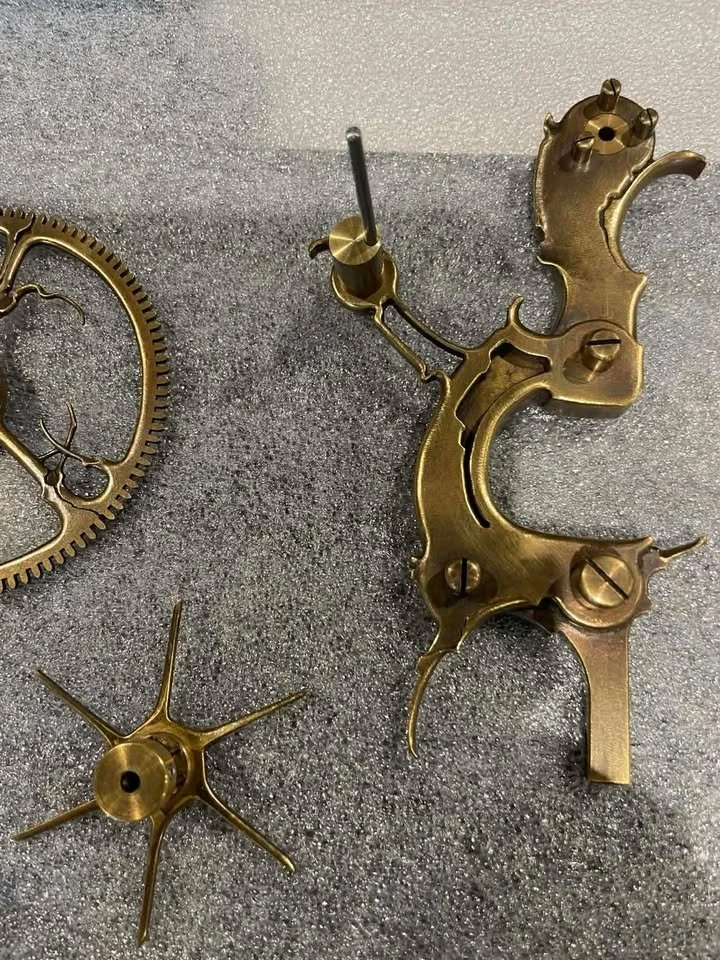
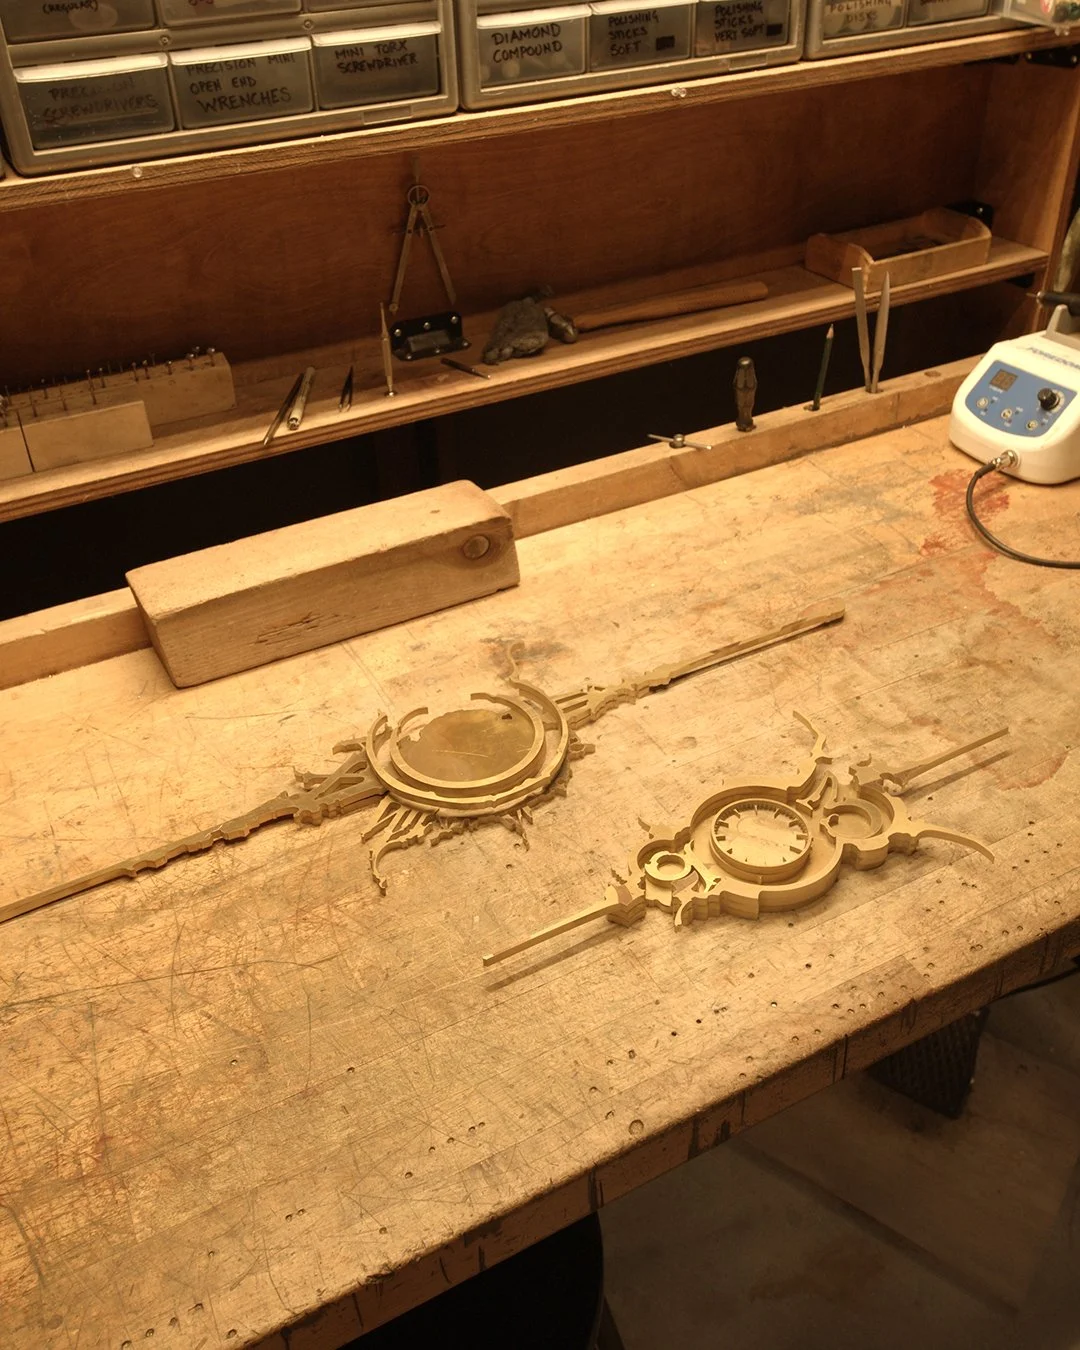
I’ve been working on a new horizontal quartz piece. All the pieces are cut out, the hardware is threaded, and the piece is assembled…or at least it was before I took it apart carve it up. I’ve been grinding away, and the main array of roman numerals is finished.
Next up is the back plate, dial rim, face, and hands. Lots left to do, but I’m getting there.
Should be a good one.
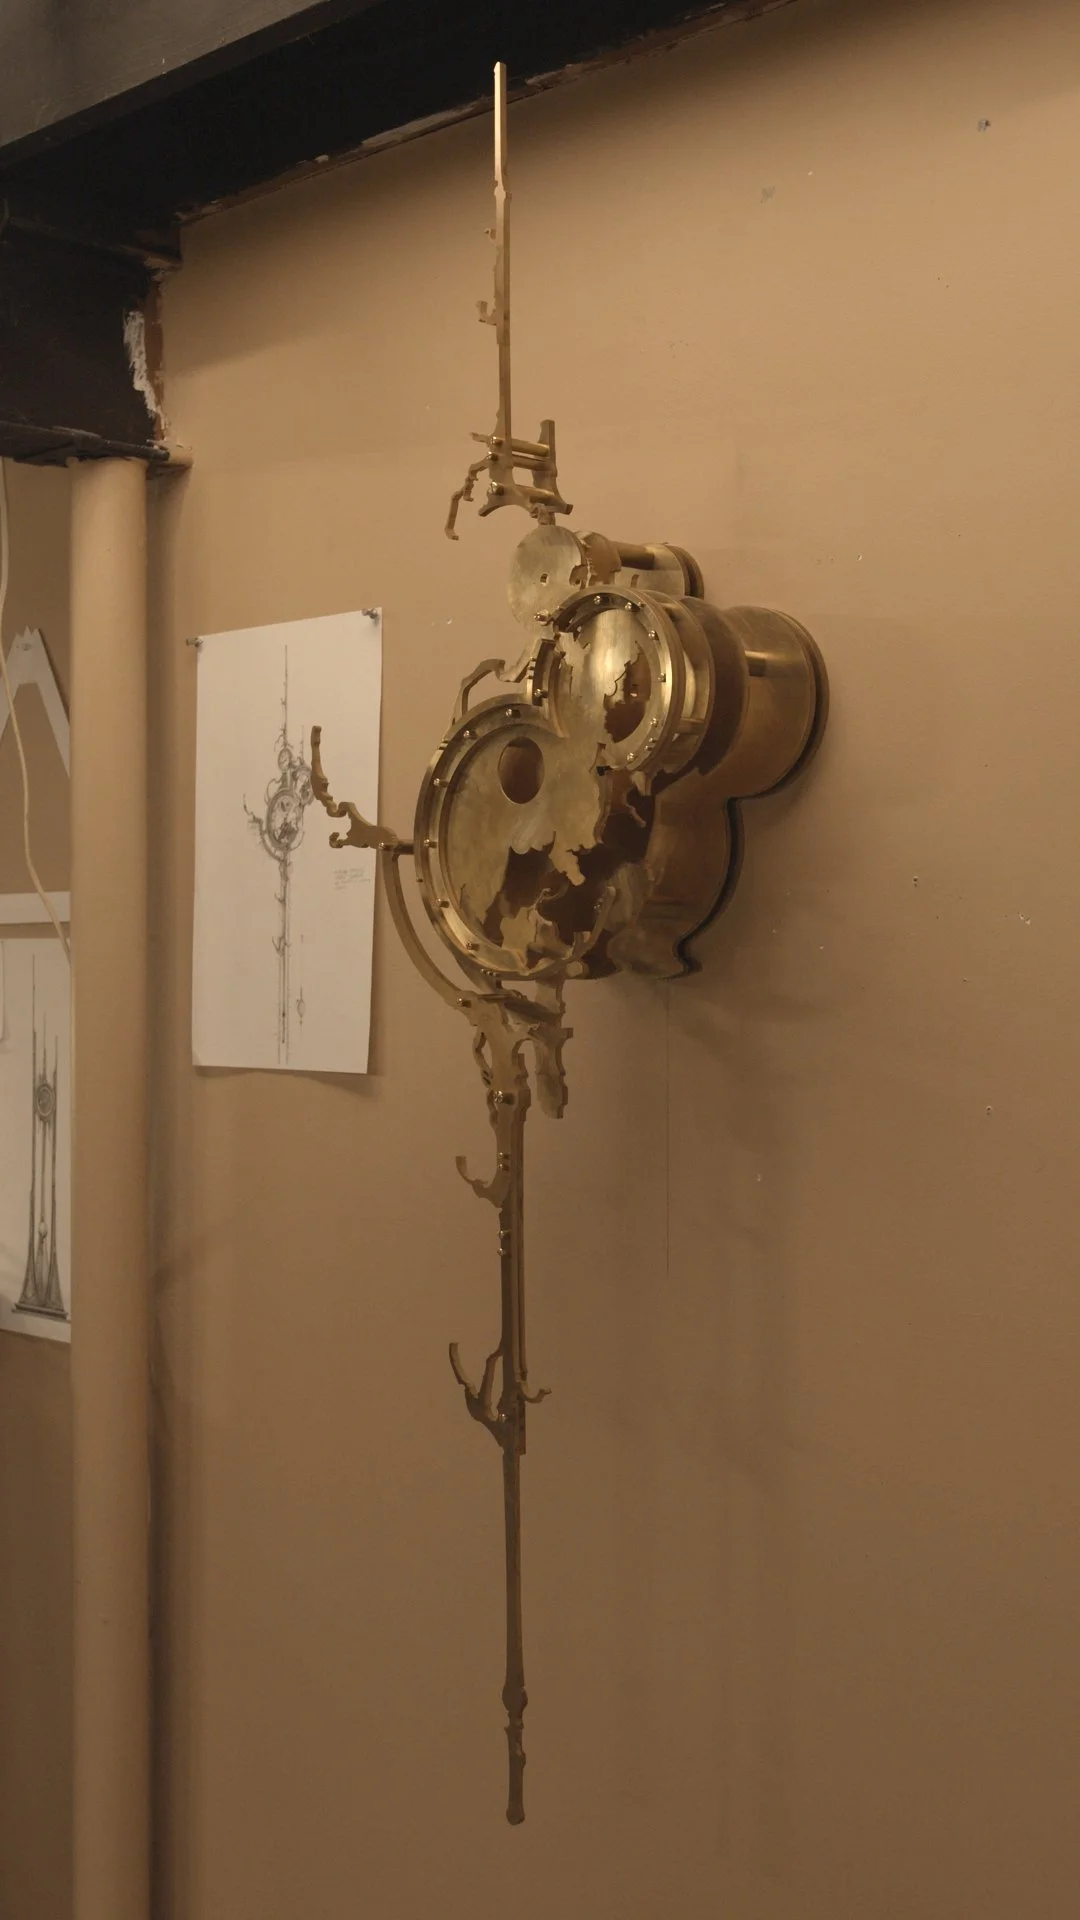
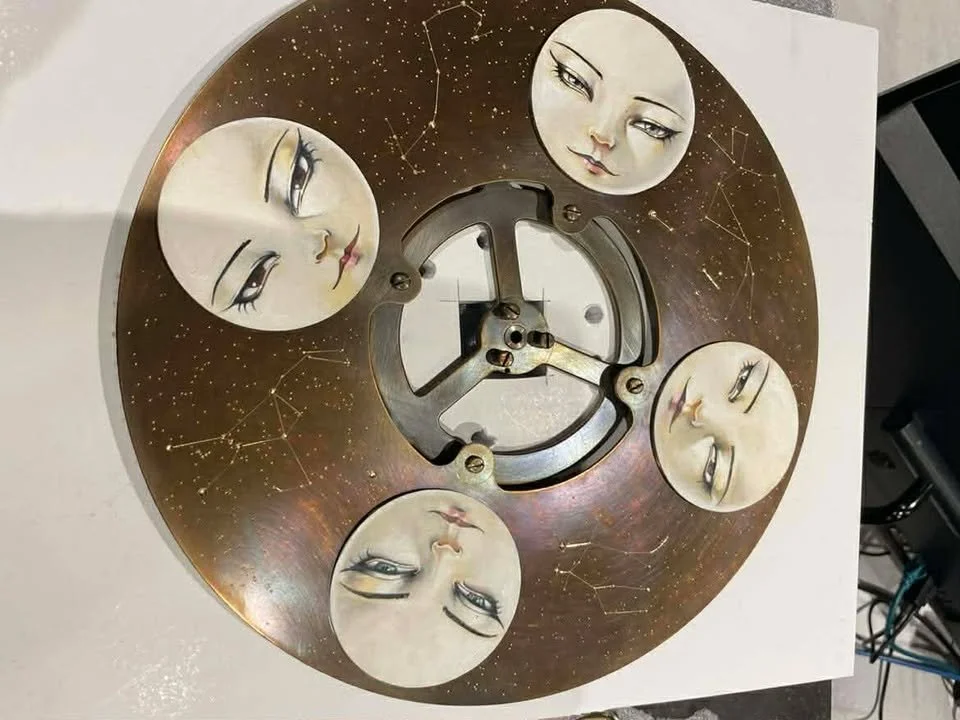
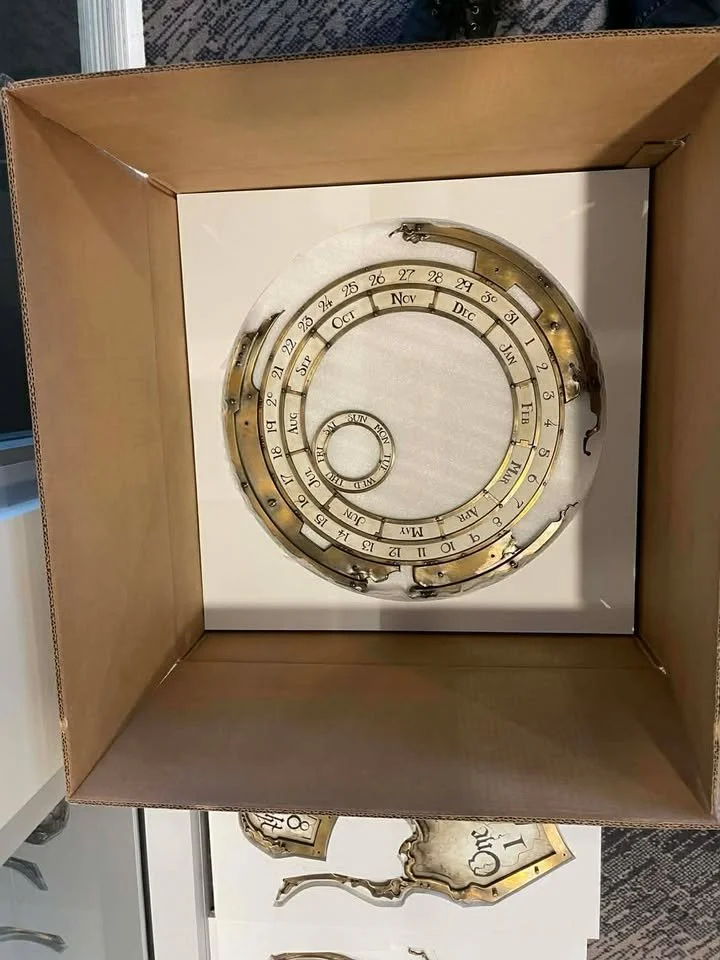
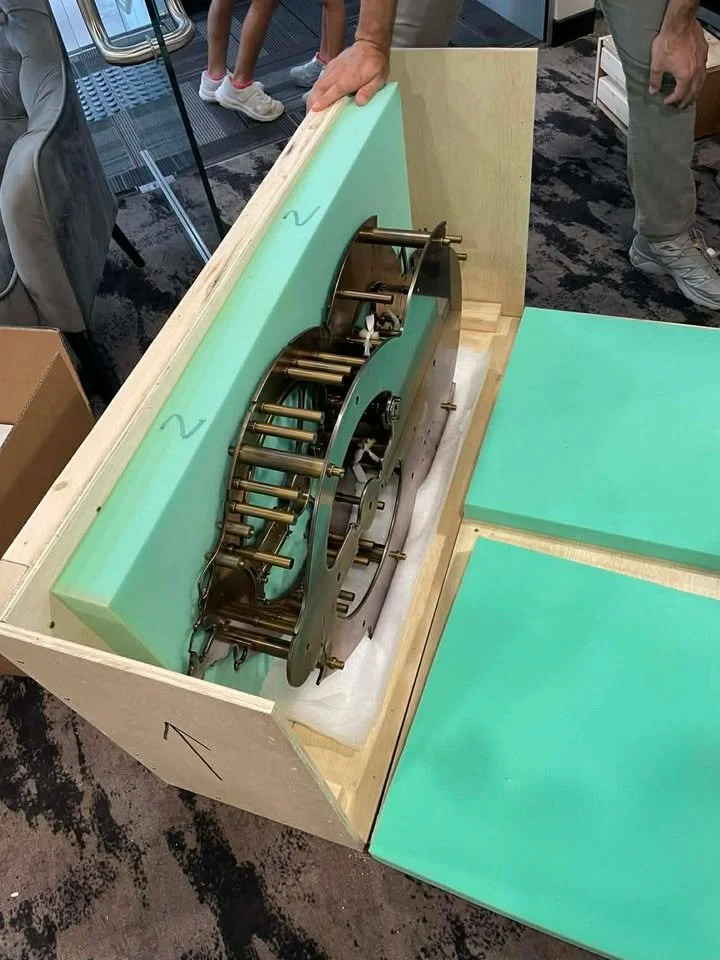
For months, the various pieces of this clock have been sitting on a table in my workshop unassembled and collecting dust. I’ve badly wanted to work on it, but right now I can’t spare the hundreds (possibly over 1000) hours needed to finish it. But once in a while I find some time. The last few days of progress were pretty satisfying. I finished the frame, made the mounting bracket, and now have an idea of what it’ll look like on the wall. The size is perfect!
Some notes about this clock:
-The large dial will have a shadow-style moon phase display. It will also have a seconds hand spanning the whole dial, ticking solidly, and deliberately with the escapement. I made a clock with a second hand once before, and the movement was really nice. Since then I’ve wanted to make a clock with a large seconds dial, and this clock was a good candidate.
-The middle dial will have the time.
-The small dial will have the days of the week (I have’n’t attached that one yet)
-The title “Synodic 17” refers to the moon phase display. Synodic is a term describing the moons cycle as we view it from earth. The number 17 refers to the accuracy, because it will take 17 million years for it to be off by a day. That’s using the number for the average cycle of 29.530587981. In truth, this is a little silly. Obviously we won’t be around that long, and the cycle can shift over a long enough timeline anyway. It might be more practical to think of it as taking 200 years to be off by a second. But even then, the point of my work has never been to chase absurd amounts of accuracy. My pursuits are more aesthetic. But there was room for the gears, so I figured why not.
I’ll have to set this one aside again, because you know…bills. But hopefully I’ll find time here and there, and eventually have a finished moon clock on my wall. I haven’t made a multi-dial moon-clock since 2018!

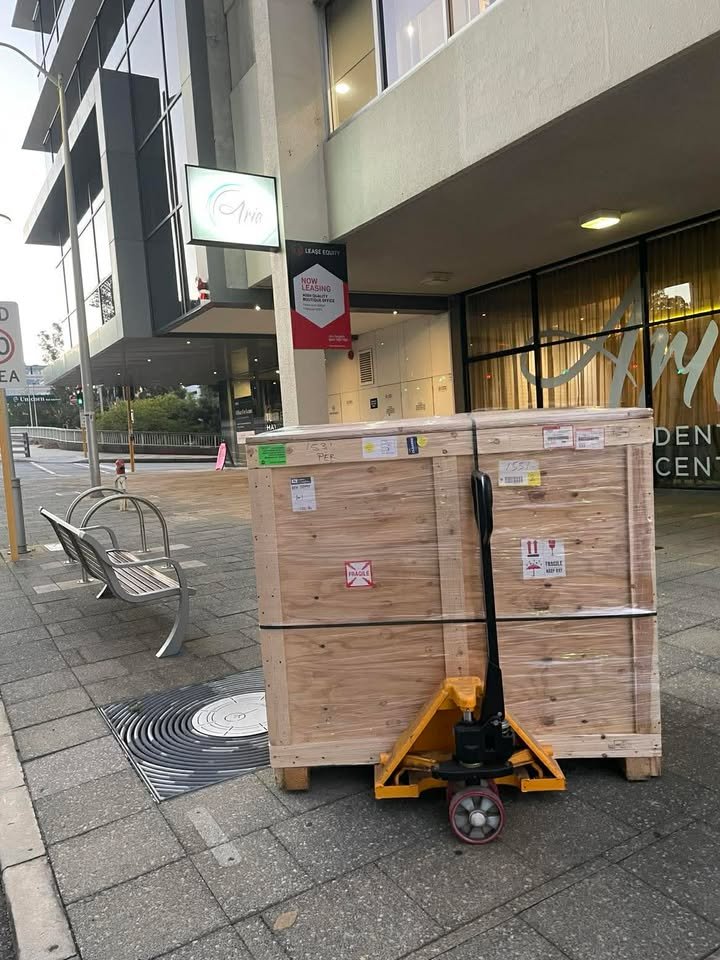
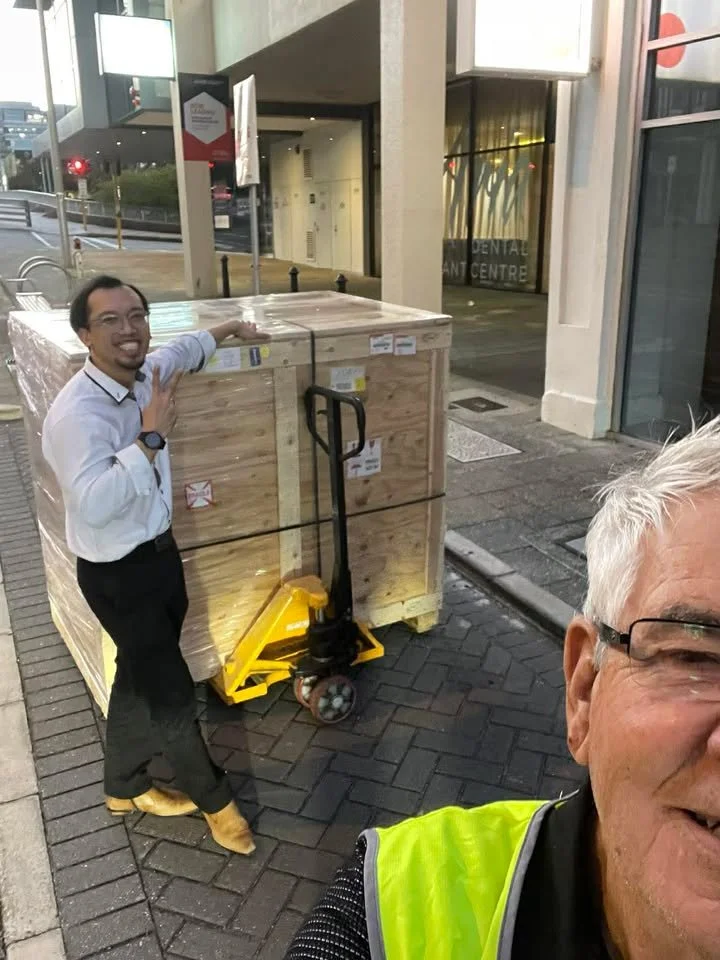
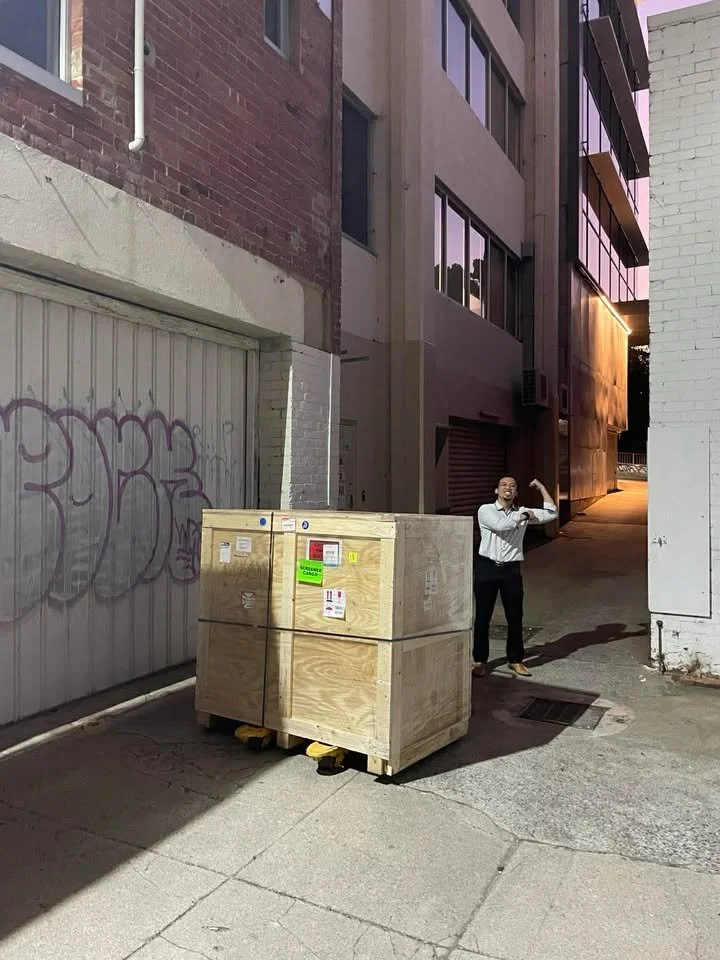
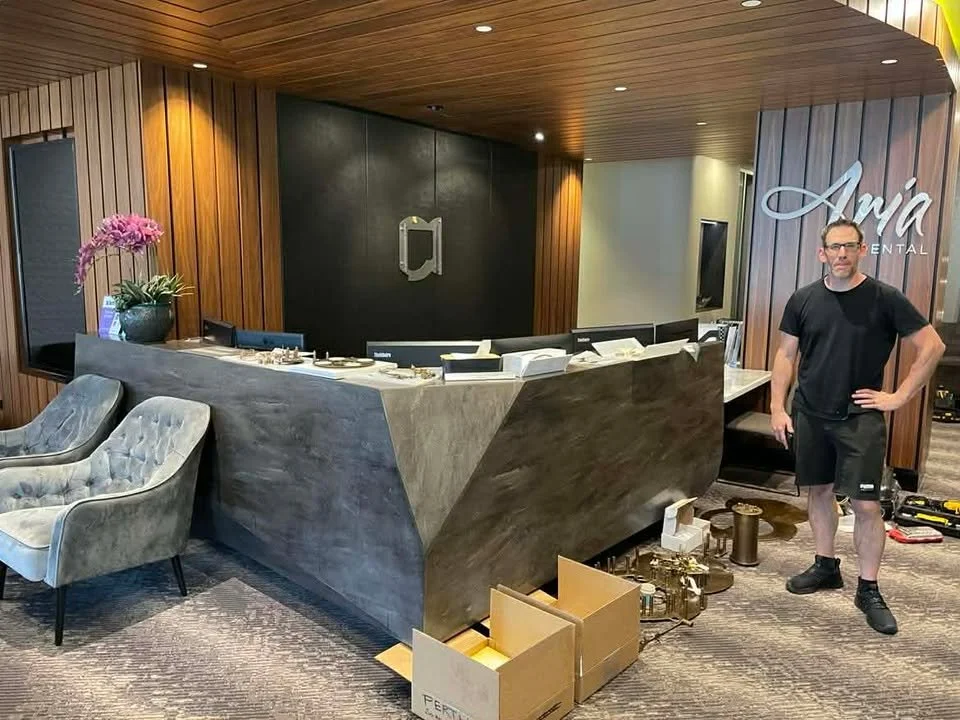
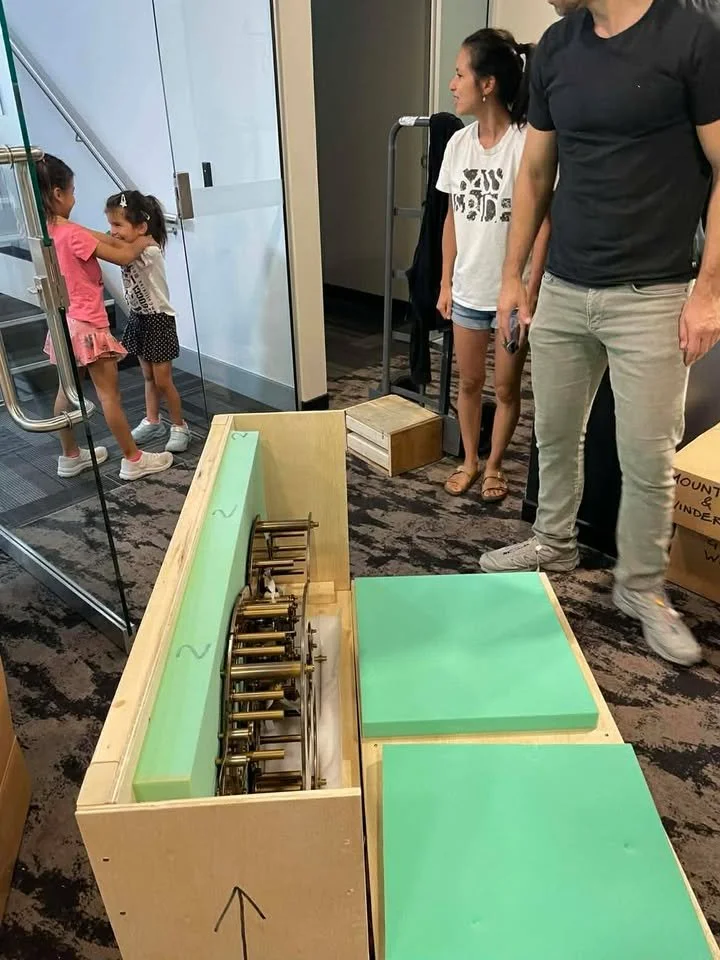
After the last post of the delivery, I received requests to see “Perth” fully installed in its new home. That prompted me to dig through the old photos and video, and I came across this montage that the client made for me. I must have been run over from the long travel days, because I completely forgot to post this. It gives a pretty good idea of scale, and what it took to install this piece.
“Perth” is the biggest wall-hung clock I’ve made to date, and the weight meant two things: First, they had to open up that wall from the other side, and reinforce it with some beams strong enough to support the weight. Second, the clock couldn’t simply be lifted up onto its mounting bracket fully assembled. It’s too heavy to safely lift, and it isn’t worth risking injury or damage. So it had to be assembled onto the wall piece by piece.
You can see why I had to be there for the install.
Side note - This was exactly two years ago. Already!
Thank you Michael for the making the video, and for your unmatched hospitality during my visit. You & your family are the warmest, most incredible people I’ve ever met.
Two years ago the clock titled “Perth” was delivered to the city in Western Australia it was named after. When the crate first arrived, the father of the clocks owner was helping accommodate the delivery, and was snapping some pictures. He recently reached out to me with the photos, and an interesting bit of info. Apparently when the shipment arrived, it wouldn’t fit through the front door of the building, so they had to wheel the heavy crate down the street, down the alley, and into the parking garage below. There it would wait for me to arrive, unpack, and assemble this giant wall-hung piece.
These things never go according to plan, but it’s great that I had good people on the other end to help make things go smoothly. Thanks to the delivery person. Thank you the construction crew, who came in over easter weekend to modify the wall to support the heavy clock. And special thanks to Miro, who was there to help when the clock arrived, and was there during the whole installation process to help out. Couldn’t have pulled it off without you guys!
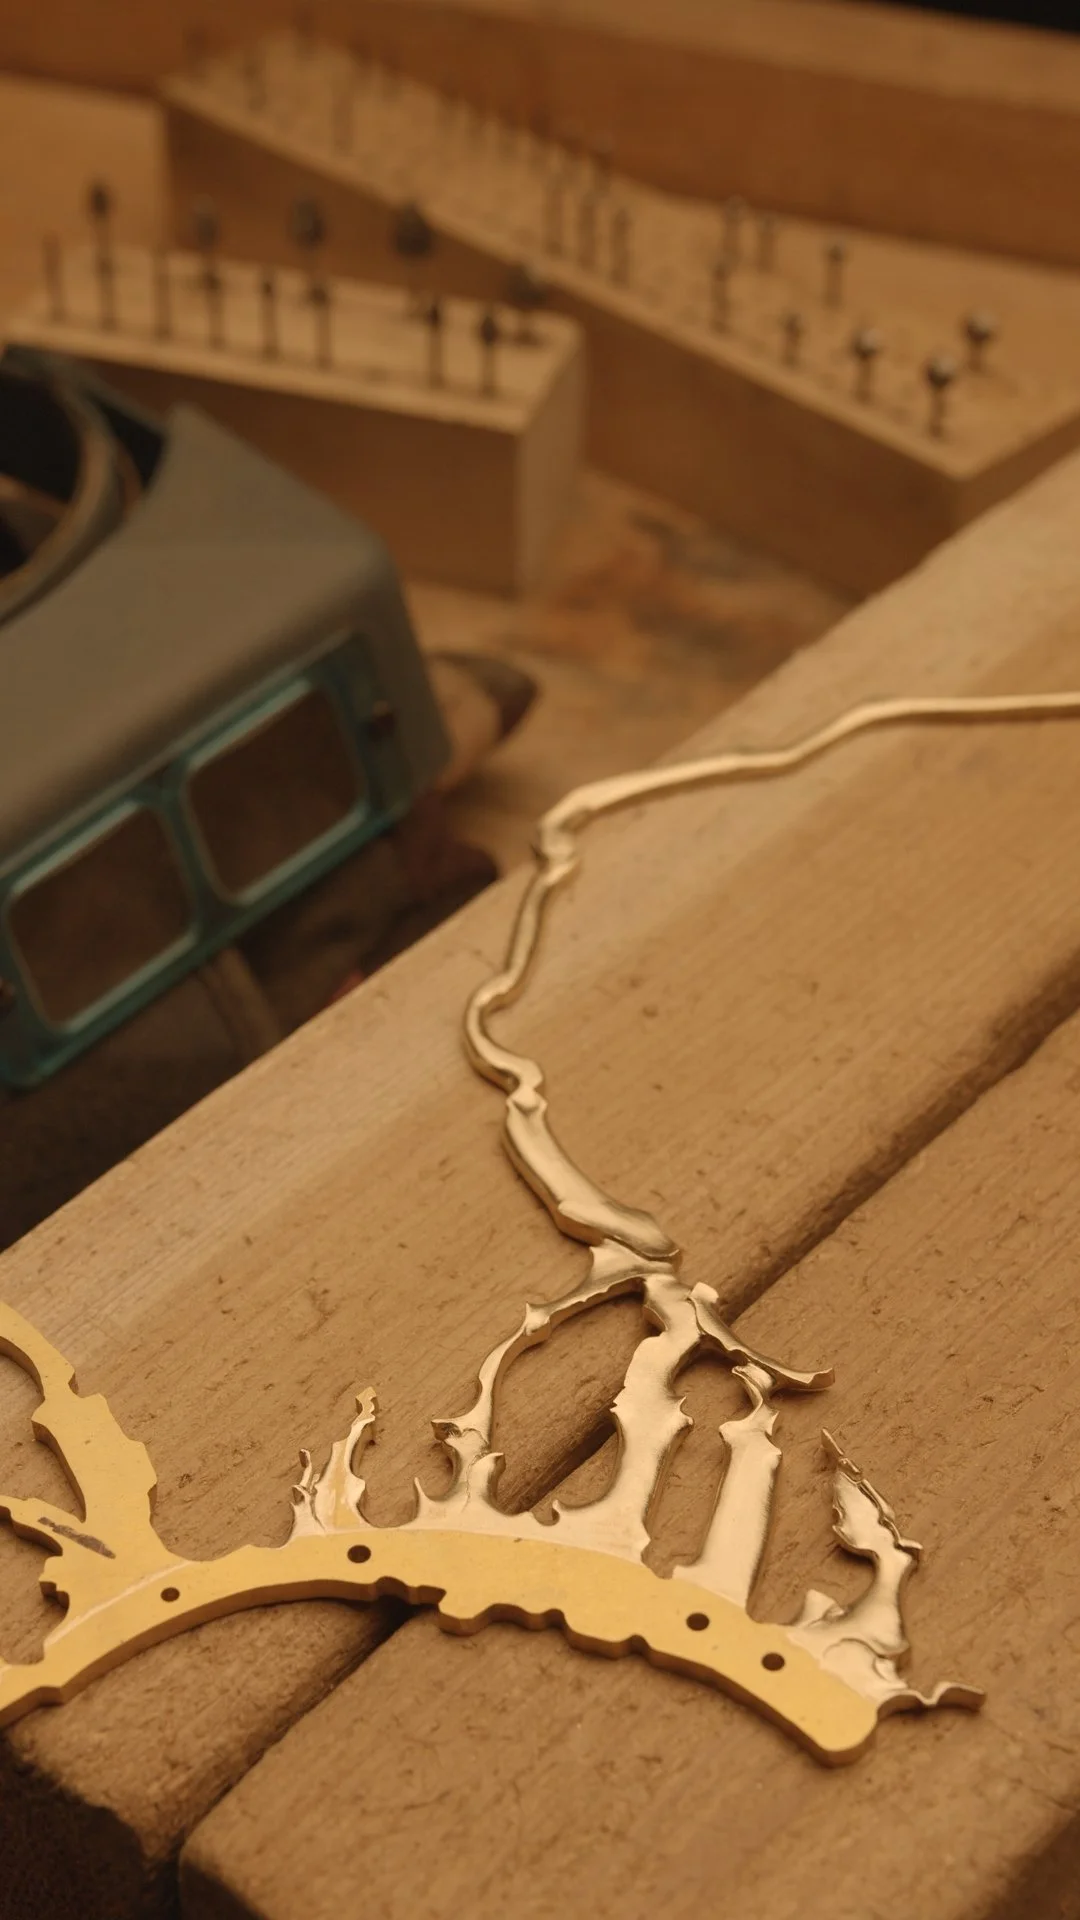
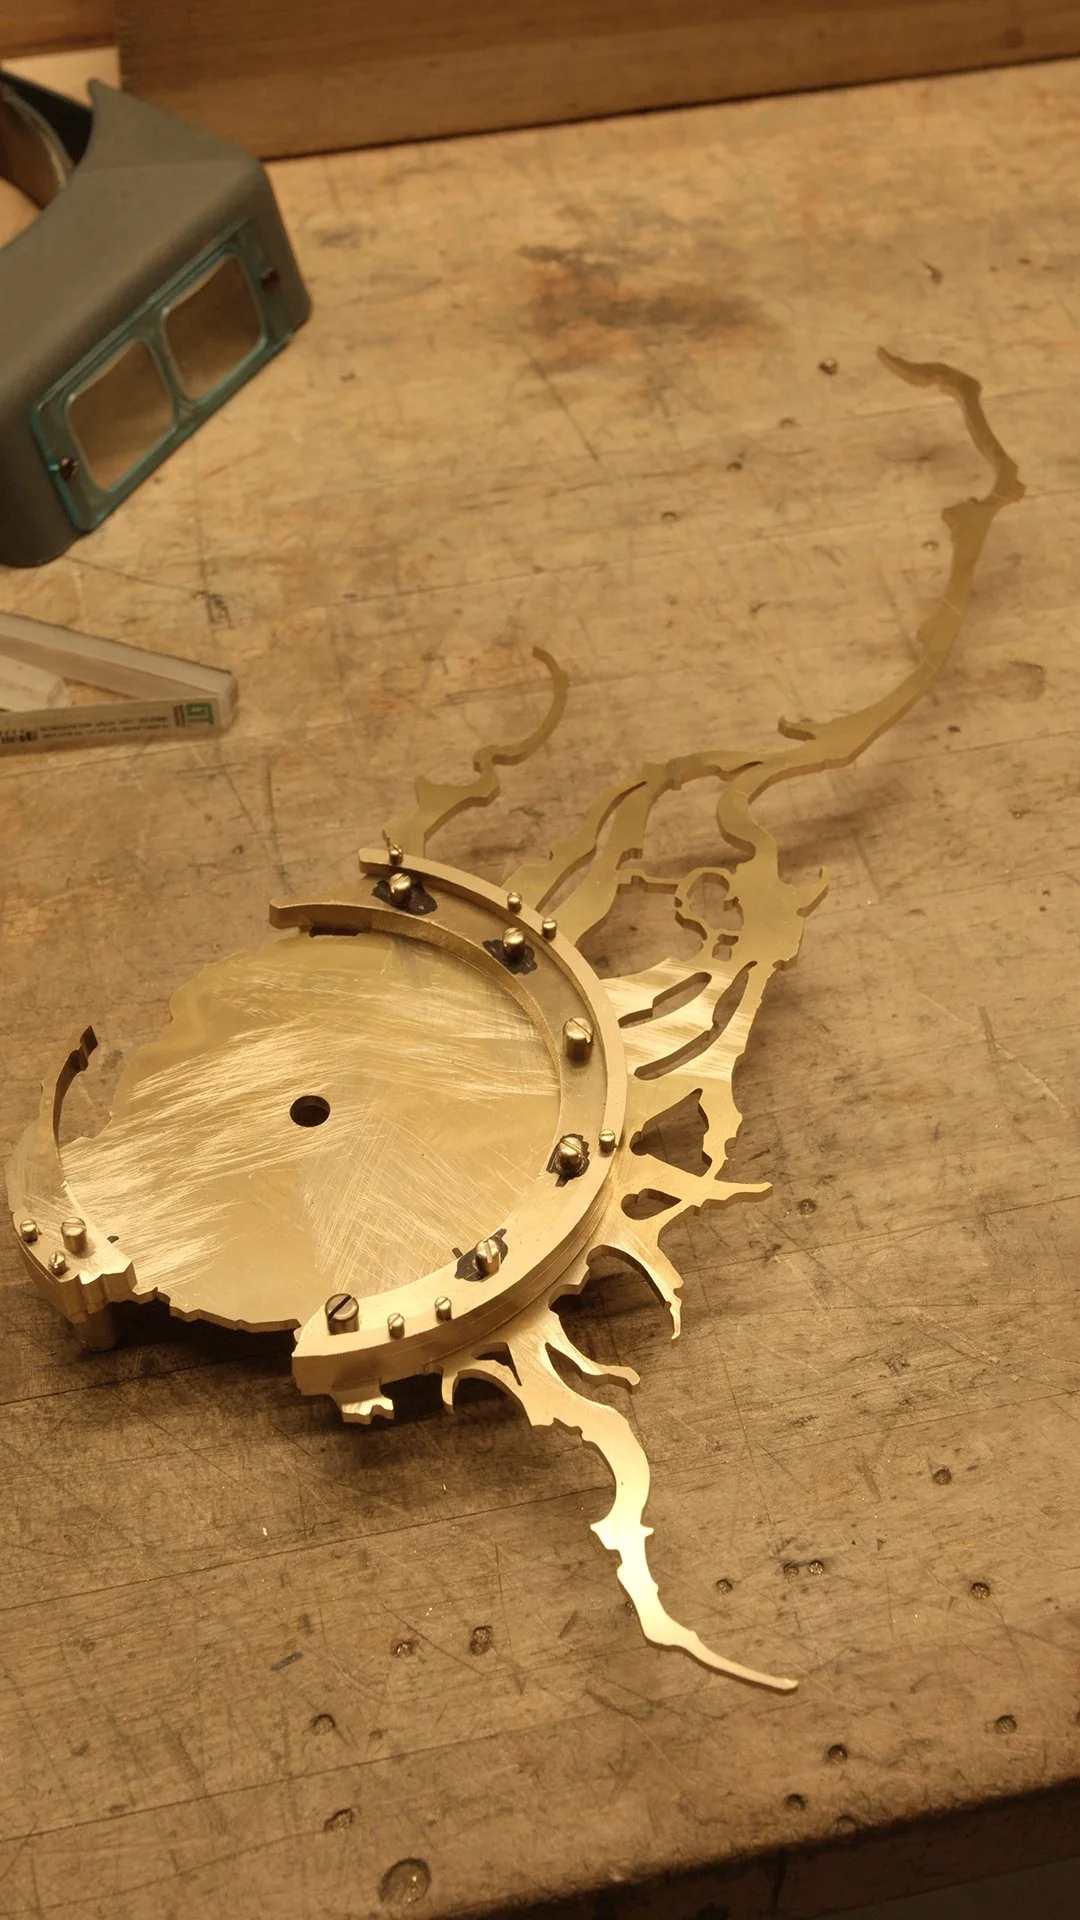
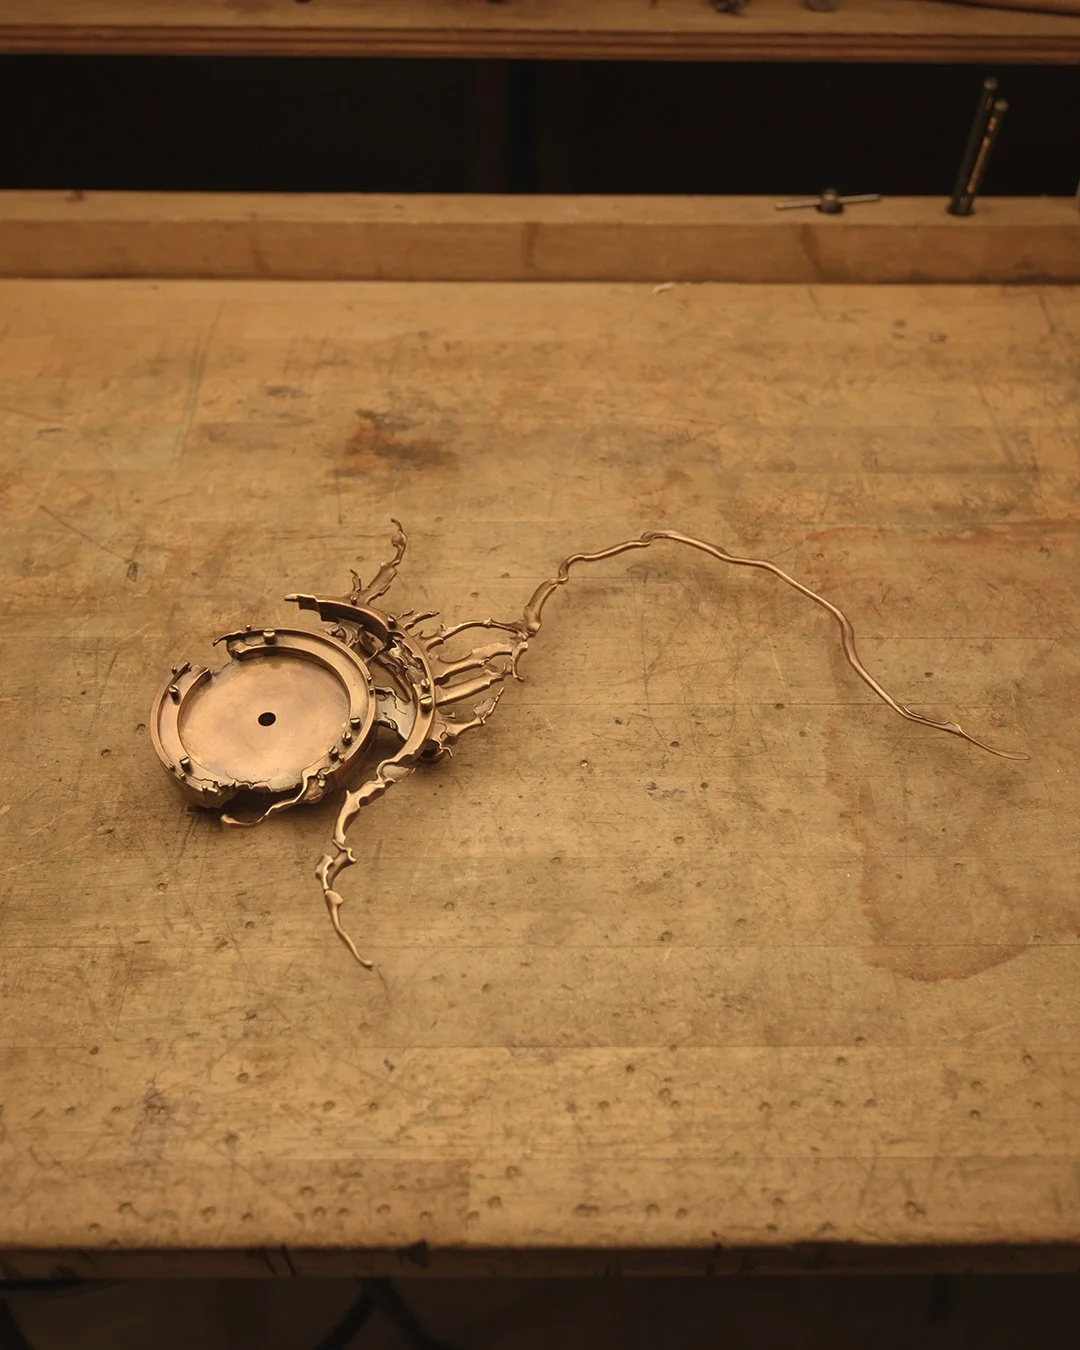
Headphones on. Press play. Drill, tap, thread, assemble.
I needed the long playlist to make all the screws for this one. Coming together nicely though! Sculpting is next.

Two more loaves in the oven.
Fresh off the CNC water jet machine, I’ve just picked up and laid out the parts for a couple new clocks. The usual drilling and screw threading is up next…right after I choose which one to make first.
A new quartz clock is on the way. There are going to be a lot of layers and depth to this one. Still need to refine a bit, but the cutting should start soon.
The workshop doesn’t stop. After hundreds of hours invested in finishing my last mechanical piece, I decided it was time to work on some smaller clocks. I’m slowly replenishing the inventory, and it’s really nice to see multiple pieces hanging in the “gallery” of my home.
This piece, simply titled “7-6-5”, is the latest addition. I tried to go for something a little more thin and delicate with this one. The original thumbnail sketch had some pretty thin pencil lines, especially at the tips of the five and seven. I liked the look of it, so I tried to keep the final piece as close to that as possible.
This piece is for sale on my website. Click the link below to take a look.
New clock!
A couple months ago I sat down and sketched out a bunch of designs that had roman numerals, twisting and transforming into gnarled, organic shapes. I singled out four of five of my favorites, and last year I finished the first of them, titled “Branchy”. This piece is another one of those designs. This style is working well, so I might make more of them.
I tried something a little different with the hands on this clock. The hour hand, rather than being a straight spear-like shape, is a triangular cutout. This works really well for readability from a distance. It also makes for an interesting overlap when the hands line up. I definitely like this look enough to consider it for future projects, should the stylistic fit arise.
This piece is currently for sale. Click the link below to take a look.
Enjoy!
Fabrication has started on a new quartz piece. It’s all cut out, holes are drilled and tapped, and the screws are all made. Now that it’s assembled, I’ll start sculpting the flat pieces with a rotary grinder to give it that branchy, gnarly, organic feel.
There will likely be a lot of quartz pieces hitting the workbench in the near future. I’ve finished a new mechanical piece, which took quite a lot of time, and now I’d like to create some smaller work. My hope is to always have a range of sizes and styles available from now on. Although these smaller ones tend to disappear, so that might be difficult.
Should be finished in a couple weeks.
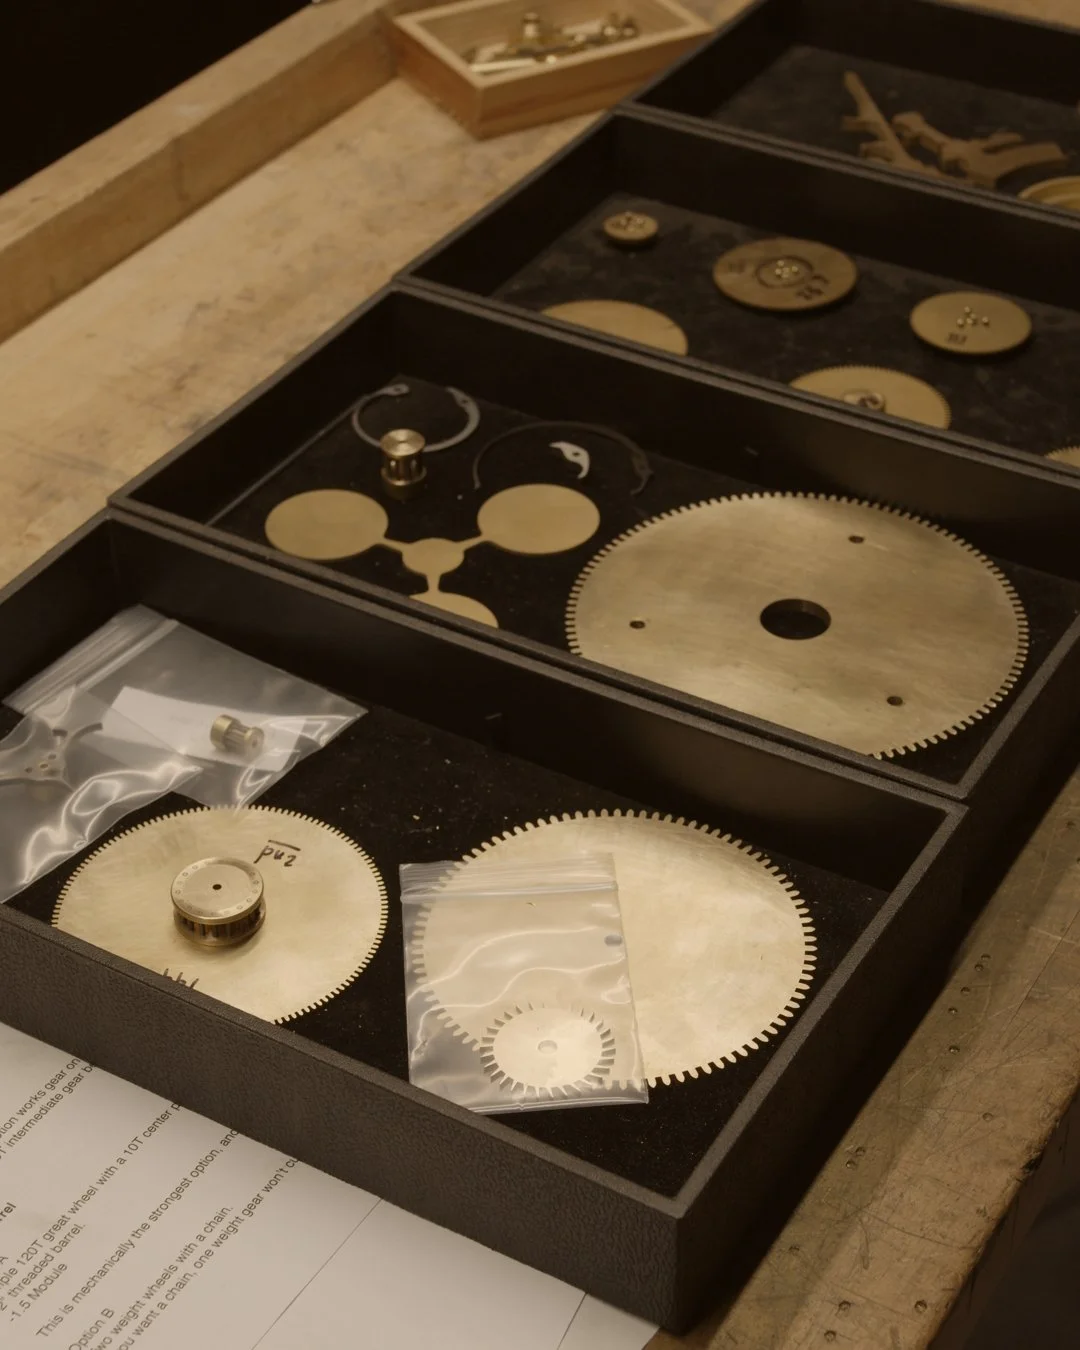
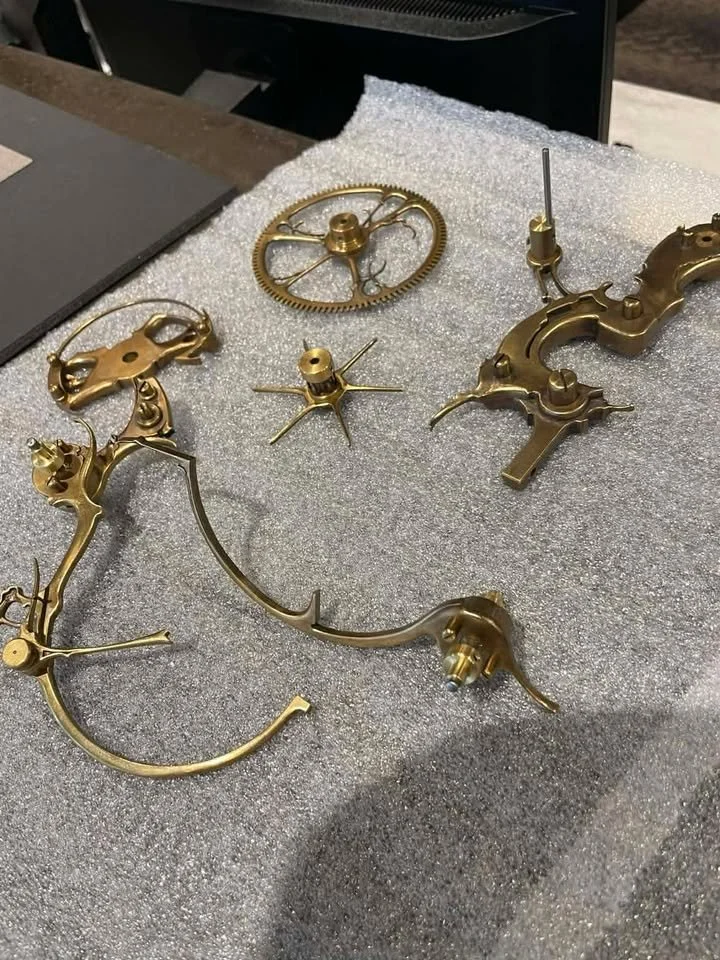
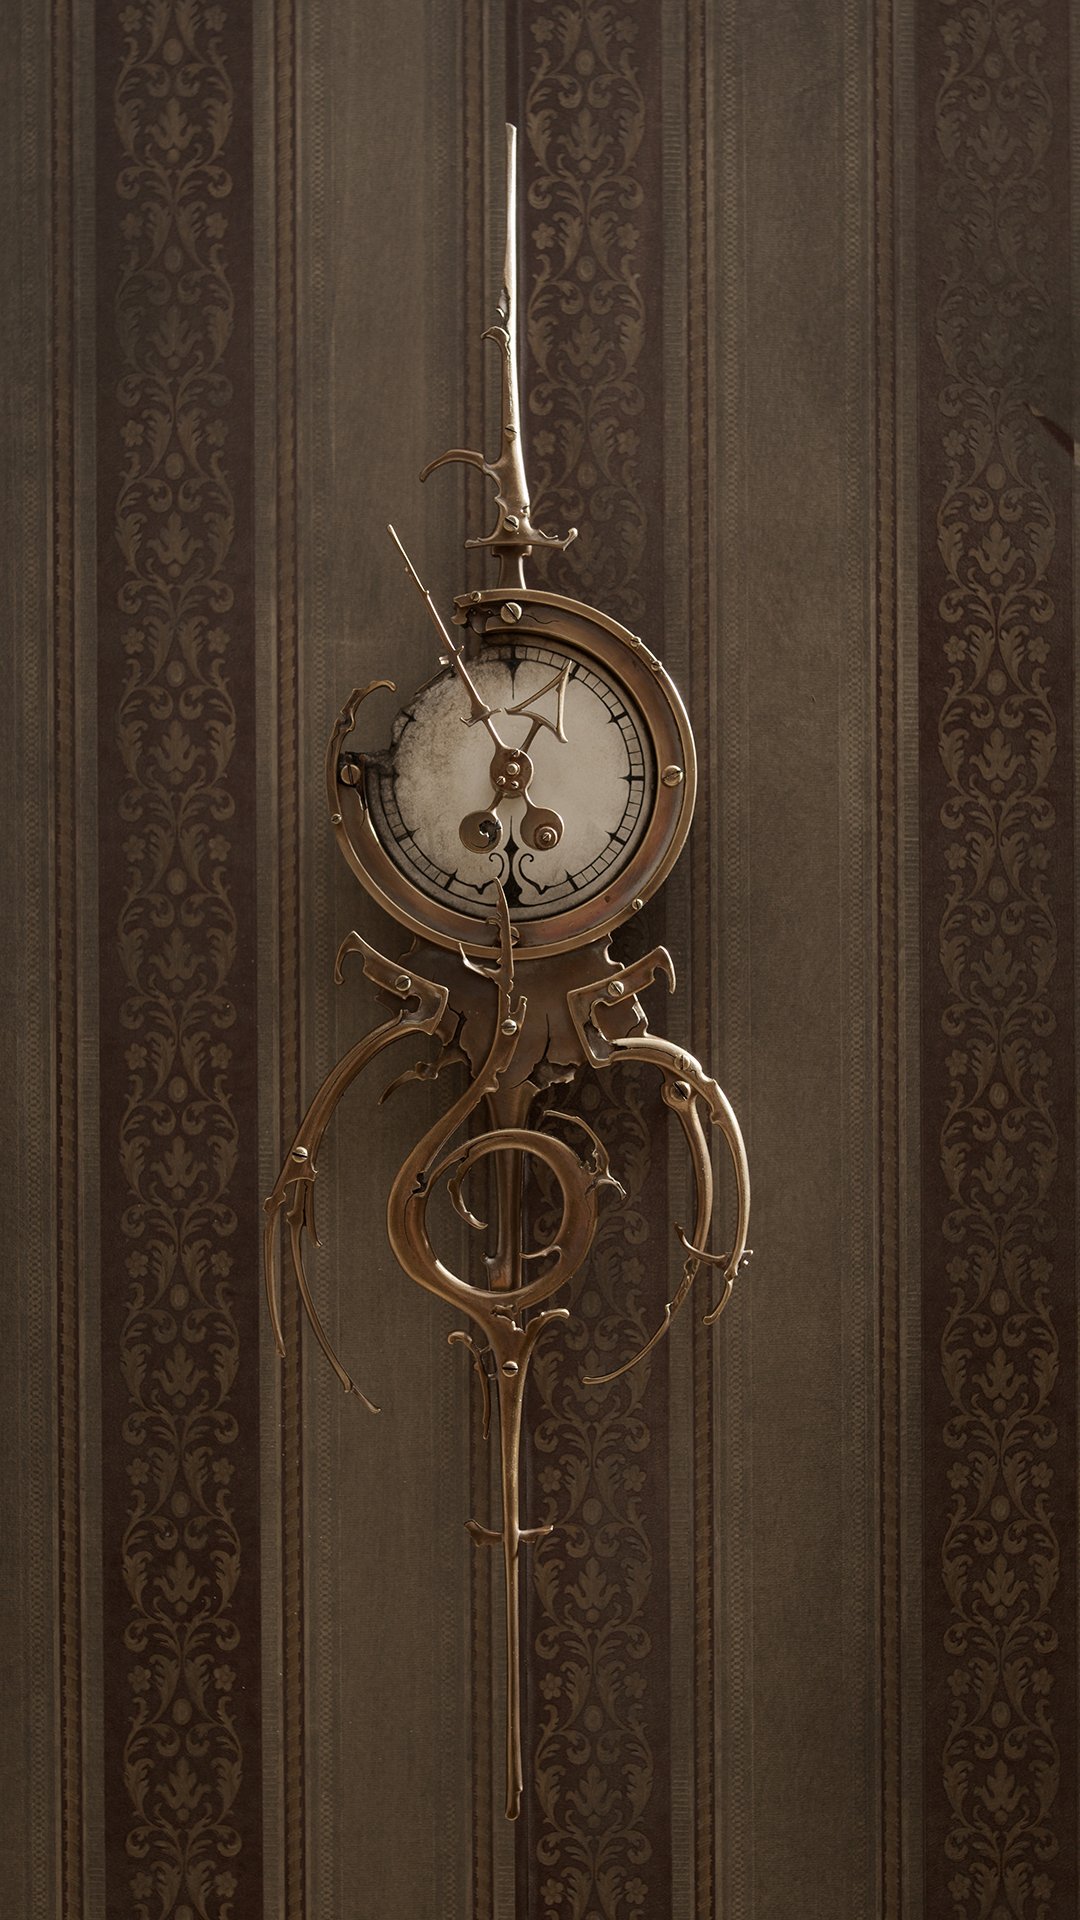
A new mechanical clock is finished!
This is the first time a new heartbeat has emerged from the shop since “Perth,” back in 2023. It’s also the first non-commissioned mechanical piece since 2019. The time required to create custom mechanical work is significant, so these clocks are very rare.
While I love all the quartz projects I created over the last few years, I really missed making gears and hearing that ticking sound echo through the house.
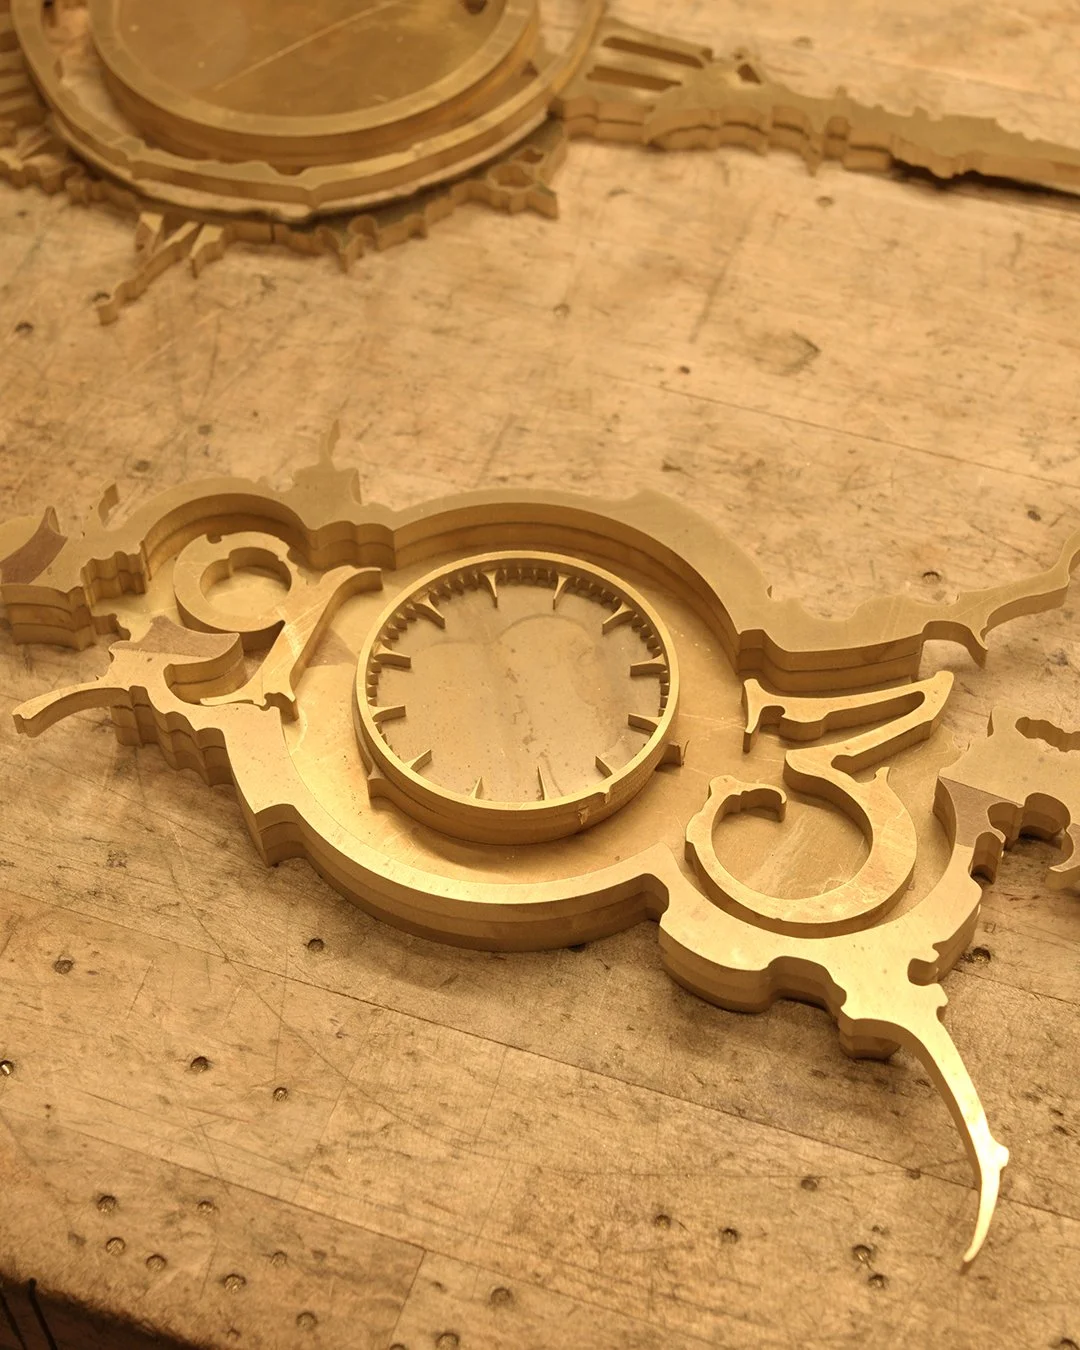
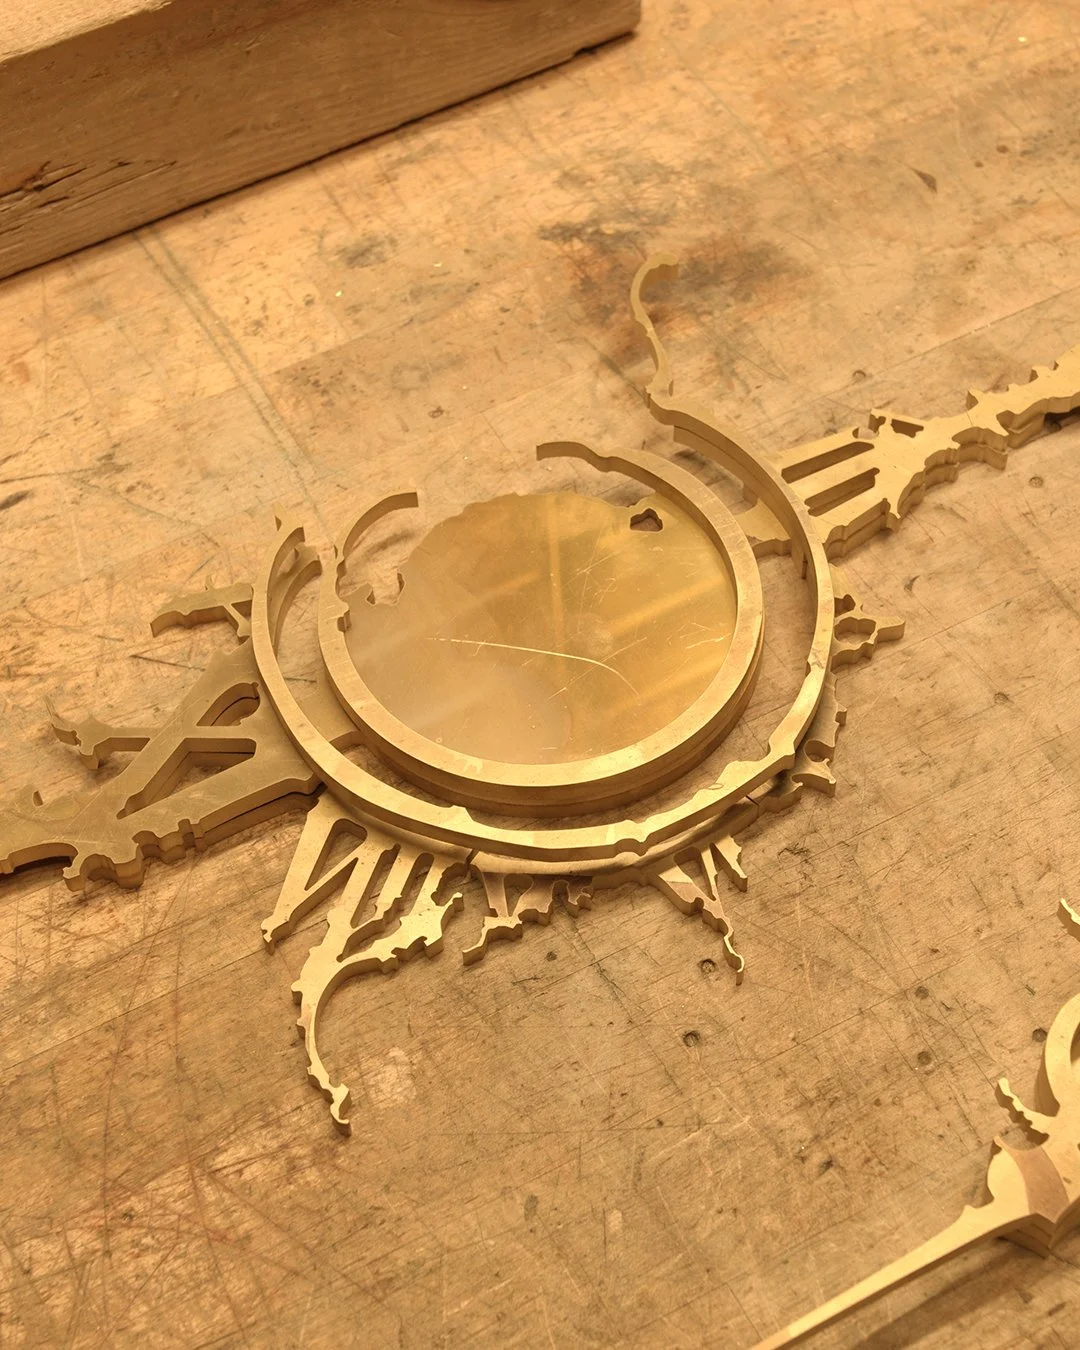
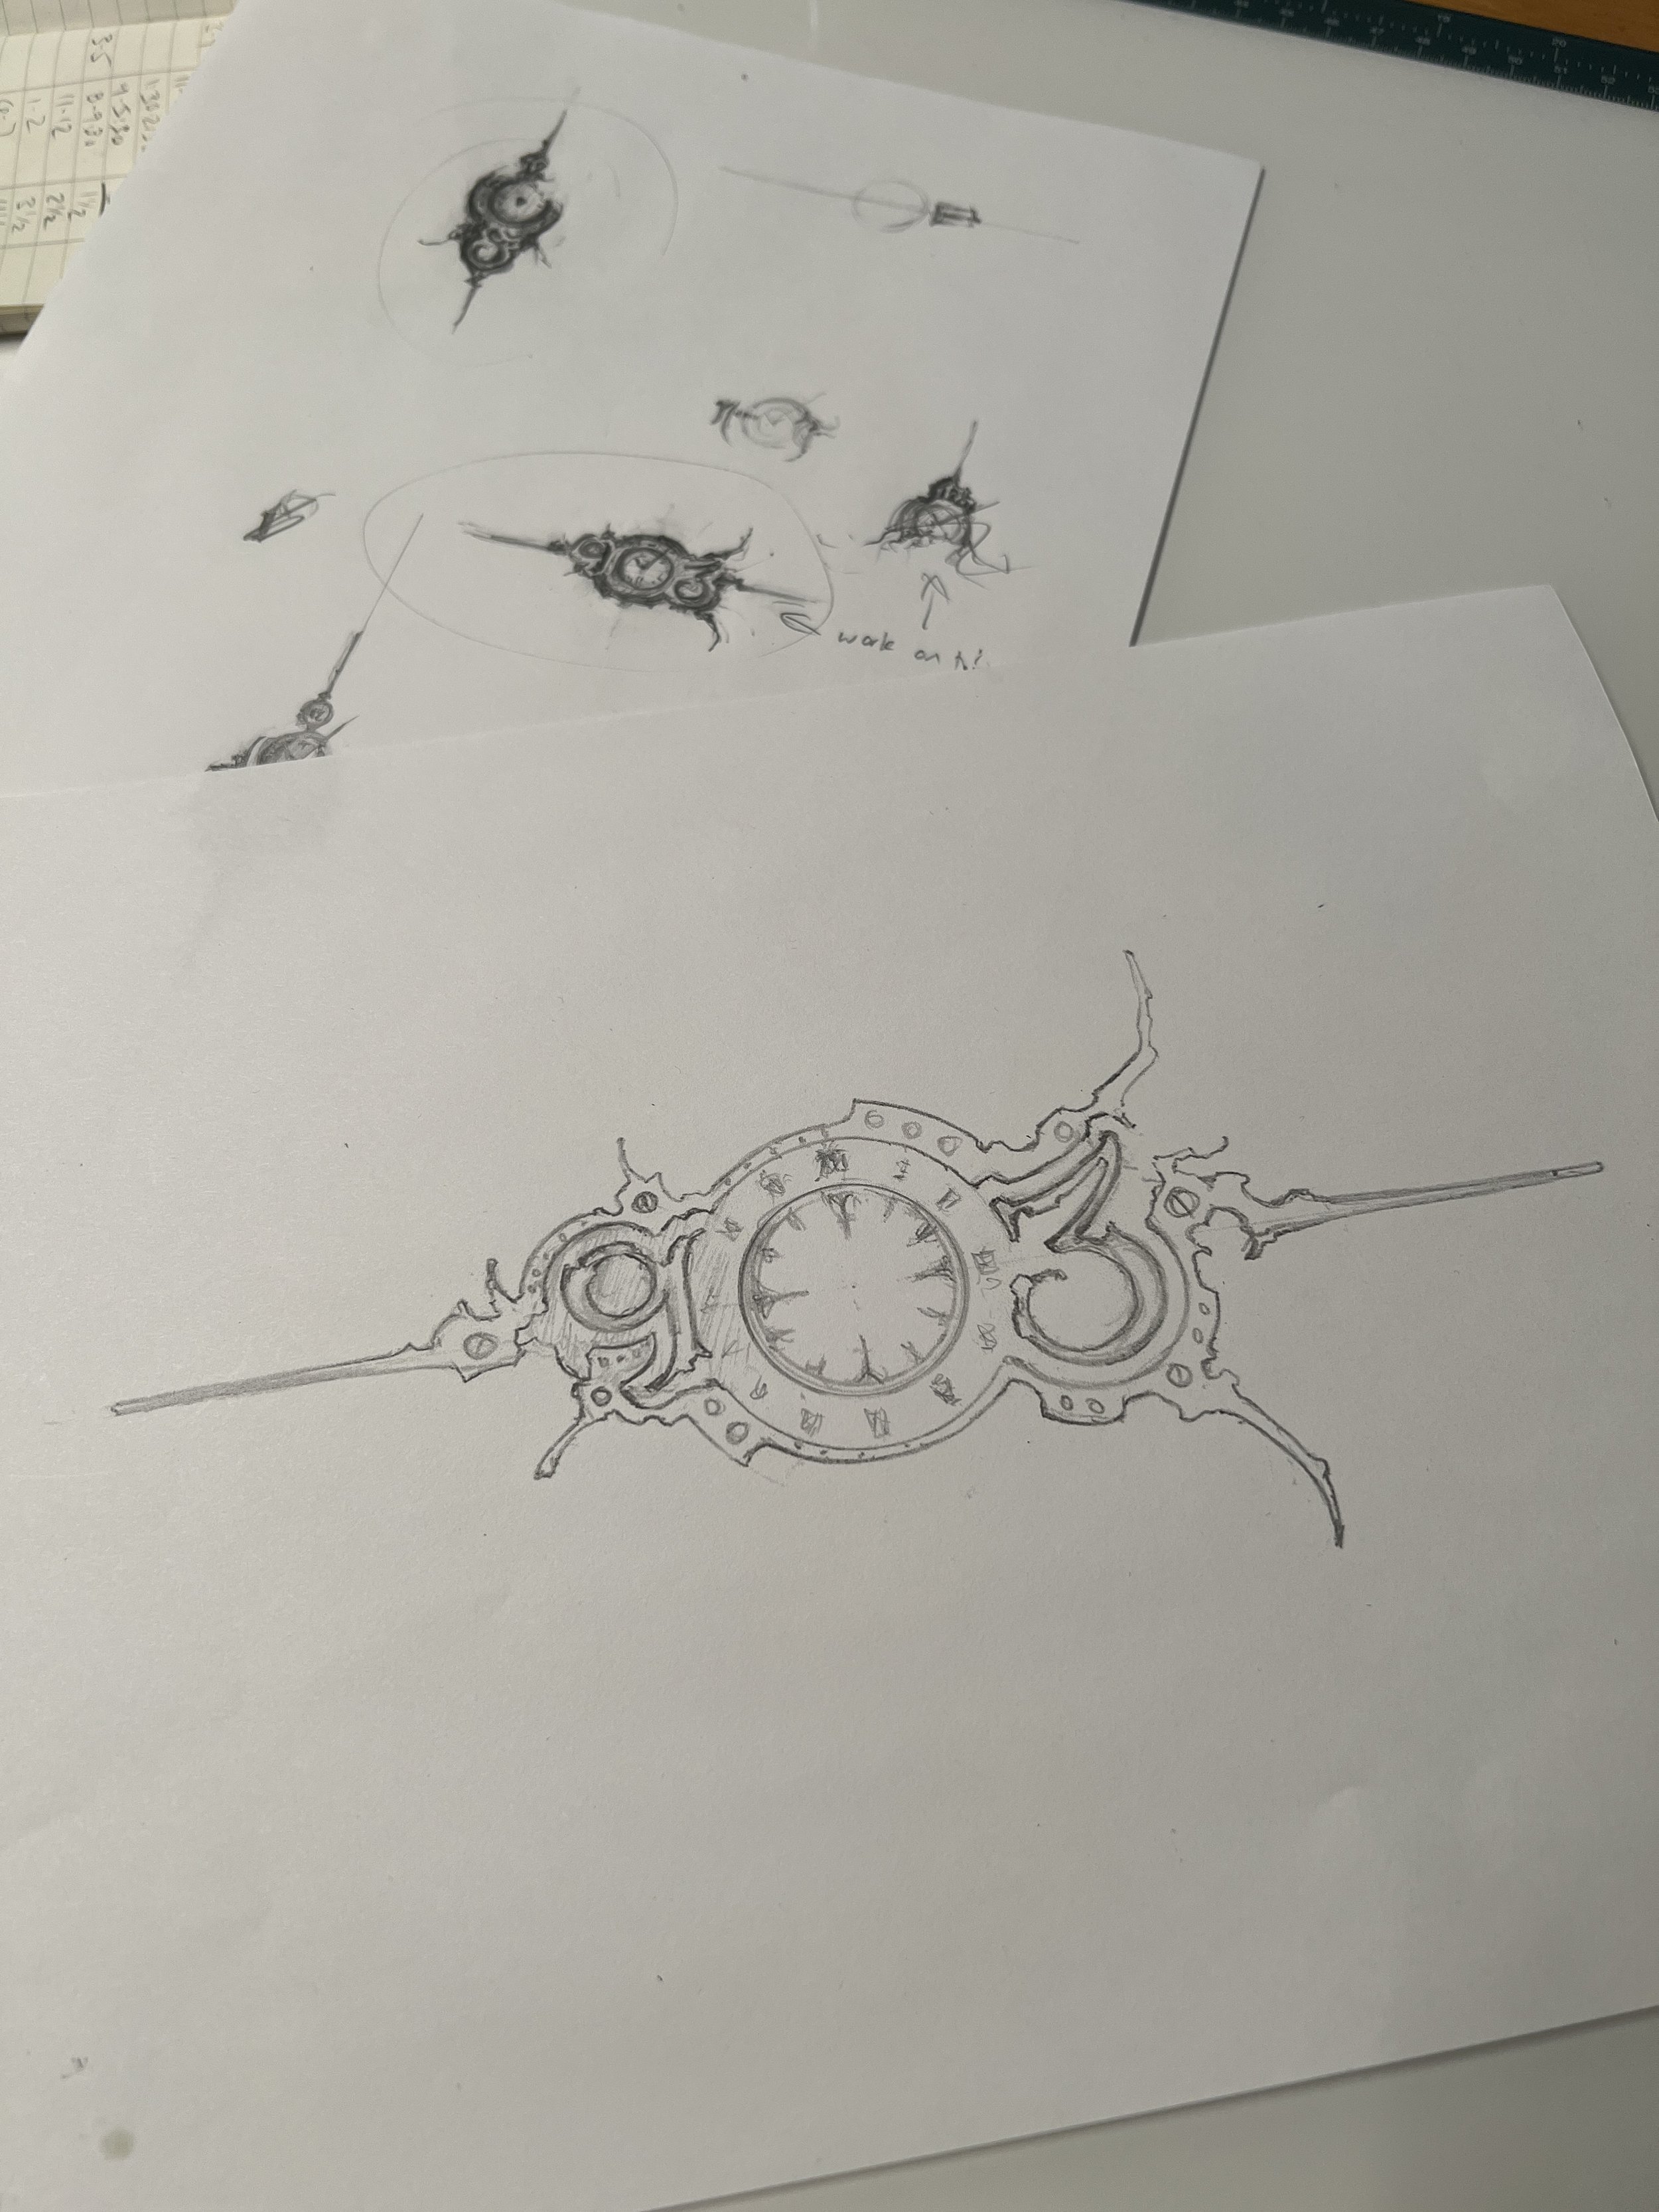
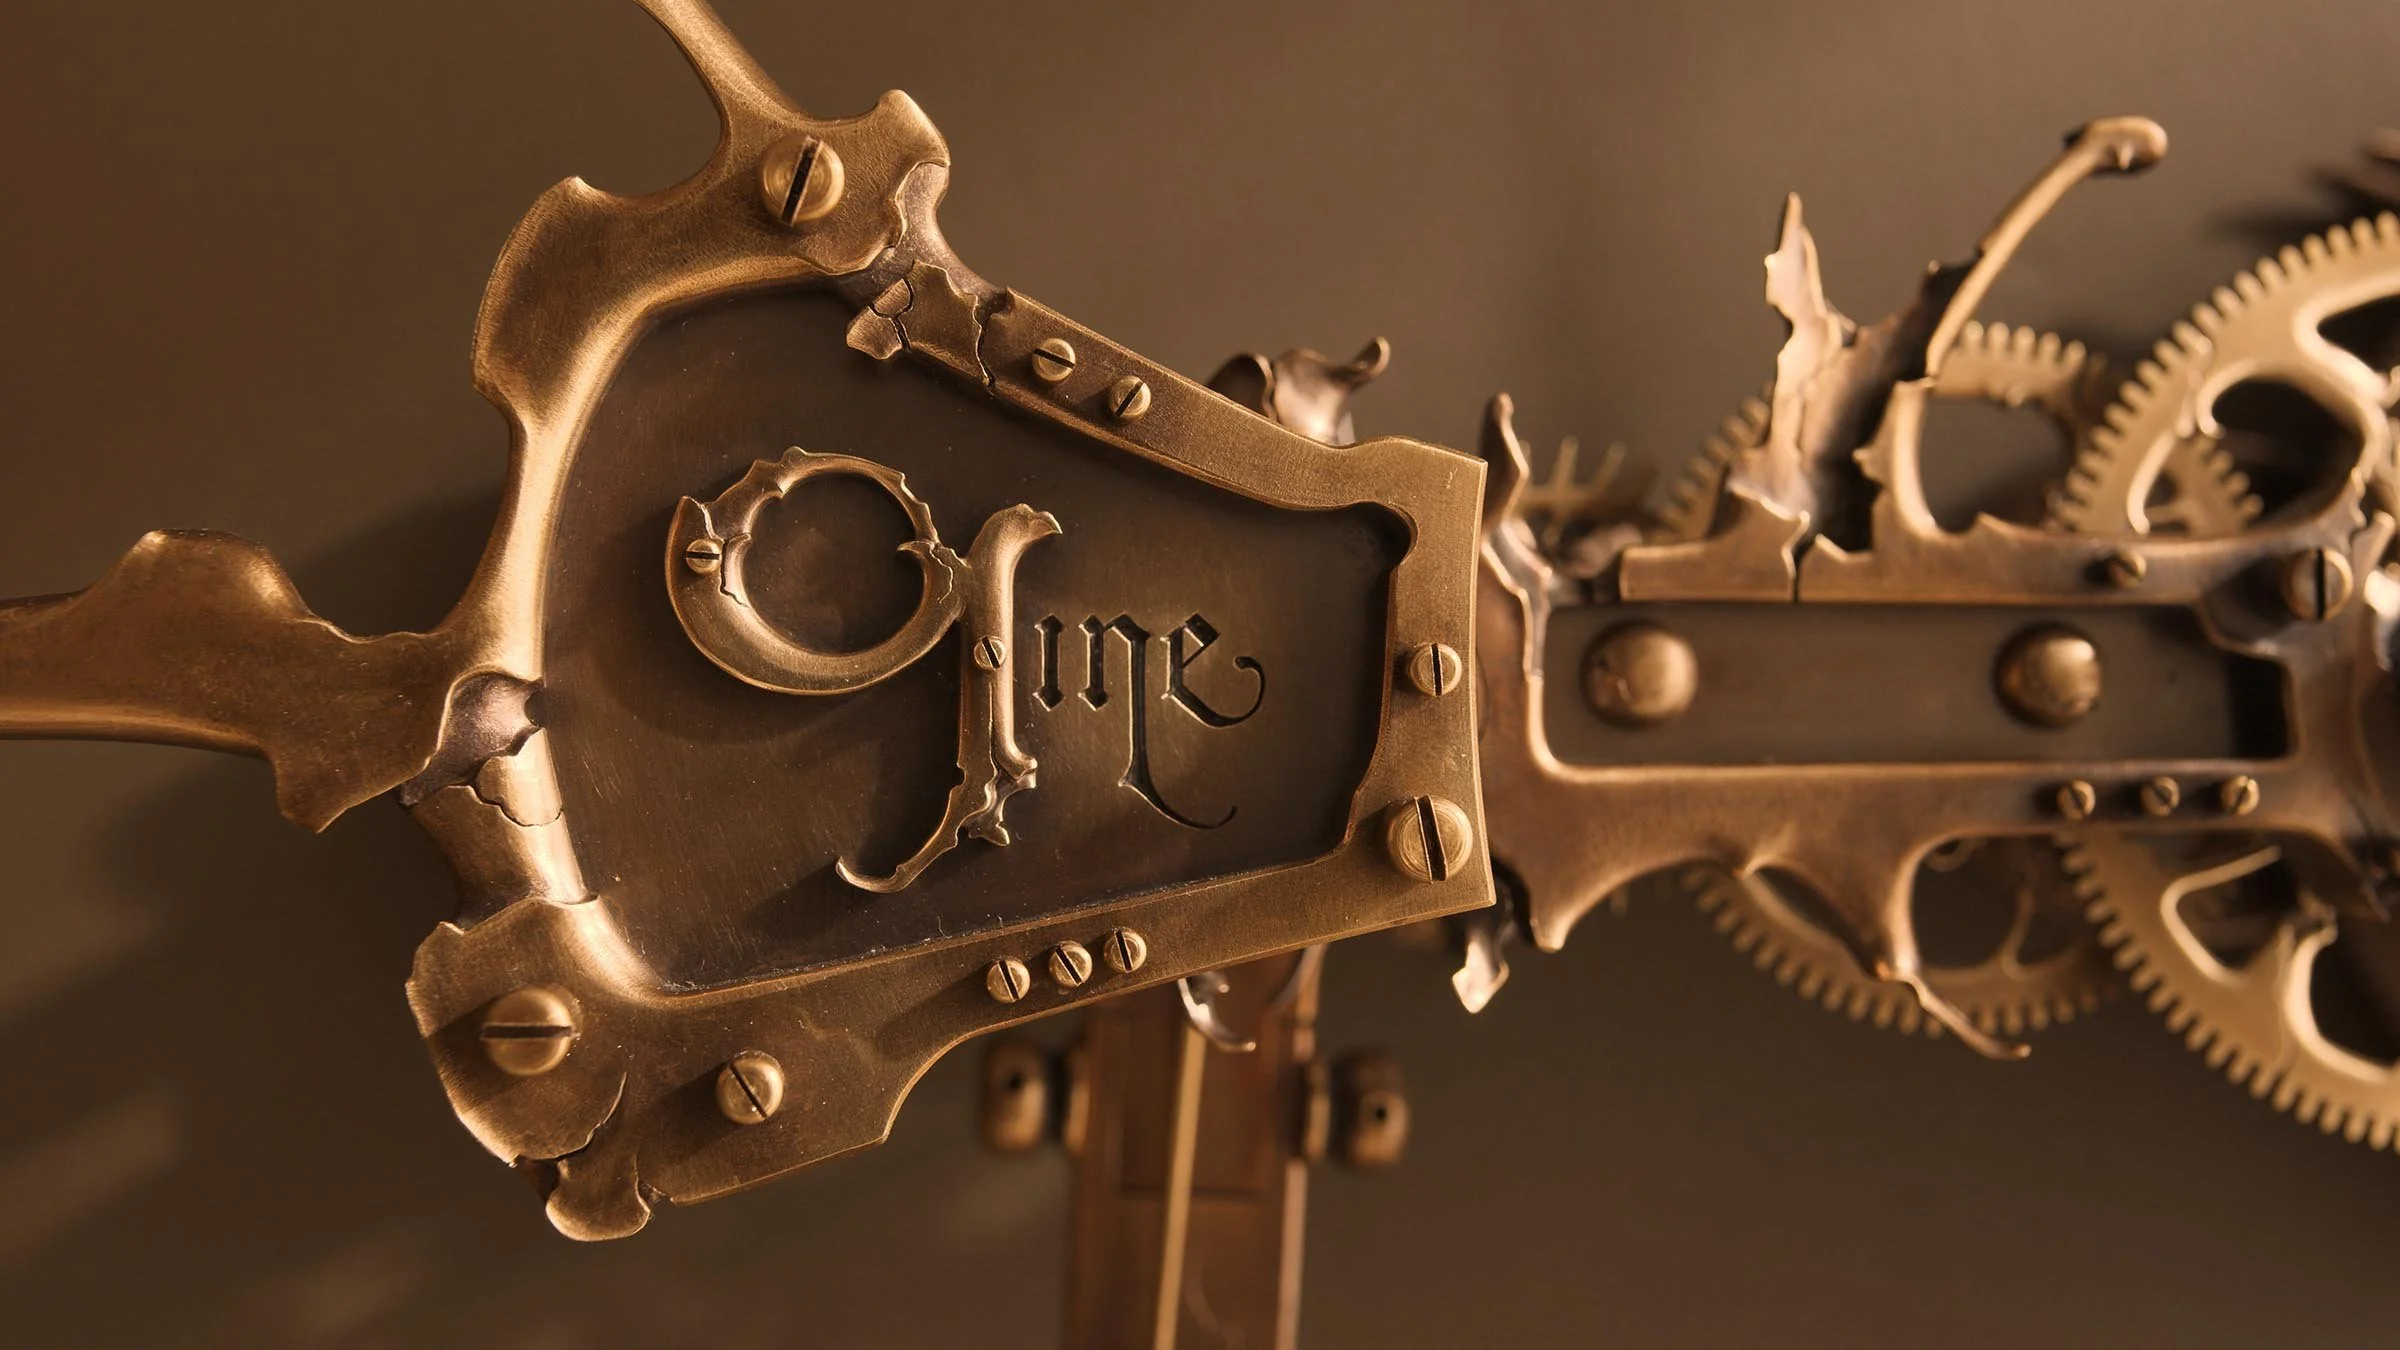
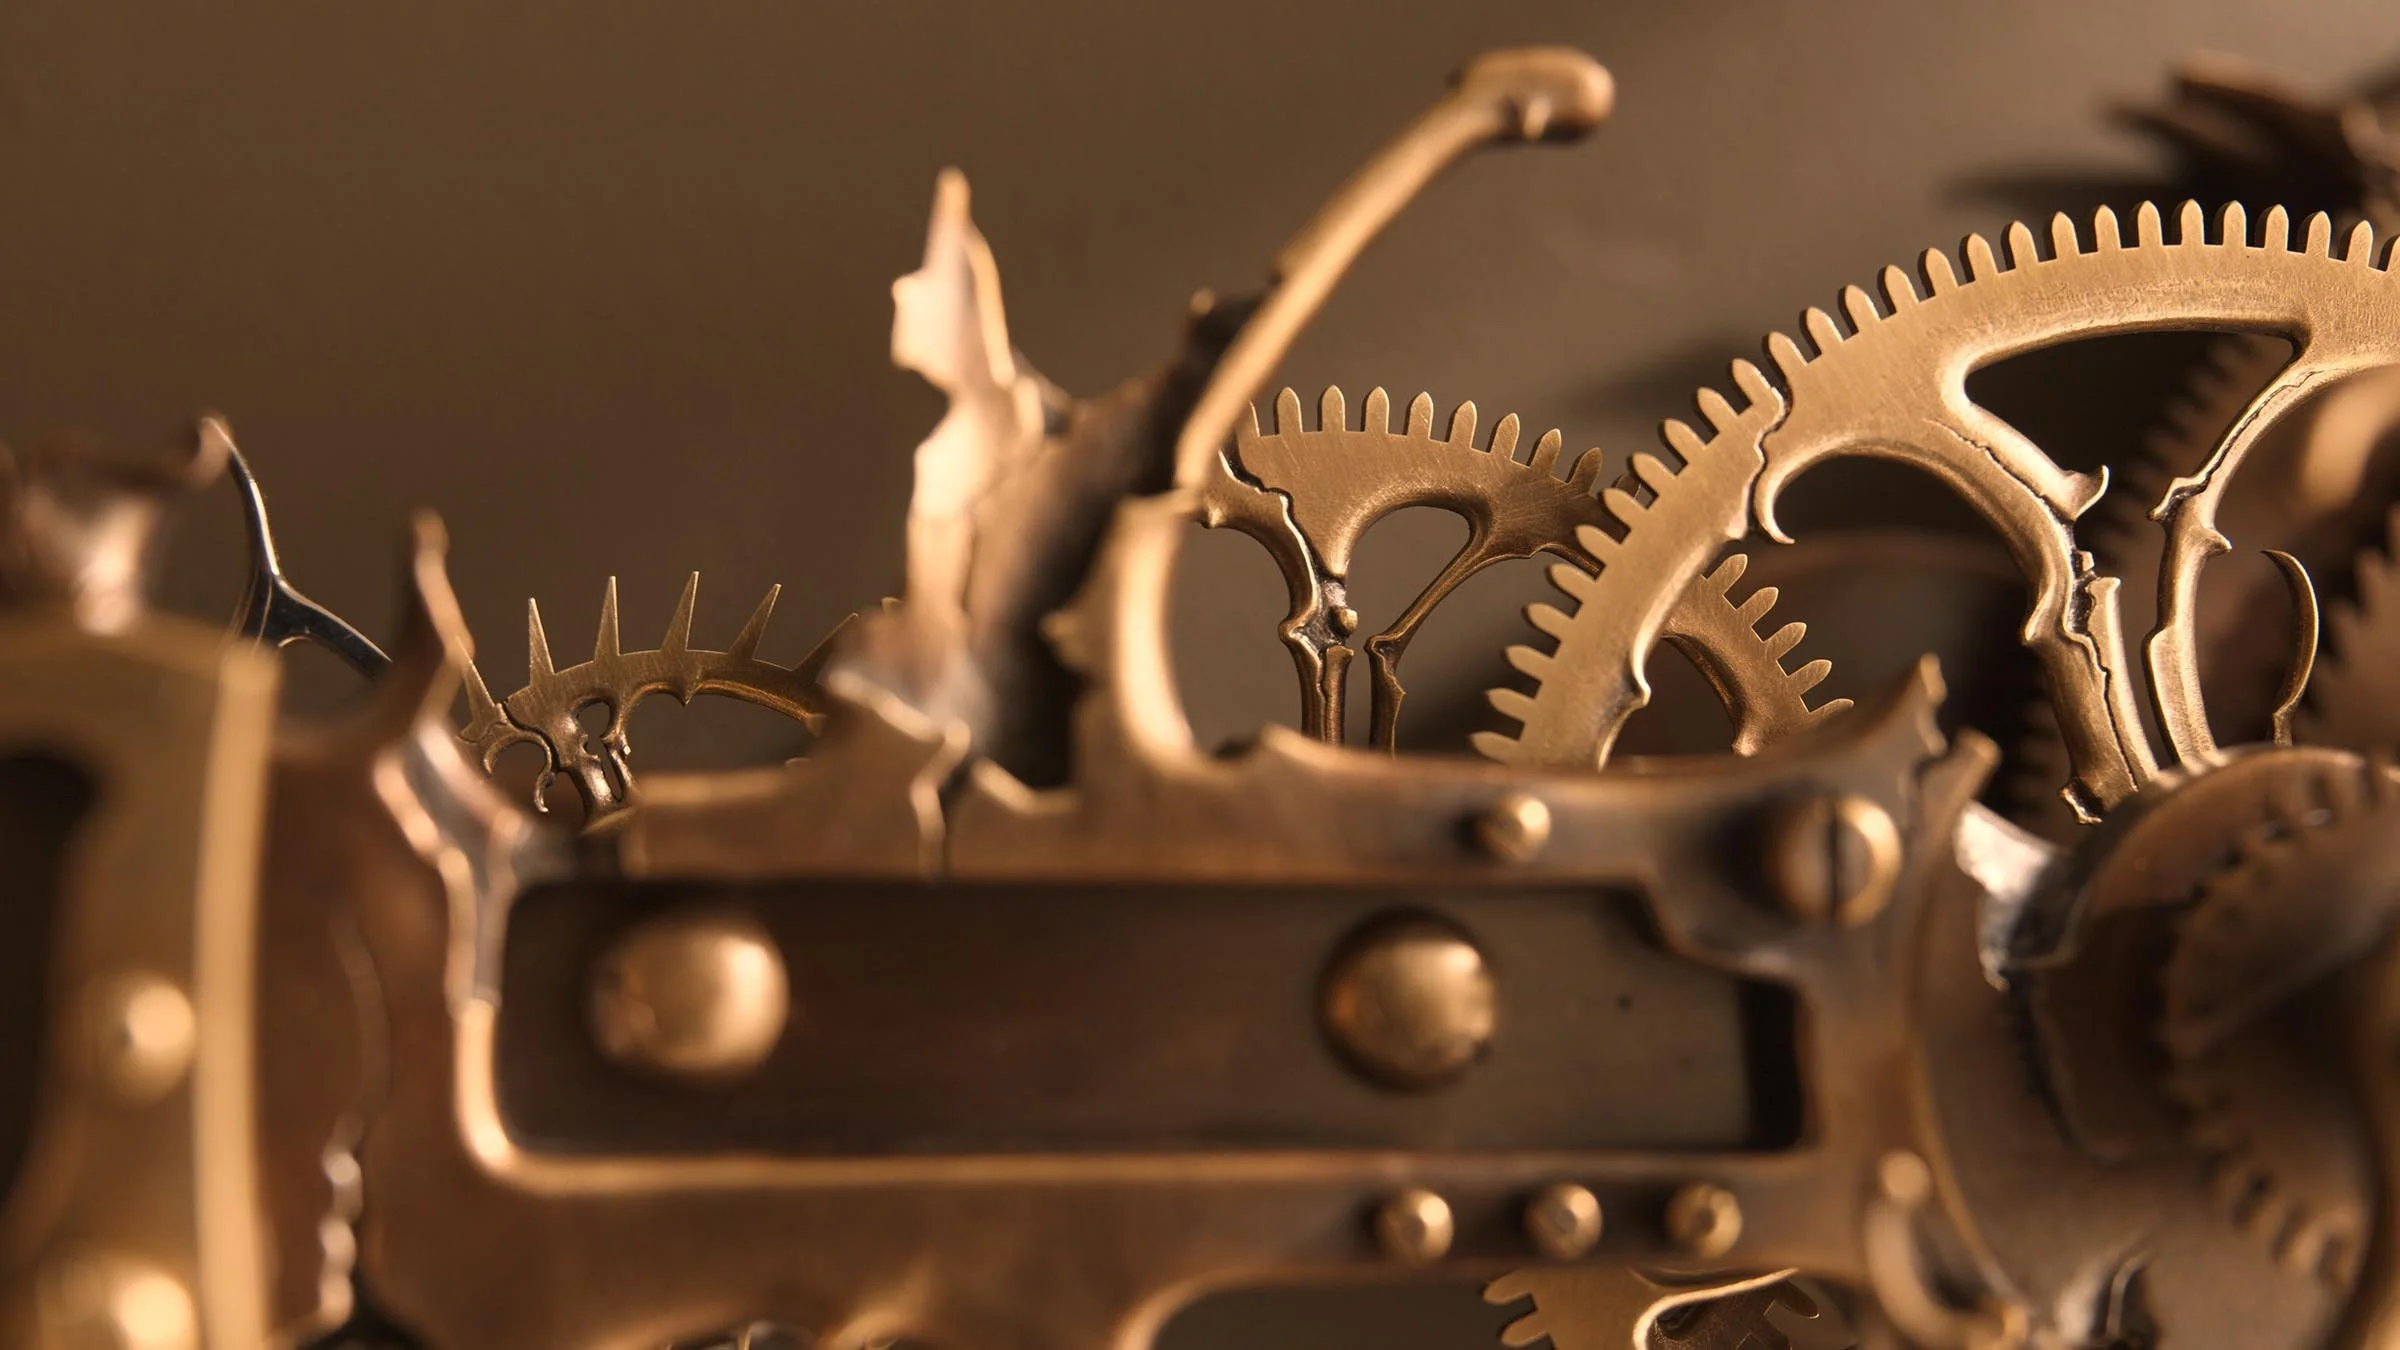
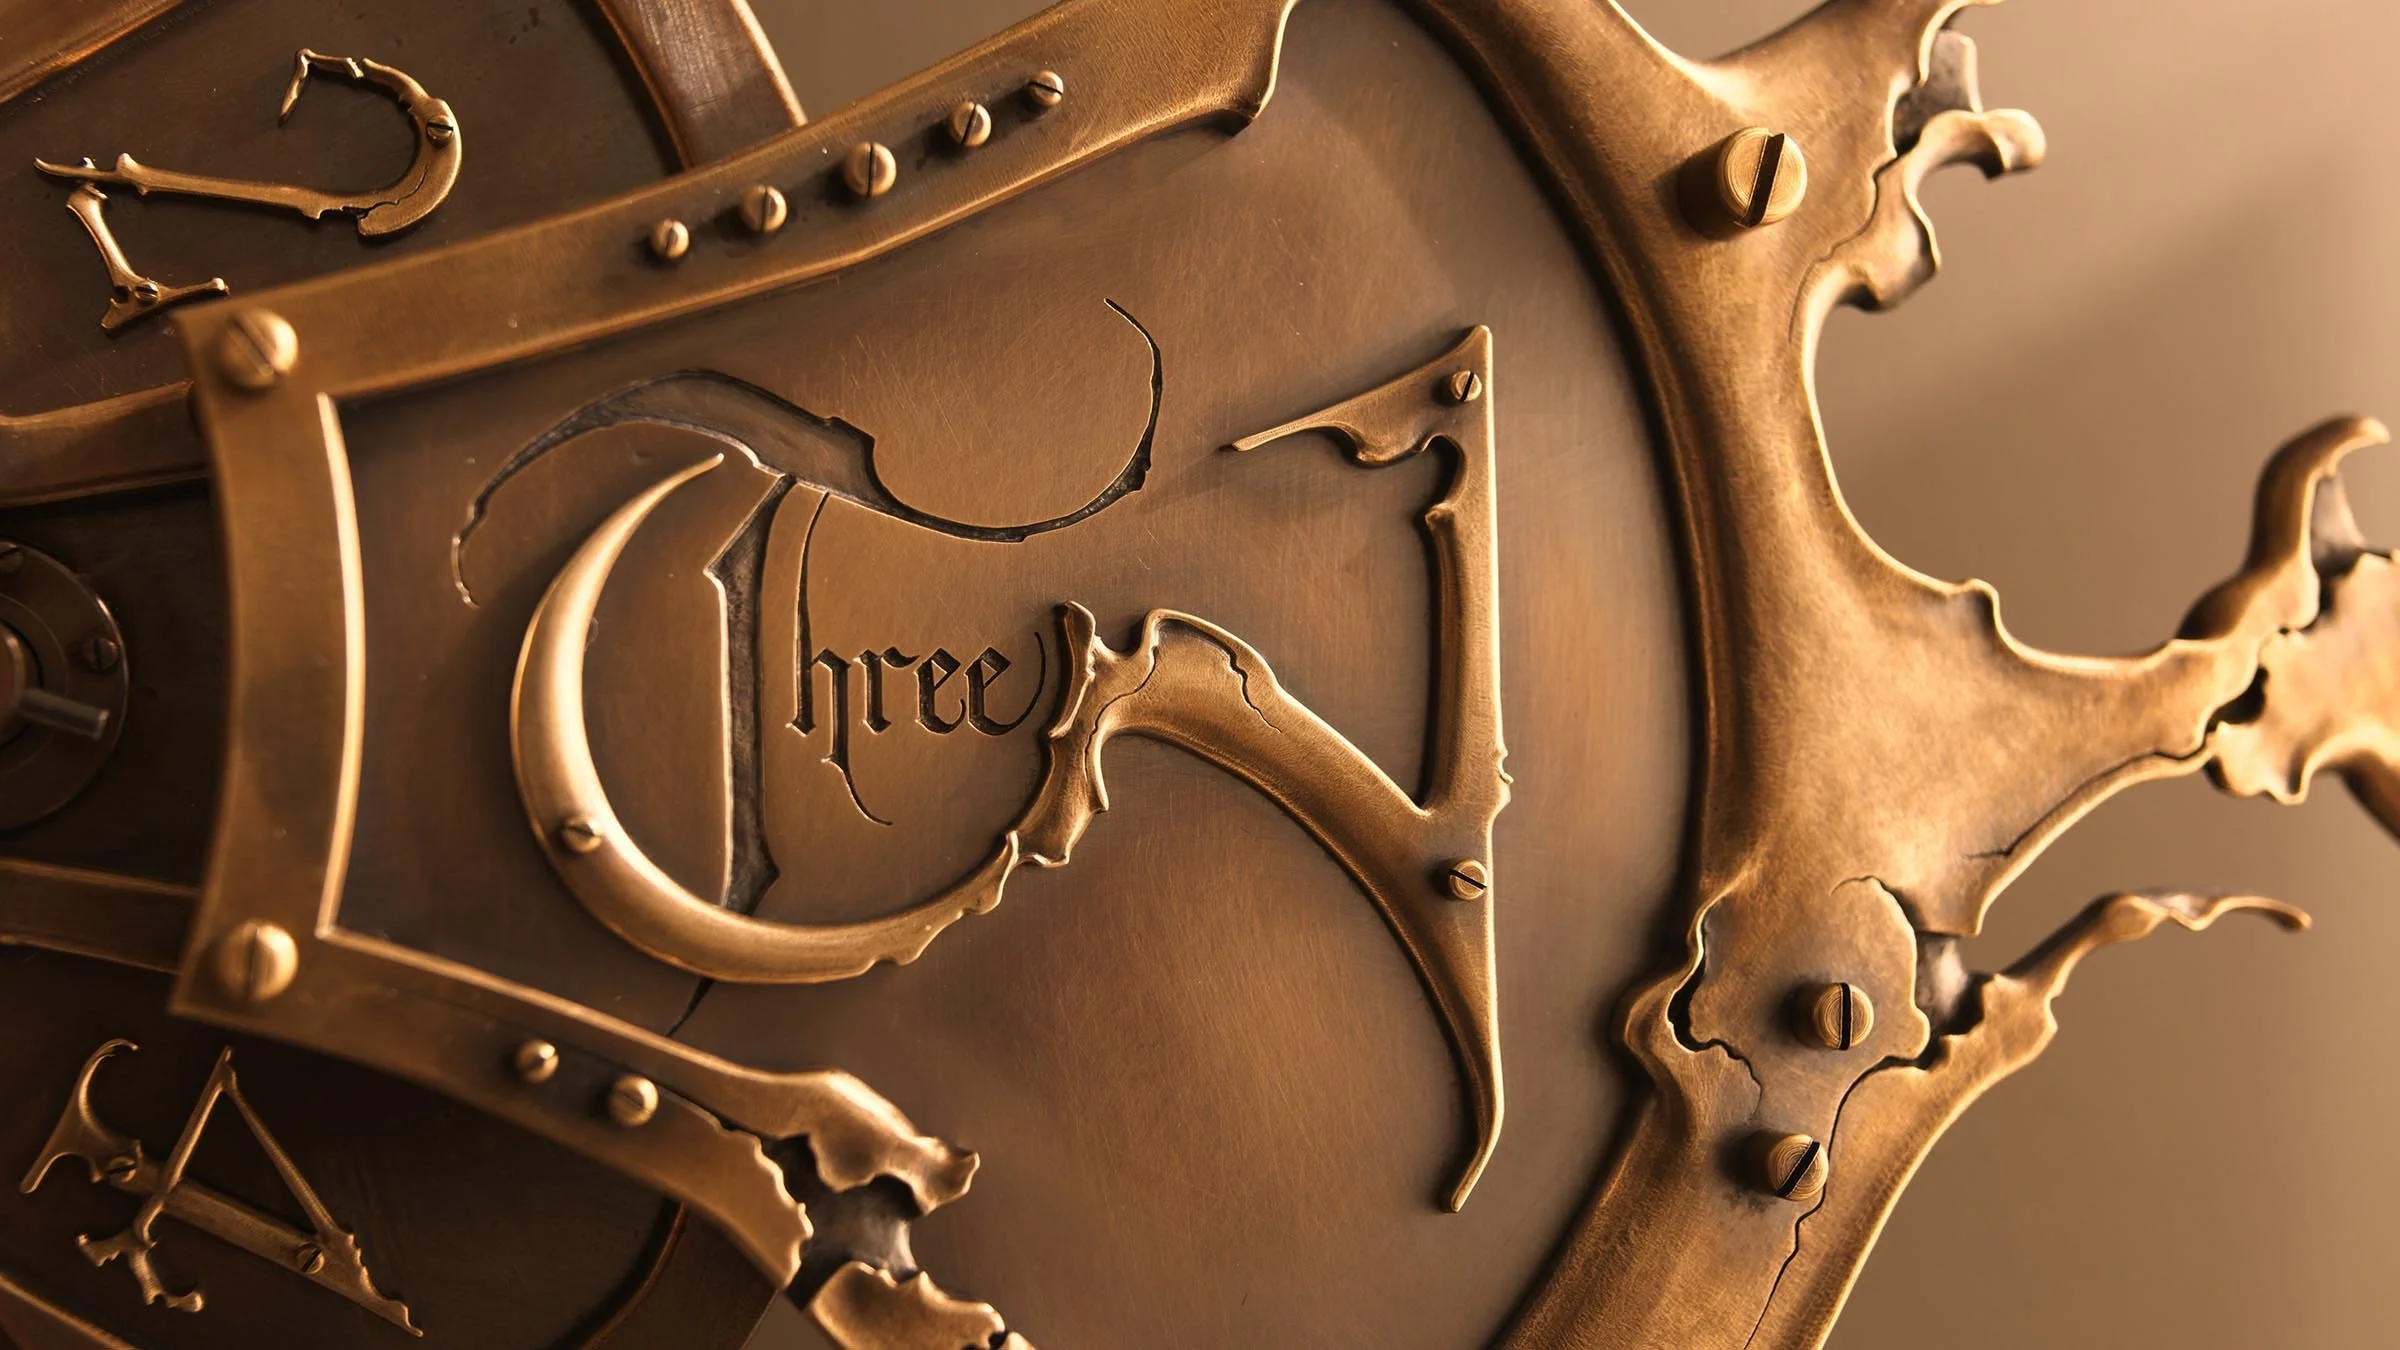
This piece is a variation of one of my favorites from 2019, titled “Th3.” Both the mechanical and visual layout are similar, but this one is bigger, and the design is more refined.
This clock is fabricated 100% from scratch. Every gear tooth and screw thread was cut by hand in my shop. All of the more organic forms were sculpted by hand with precision rotary grinders. Click on these links if you’re interested in the process:
Process content here on this site
This piece is available for purchase. If you’re interested, click here:
Feel free to contact me if you have any questions.
Thank you!


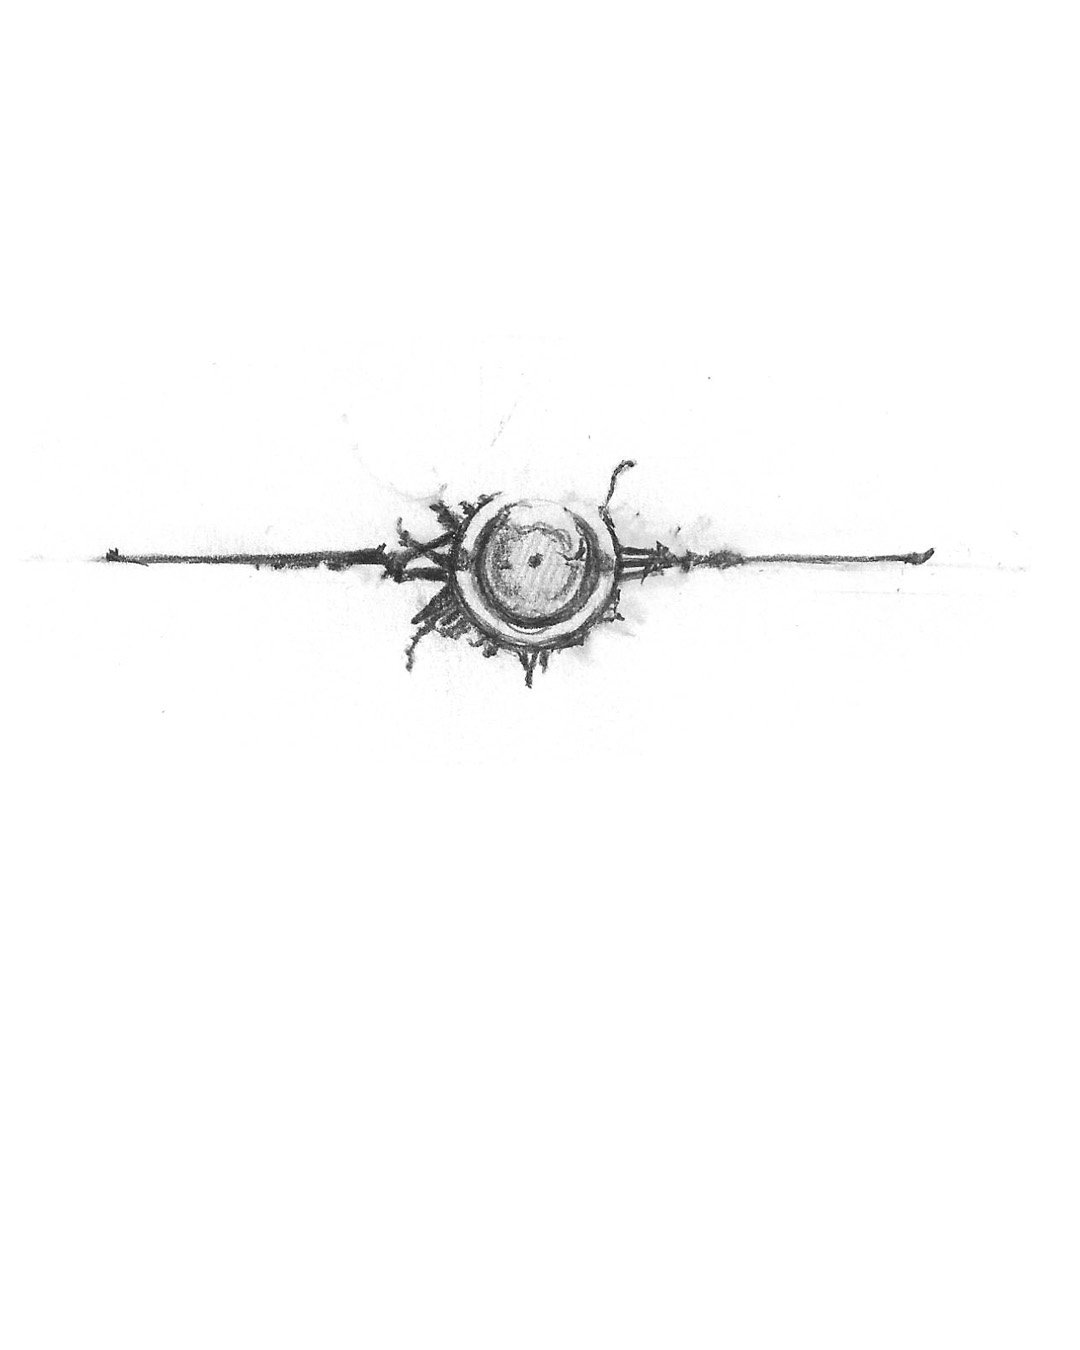
A tellurion is an earth/moon/sun orrery. The sun is in the middle. The earth spins once a day, and also orbits the sun once a year. And the moon orbits the earth.
After I worked out the gearing for this complication I wanted to see what it would look like in a clock. The quickest way to do that was to draw up a variation of my “Perpetual No.1” style layout. It visually worked well, but I’ve always wanted to come up with a design dedicated to this new mechanism.
A few days ago I was doing some thumbnails, and stumbled on to this one. I’ve refined it over the last couple days, but I still have to tighten it up, and work out some mechanical things. I really like the way this one is shaping up.
The little dial on top is for the time. If I keep it clean and simple enough, it won’t need to be very big. This allows the tellurion orrery to be the hero of this piece.
I’m going to set this one aside for now and get some mental separation from it.
Creating this one would land in the ‘thousands of hours’ category, so I won’t be able to tackle it anytime soon. However, it is at the top of the stack, prioritized alongside a couple other favorites.

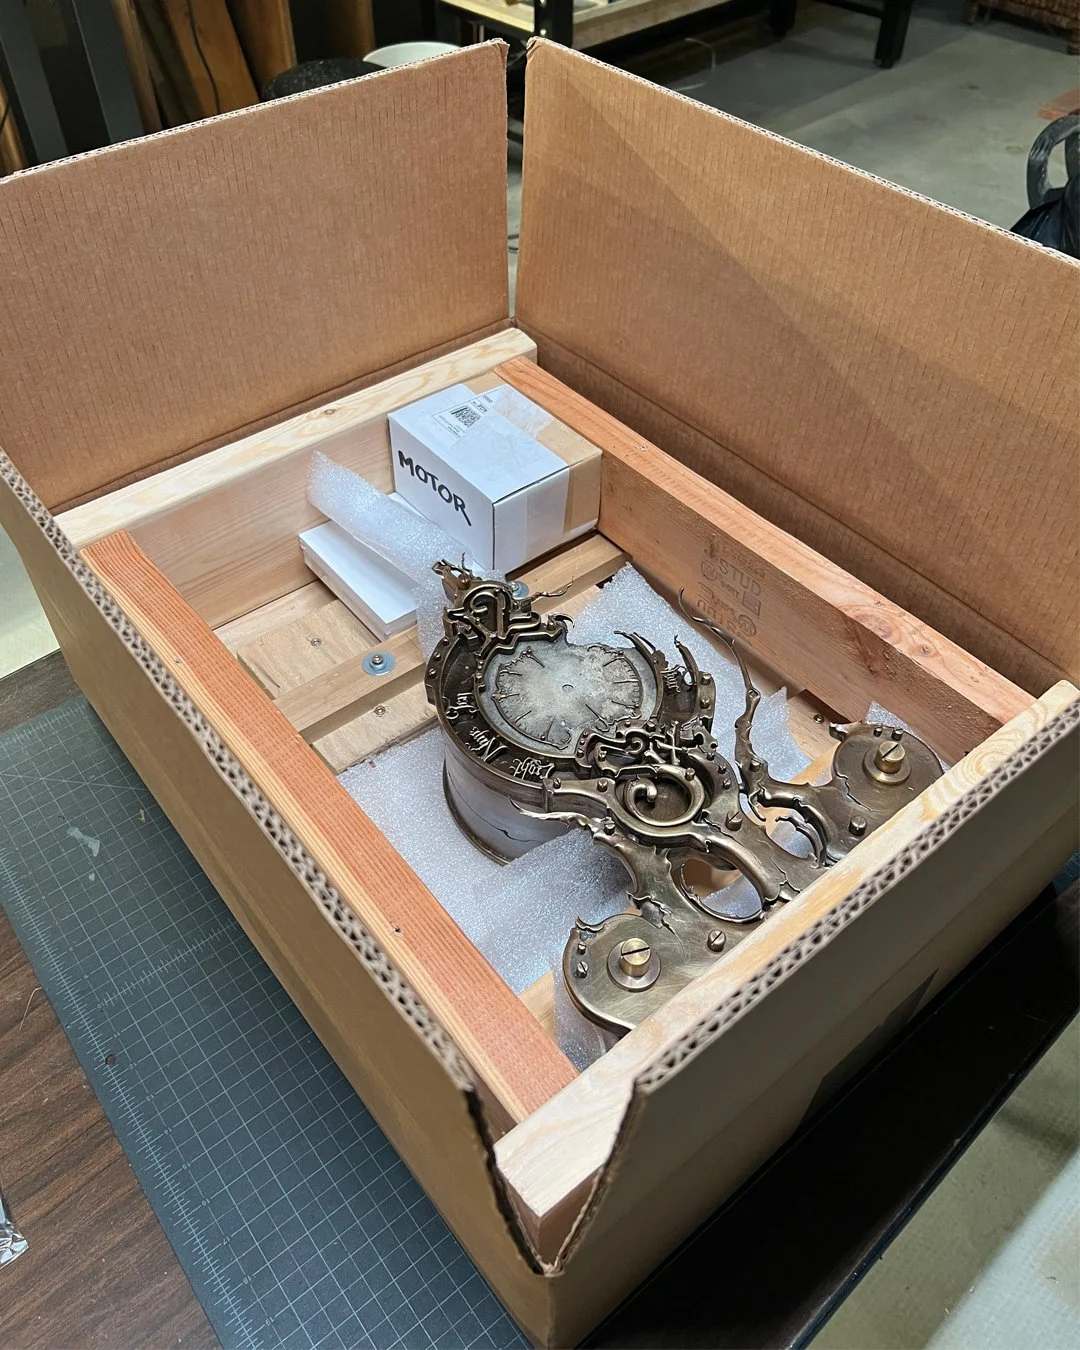
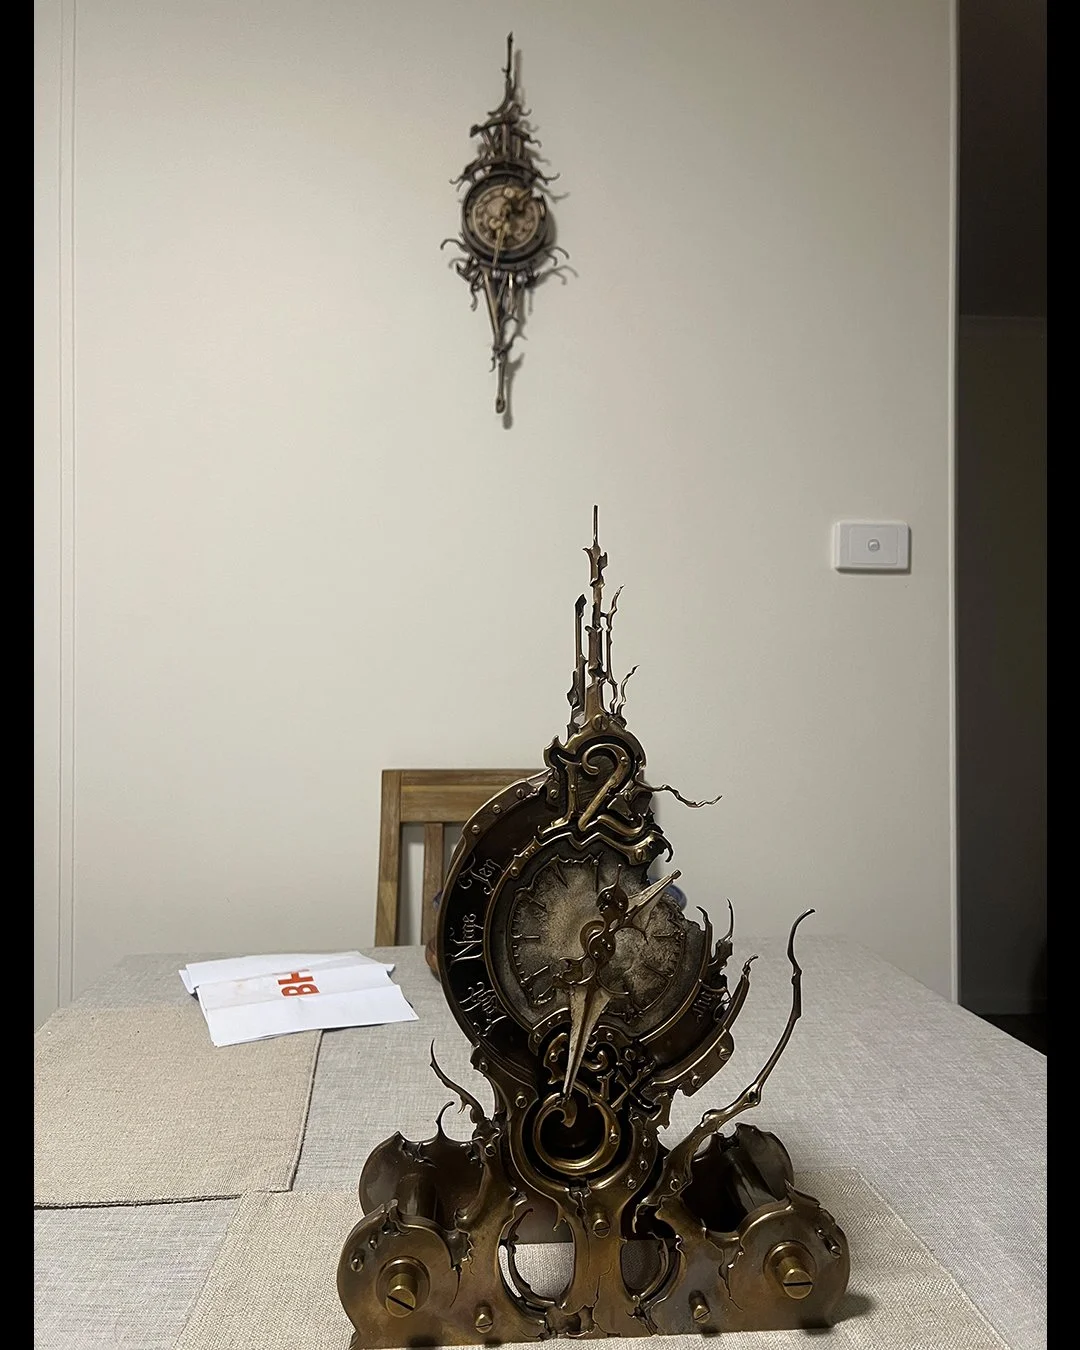
Yesterday I got a picture from the recipient of my latest tabletop piece, confirming that it arrived in Australia unscathed!
Shipping is always a little (okay very) stressful. And the nail-biting is amplified when a piece is going half way around the world. To alleviate some of that stress, I really went overboard with the packaging. Direct quote from the client: “I think it would have survived a small IED the way you boxed it up.”
As you can see from the picture, he is now the proud owner of not one, but two of my clockwork sculptures. He’s an awesome client, and my work found a good home.
On the flip side, the room in my house that used to have multiple clocks on the wall now has zero clocks. I didn’t realize how much I used them until they were gone. It’s so much easier to glance up, rather than have to reach for my stupid phone to see the time.
Guess I need to get back in the shop!
In my recent post of this clock I promised a couple things.
The first was a new photo set featuring a worn and aged vintage wallpaper background. After wallpapering, sanding, and repeated oil paint washes, I have a stack of panels with vintage wallpaper that I can use to photograph my smaller work. I’ve been wanting to do this for a while. It’s a technique I used in the past, and it was a good way to keep my clock photos from looking too repetitive.
The second thing I promised was the reopening of the shop here on my website. For the past six years I’ve been working on very large commissions, which took years to make. I loved the challenge, and seeing what I could do if I committed such a significant amount of time on larger work. One downside is that the inventory in my shop ran out, and I didn’t have any time to replenish the collection of smaller work. I eventually closed the perpetually empty shop.
But now that the larger work is behind me, I’m happily getting back to my old routine. I have a lot more work on the way, and I’m looking forward to having the walls in my house full of clocks again.
But not too full.
Enjoy the new photos!
The next piece is already in the works.
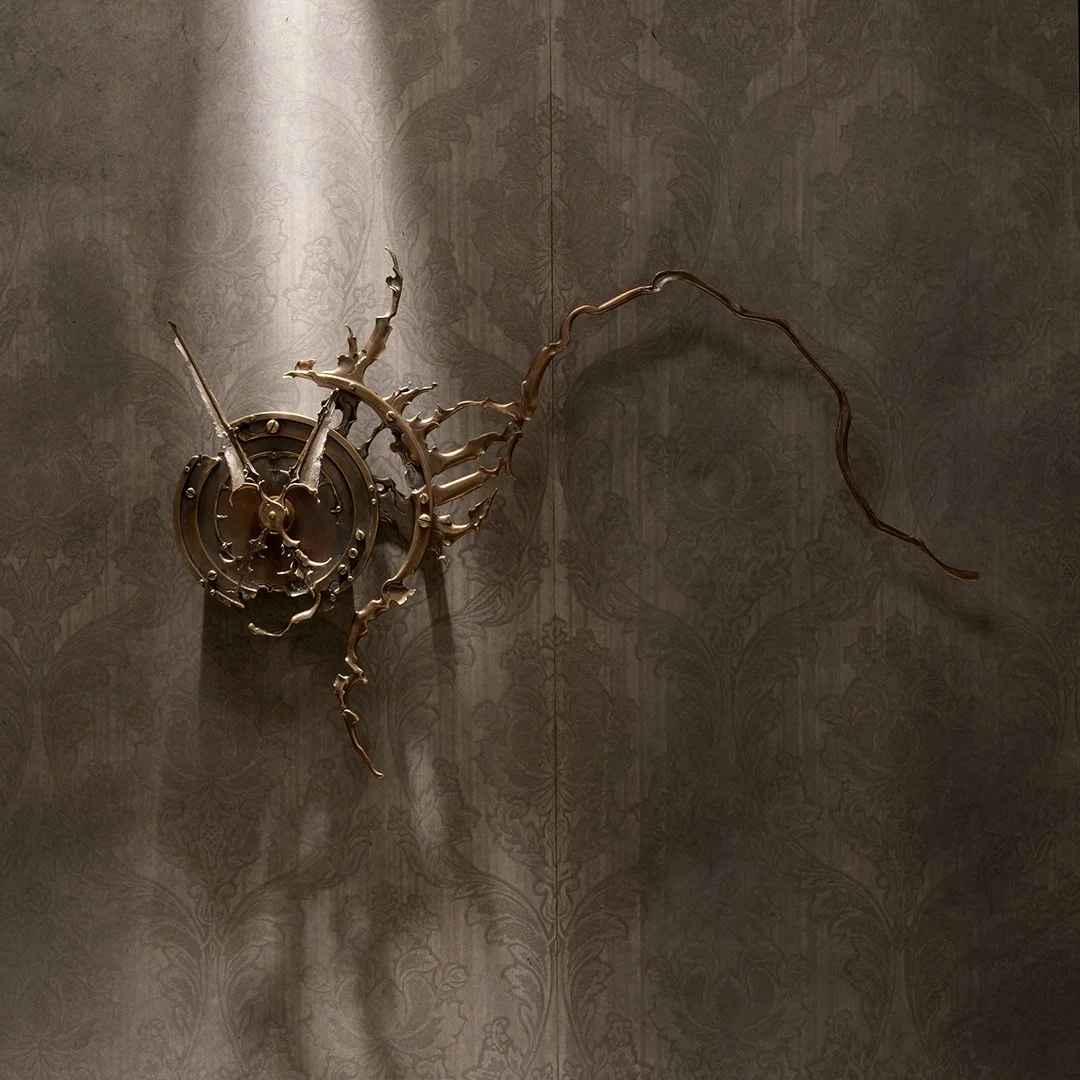
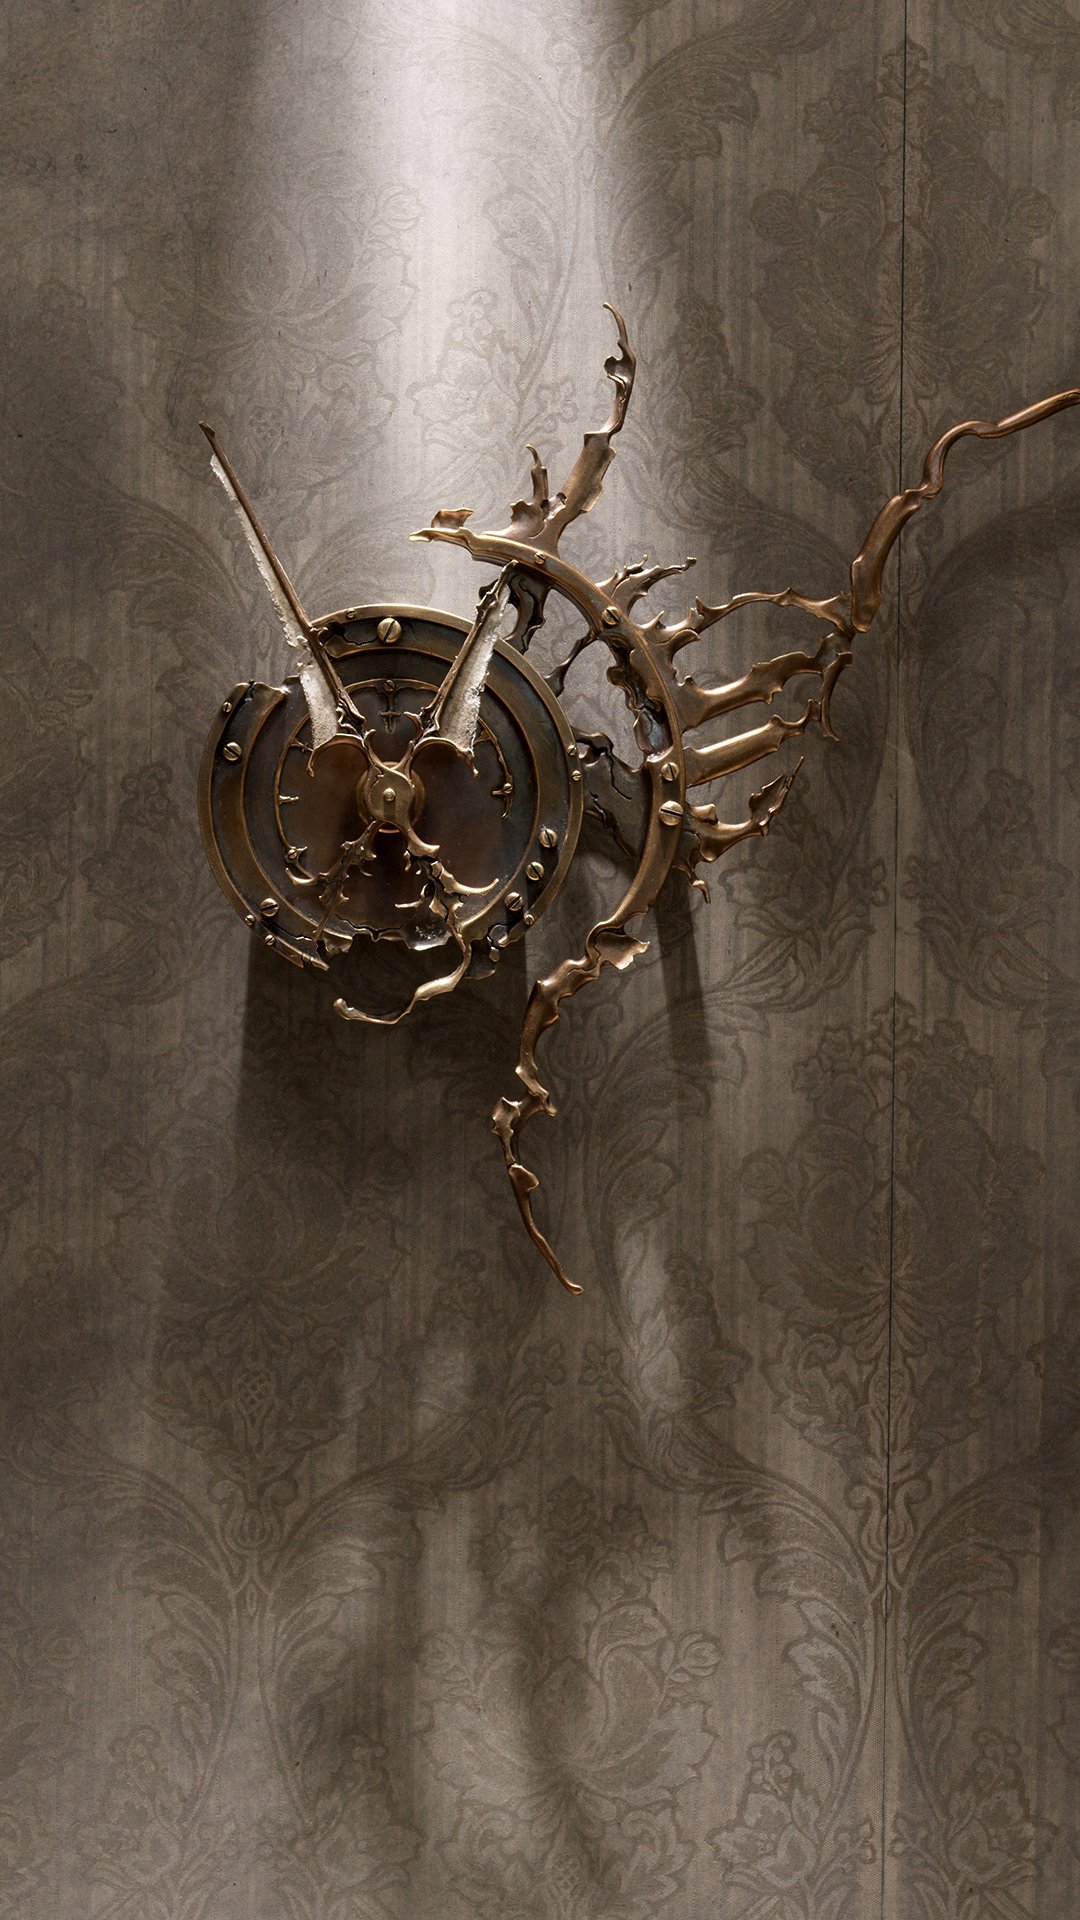
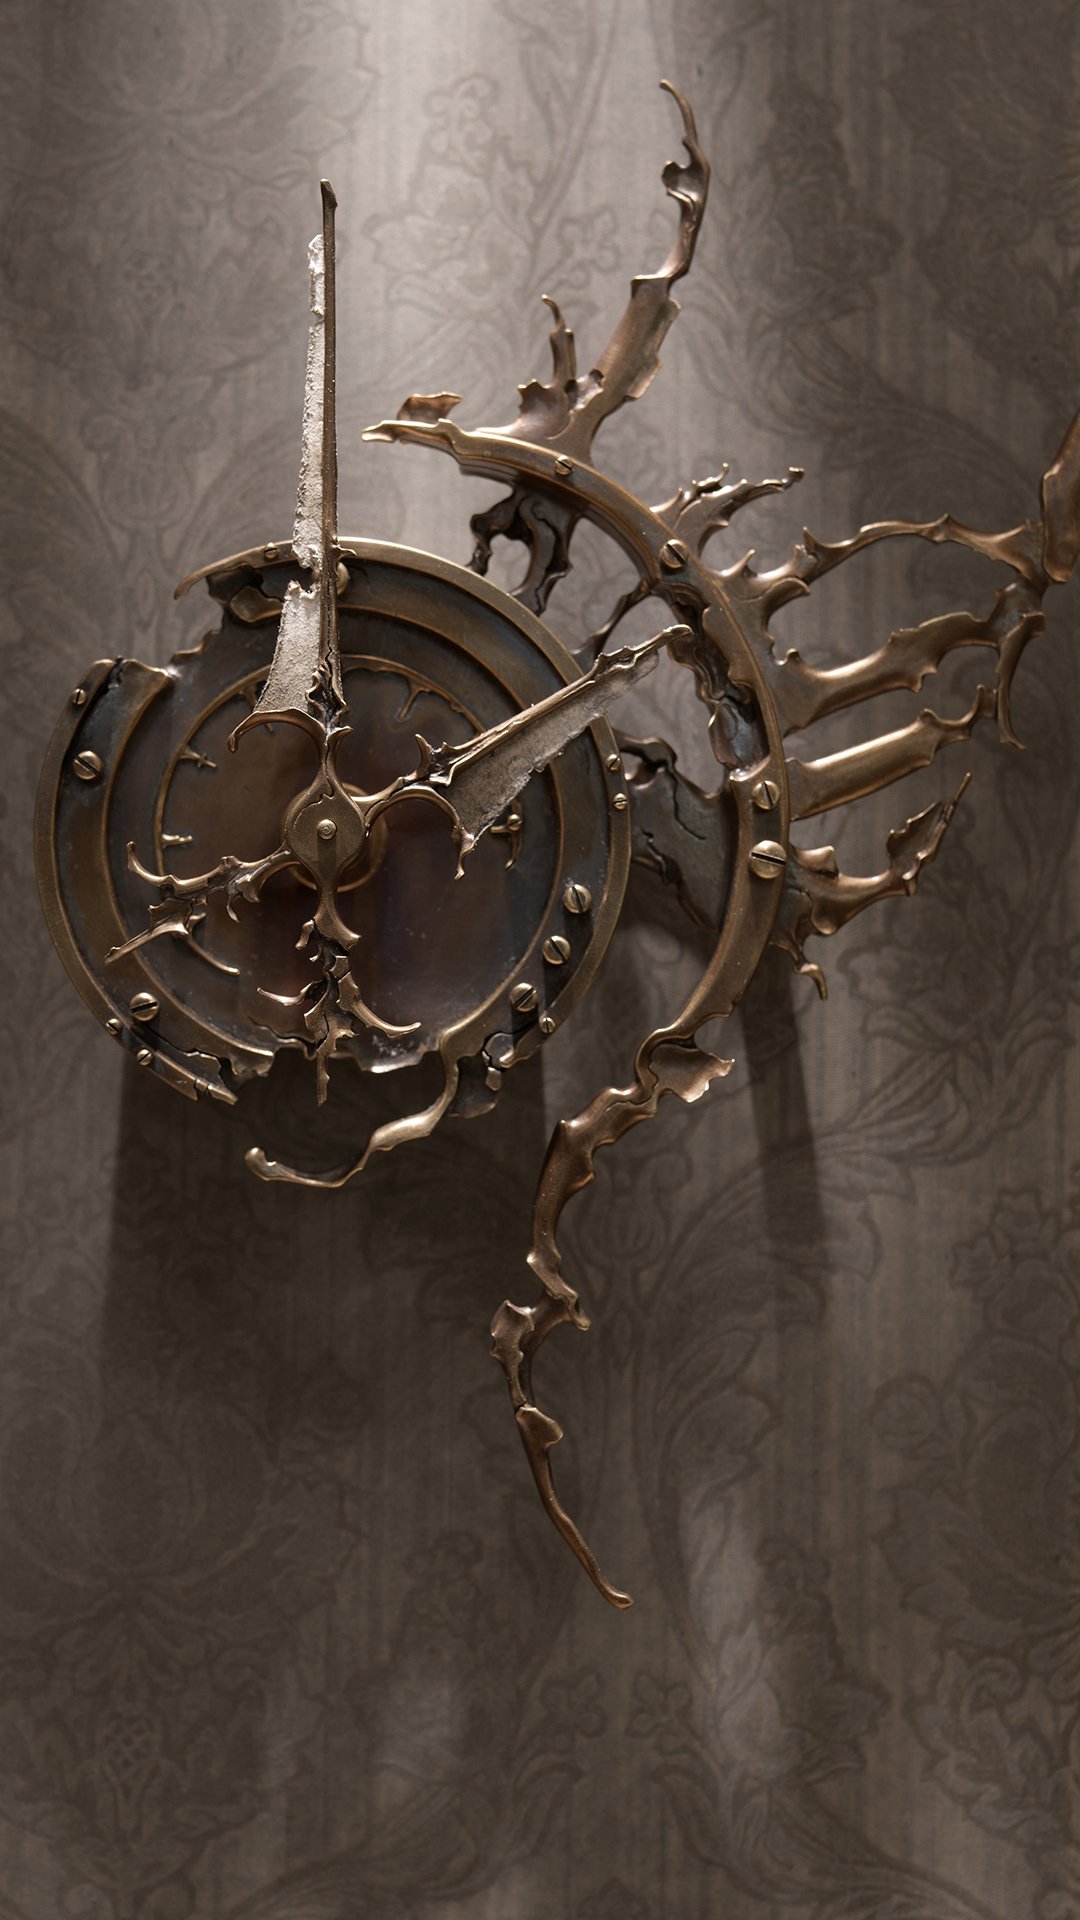
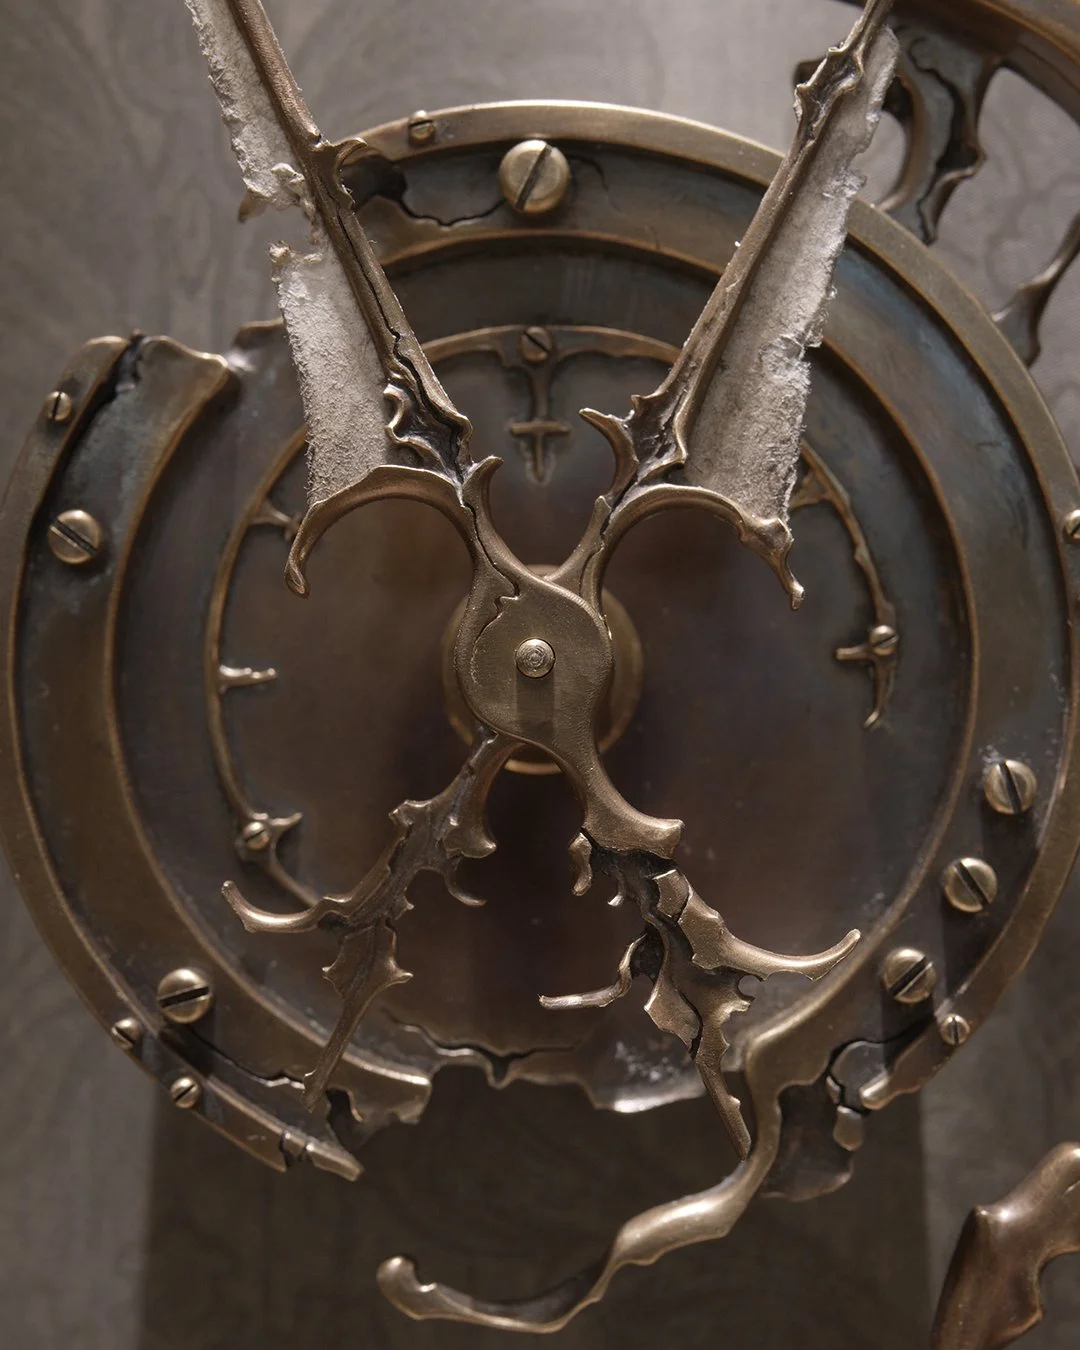
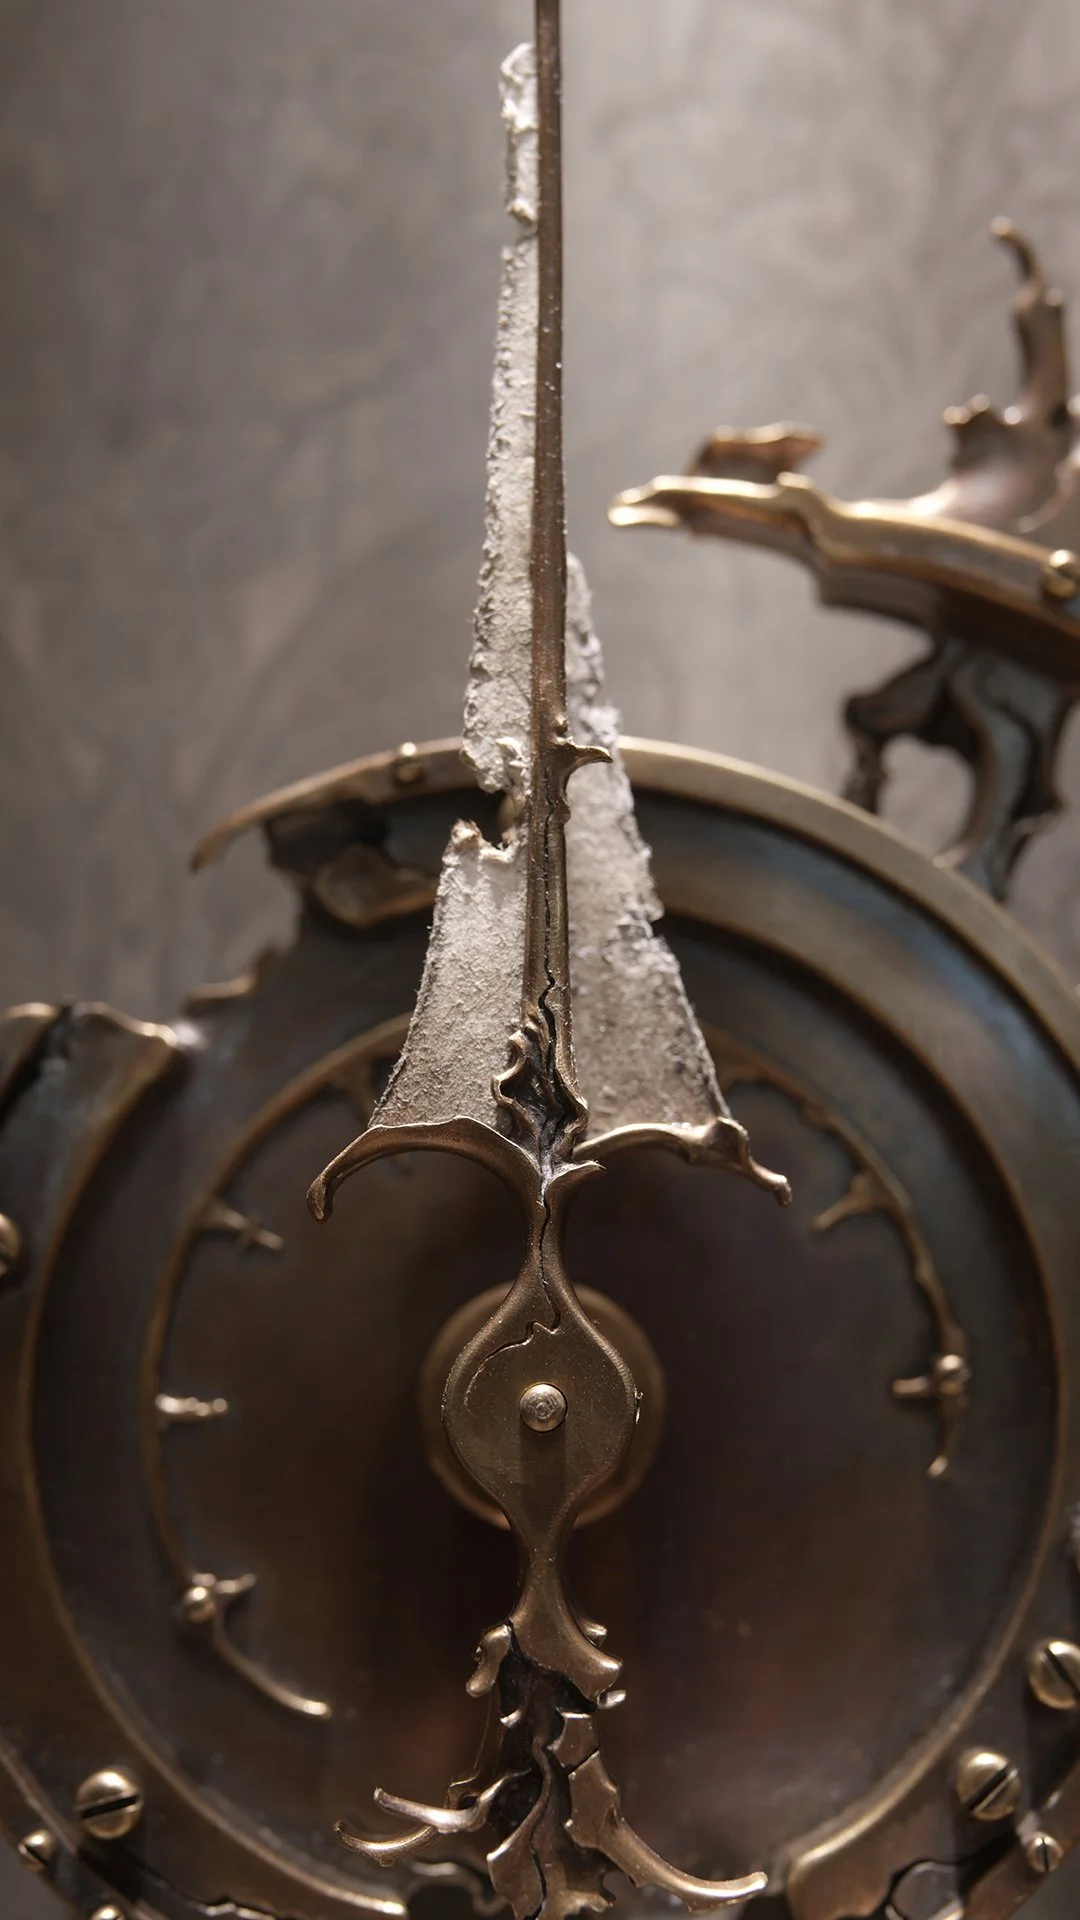
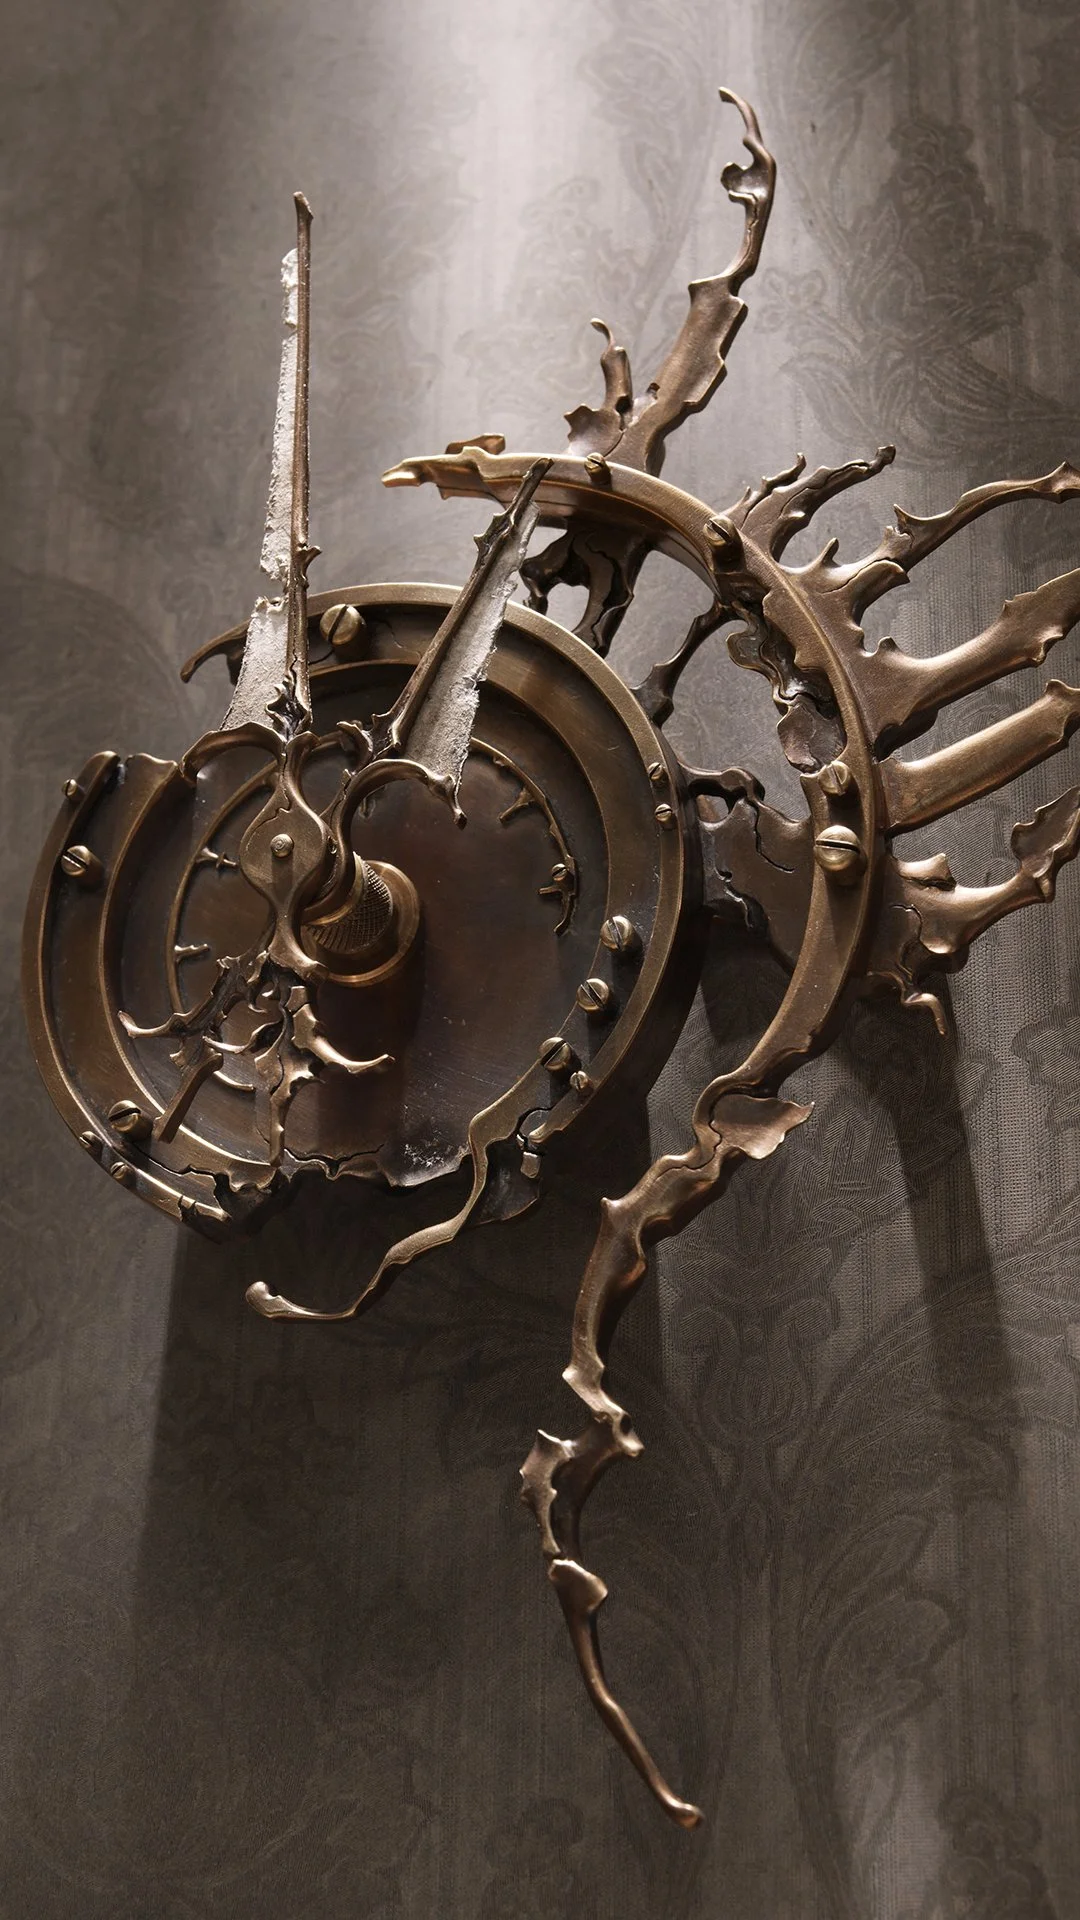
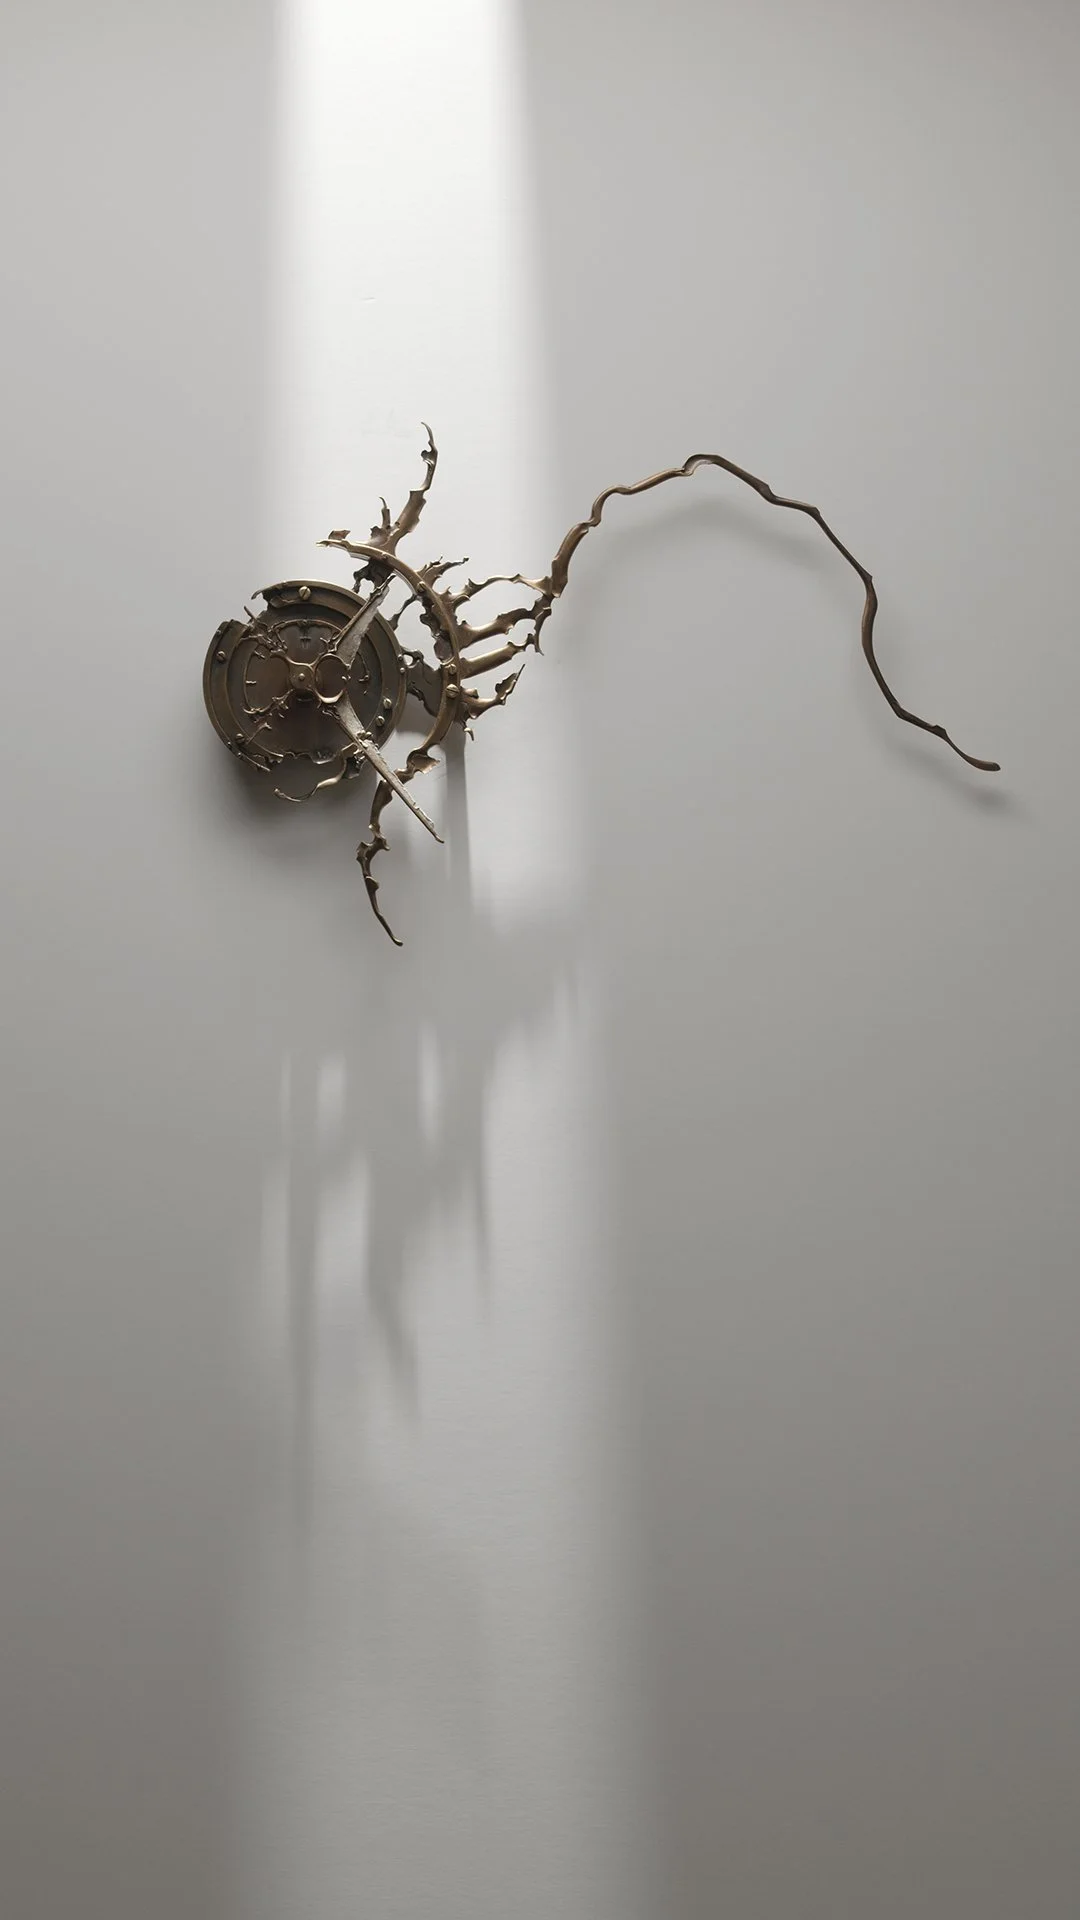
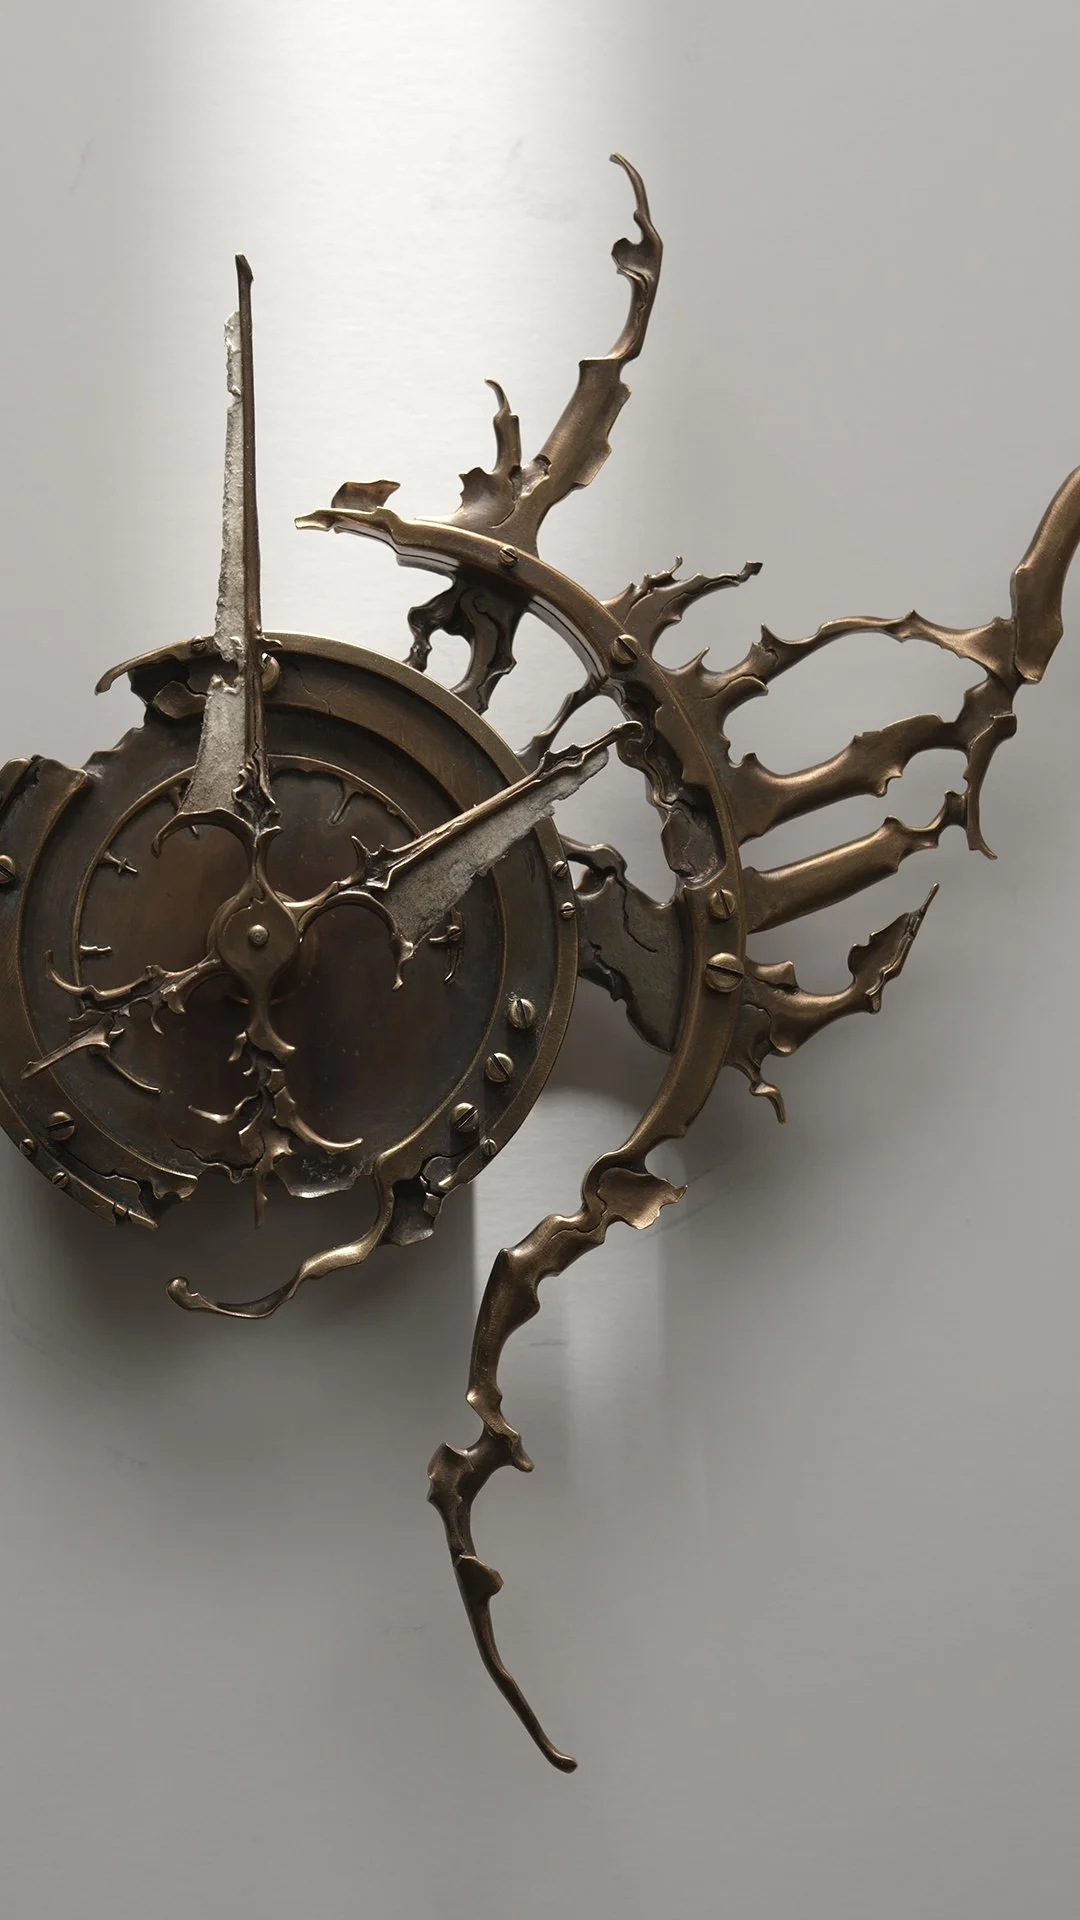
New clock finished! Here are some preliminary photos. I have something special in store for the final photo set.
I really like this one. The romans are completely broken apart, and have a good gnarled flow to them. I like the half-bladed hands too. And even though this one is smaller and less structured, it’s still very readable from across the room.
A couple pieces of news:
One
I used to make interesting backgrounds for the photo shoots of my smaller clocks. A lot of my work for the last five or six years has been too big for that treatment, so I got away from it. But I’m bringing back the tattered and aged wallpaper backgrounds that I used to use. It takes a little work, but it’ll be worth it.
Two
Awhile back, I deactivated the shop on my website. During the fabrication of the larger commissions the supply in the shop disappeared, and I never had the chance to replenish it. I’ve gotten back to creating work for myself, and I’ll soon be reopening the shop on my site for the first time in six years.
More soon!

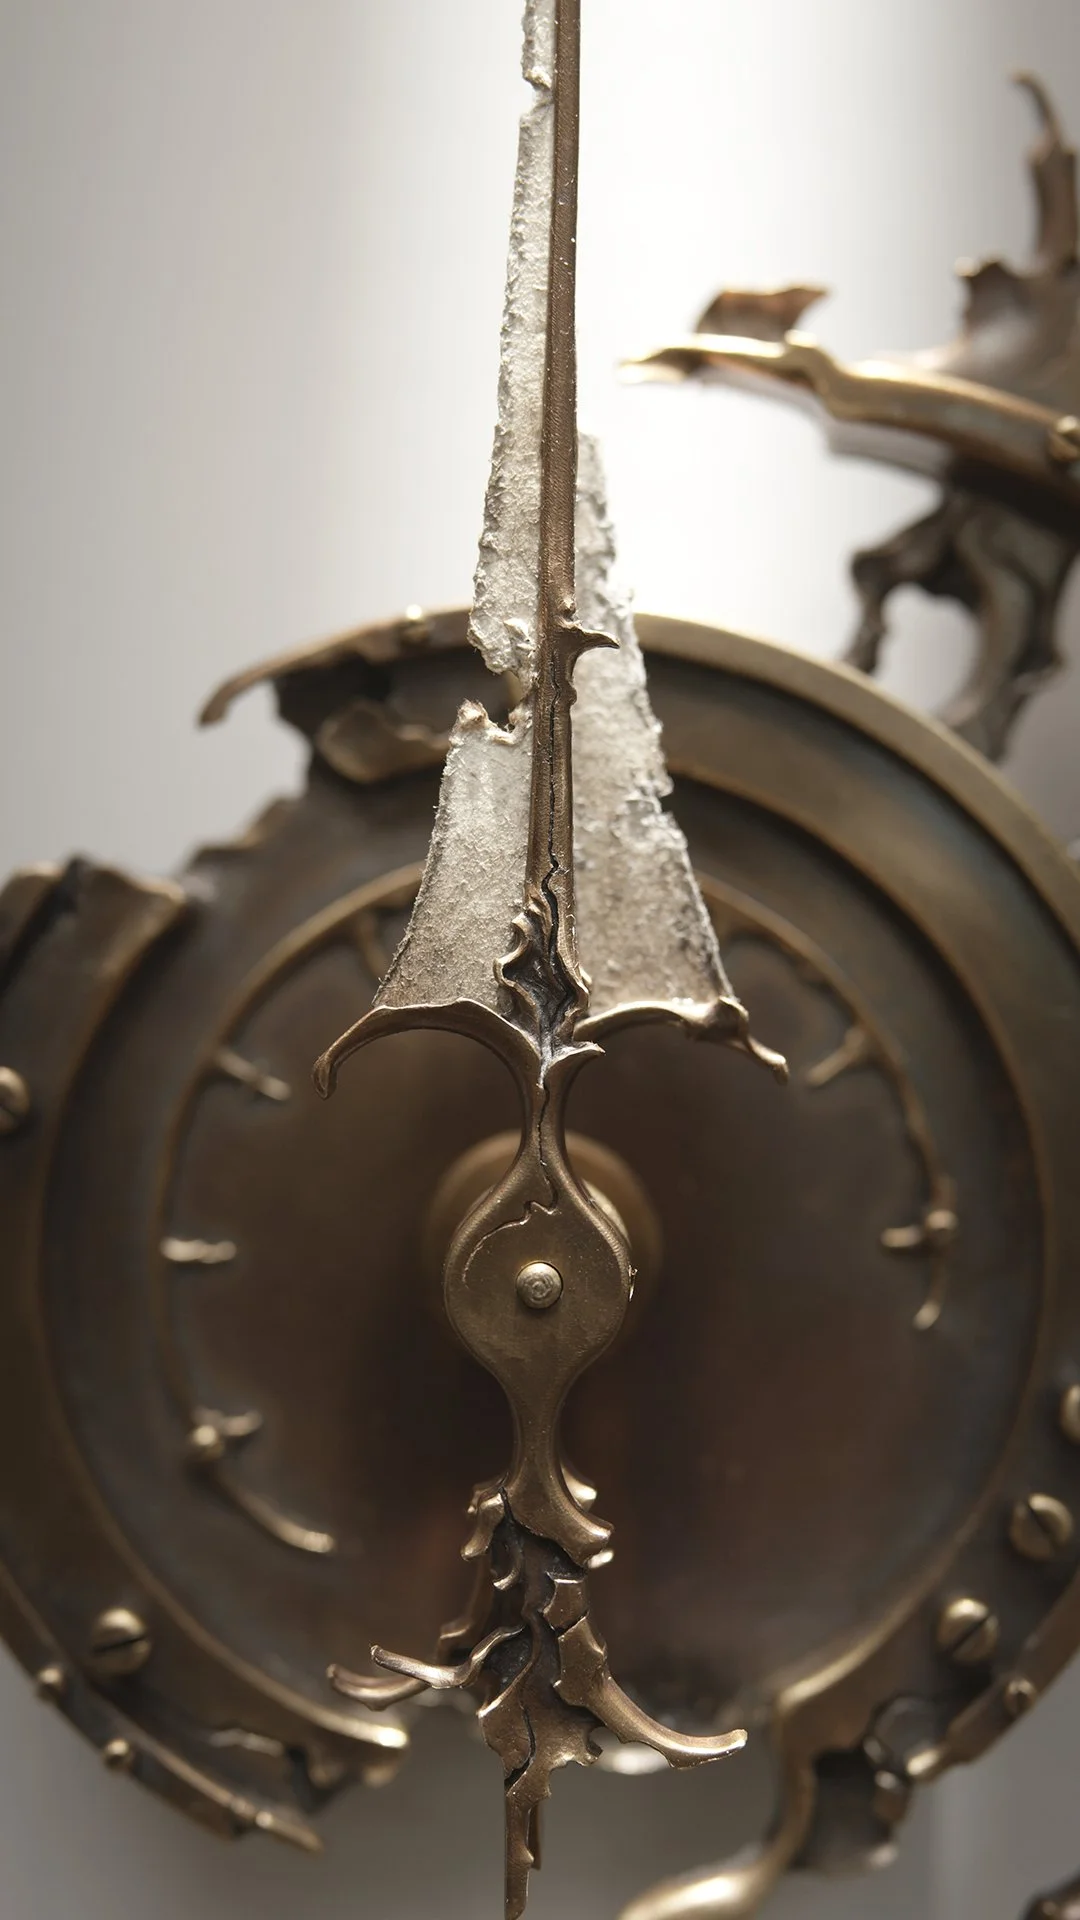
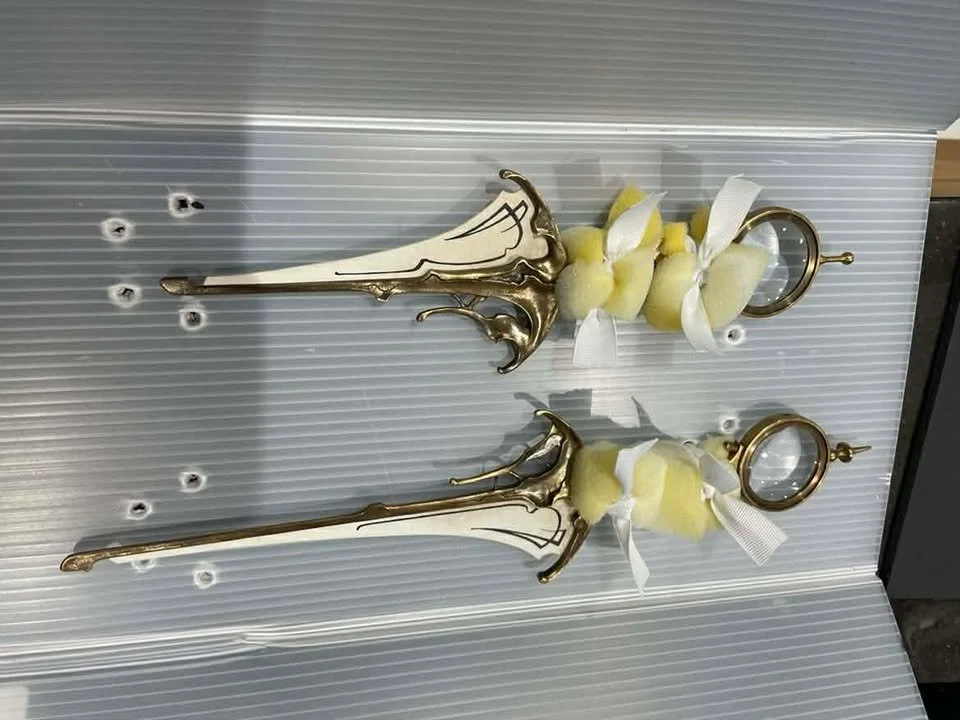
All sculpted and darkened. Time to make some hands!
I’m having a lot of fun with this design. It’s leaning into my usual decayed organic thing, but this one has a lot of nice movement to it.
I should be finished with it in a week or two!

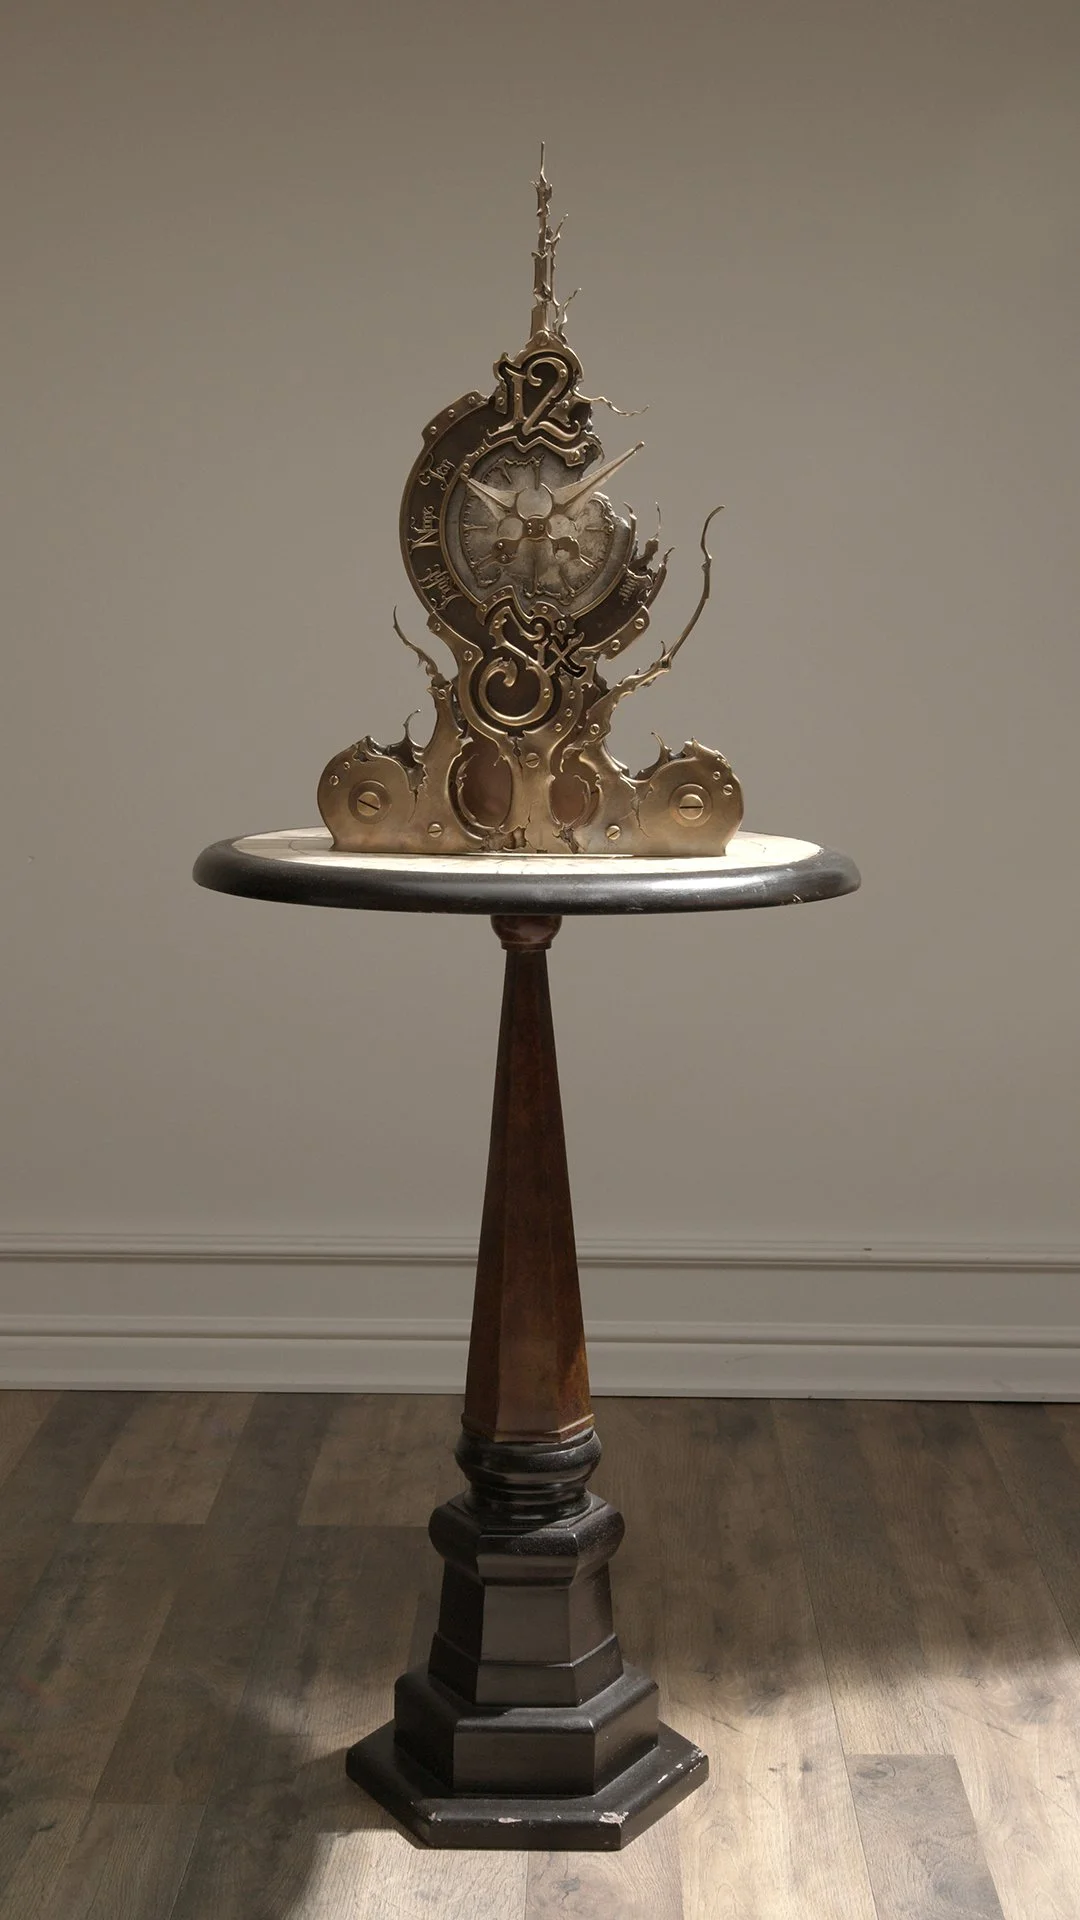
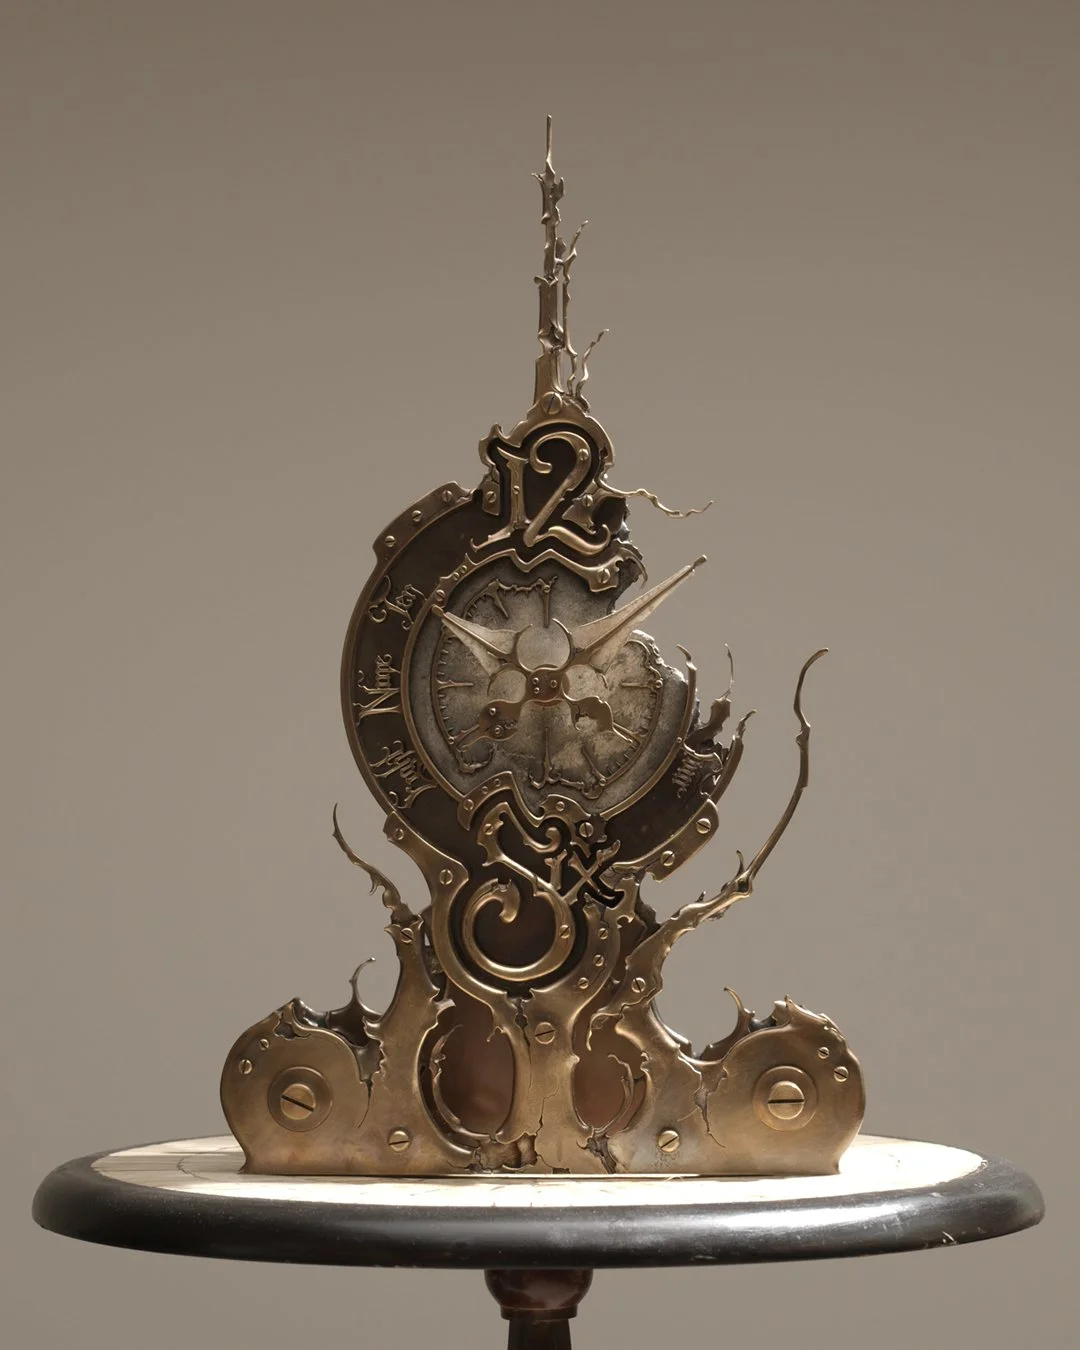
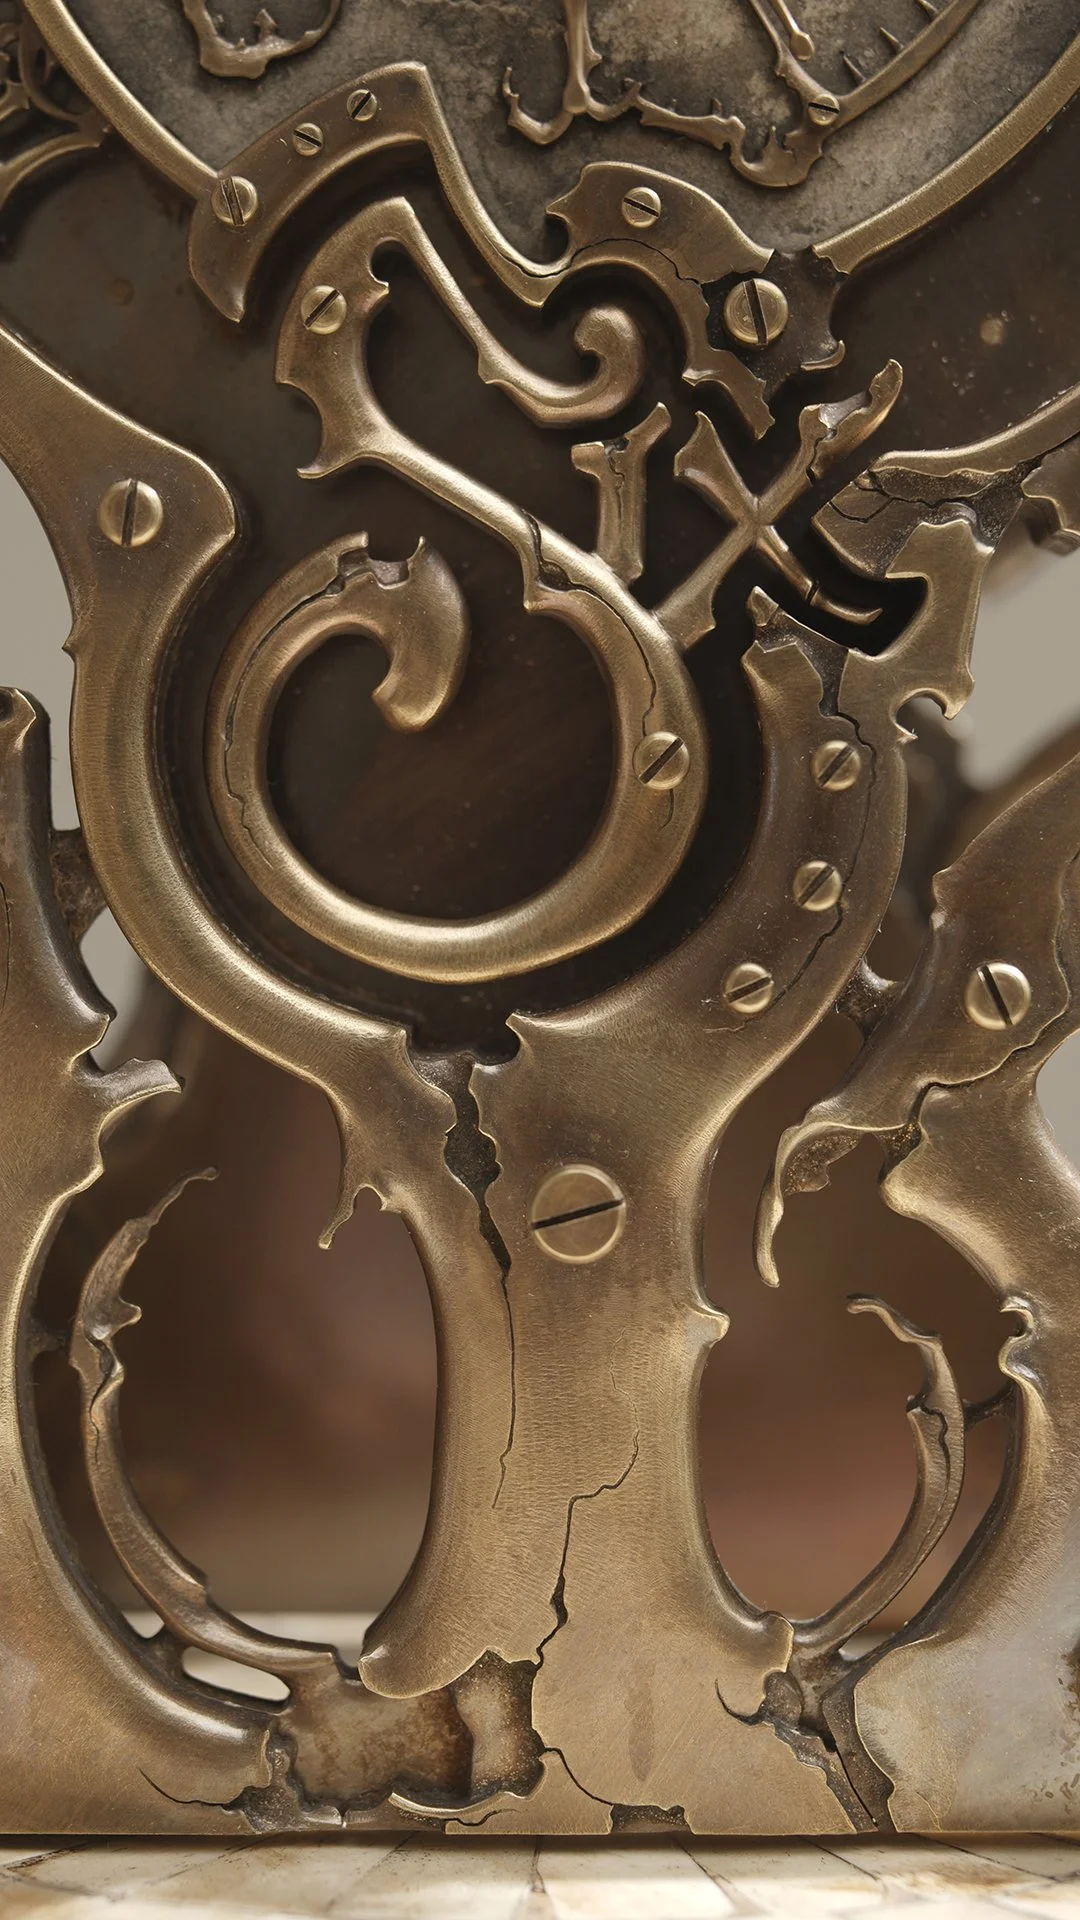
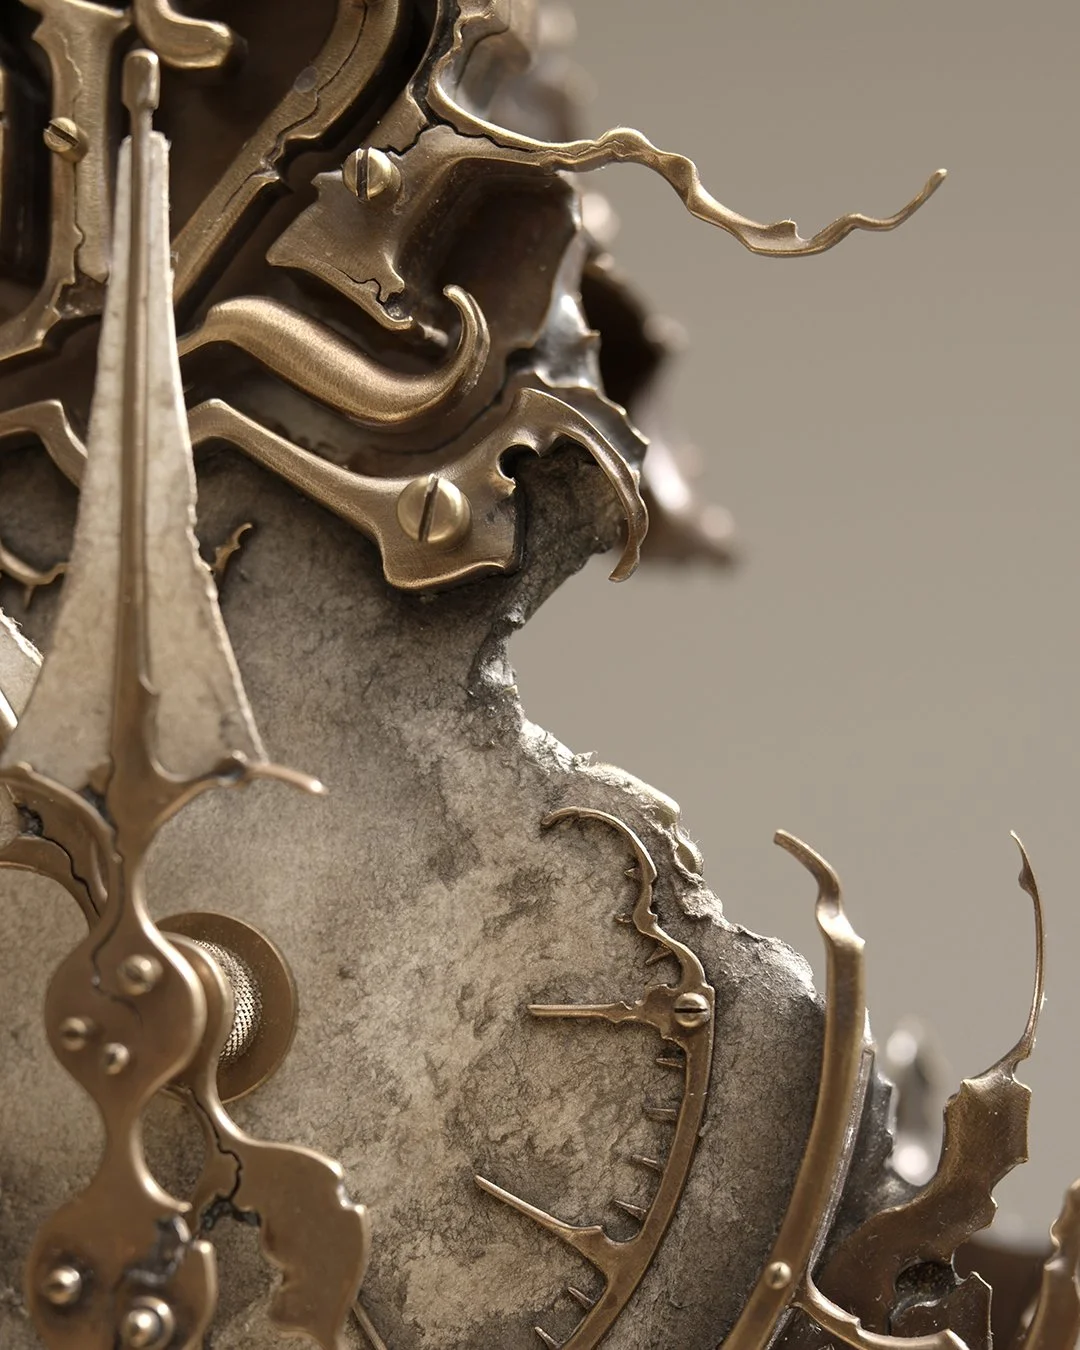
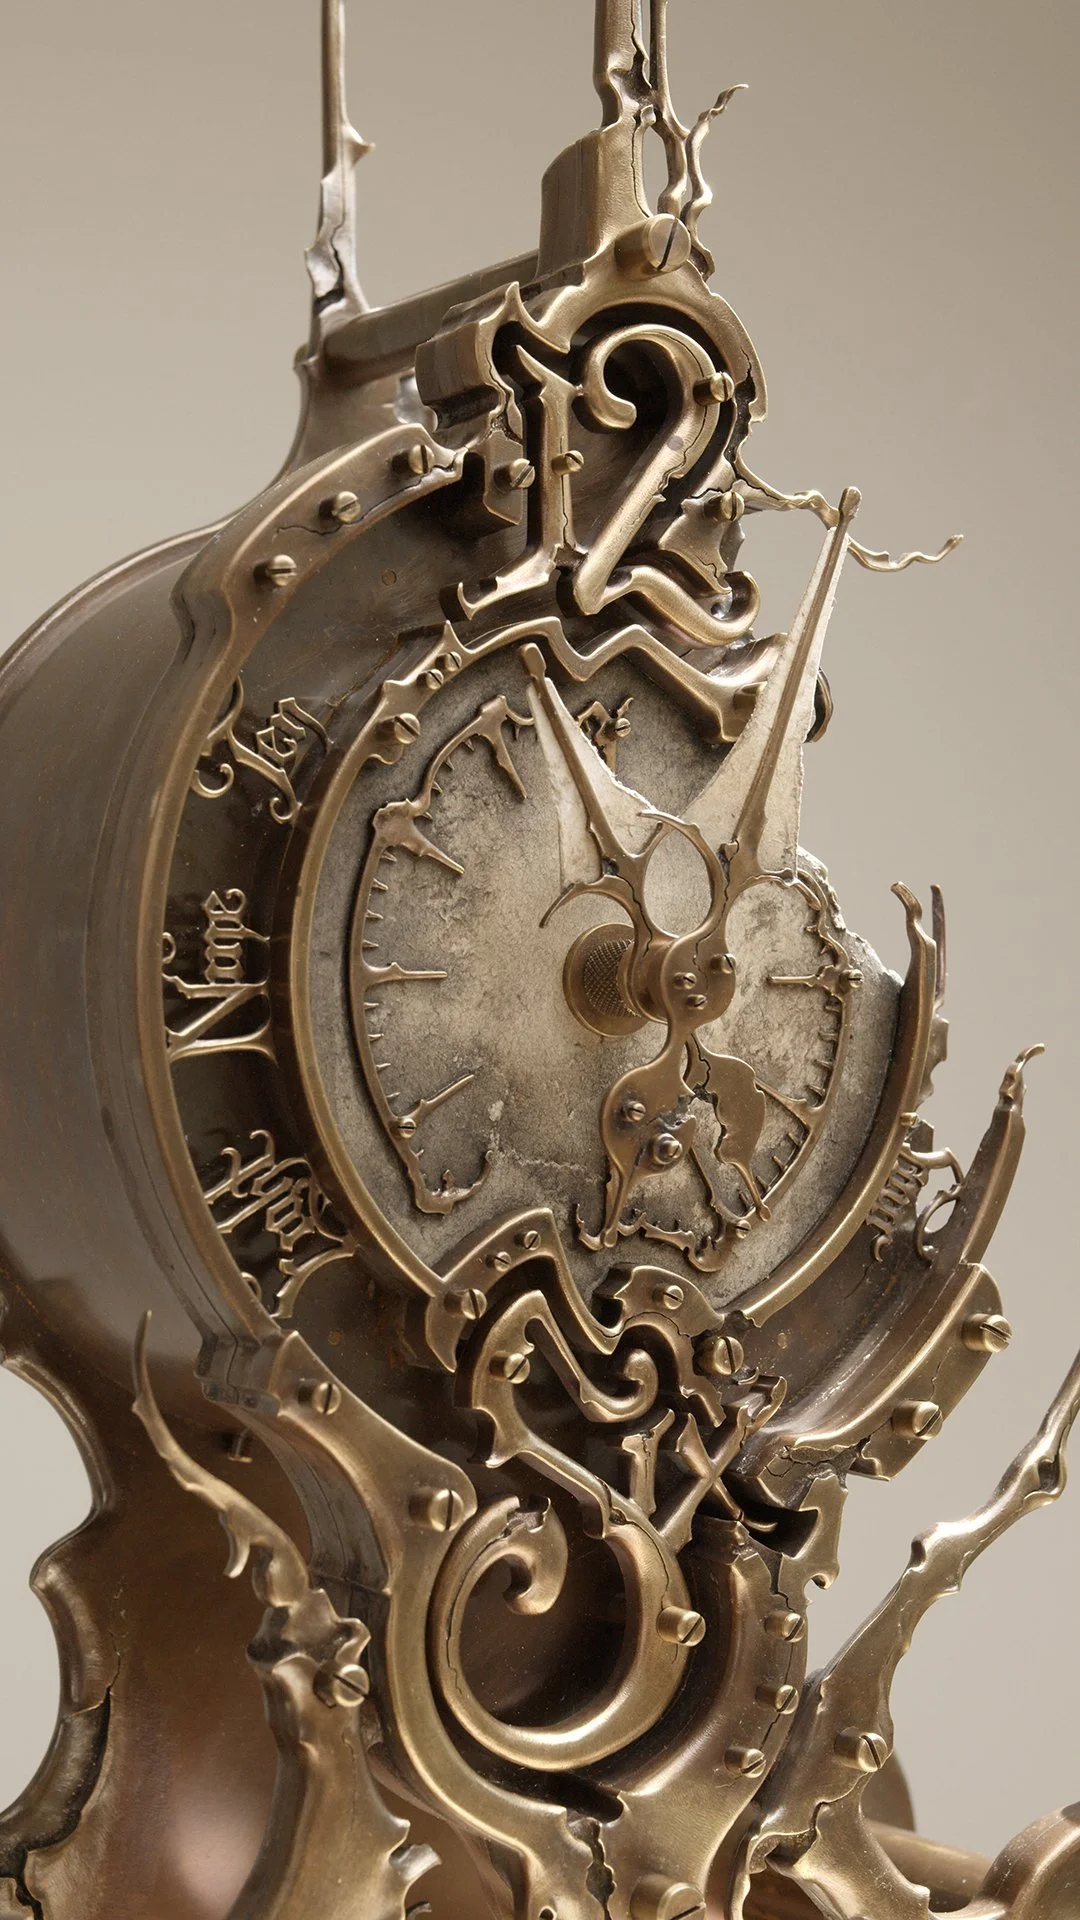
Finished!
After months of work, I’ve finally completed my first tabletop piece. This one took a bit longer than I expected, but it was worth it.
I’m really happy with the way the inlaid “Six” and “12” worked out. I might have to incorporate that look into some future projects.
Soon this one will be on a plane to Western Australia. I’ll be holding my breath for a safe delivery.
The fabrication of the next quartz piece is underway.
About two weeks ago, while I was waiting for some materials to finish up the tabletop piece, I started the first cuts on a new quartz clock. This one will be small, delicate, and detailed; leaning into a more organic and unbridled style.
Estimated completion in a couple weeks.